Mist Multihoming Fabric Lab
Overview
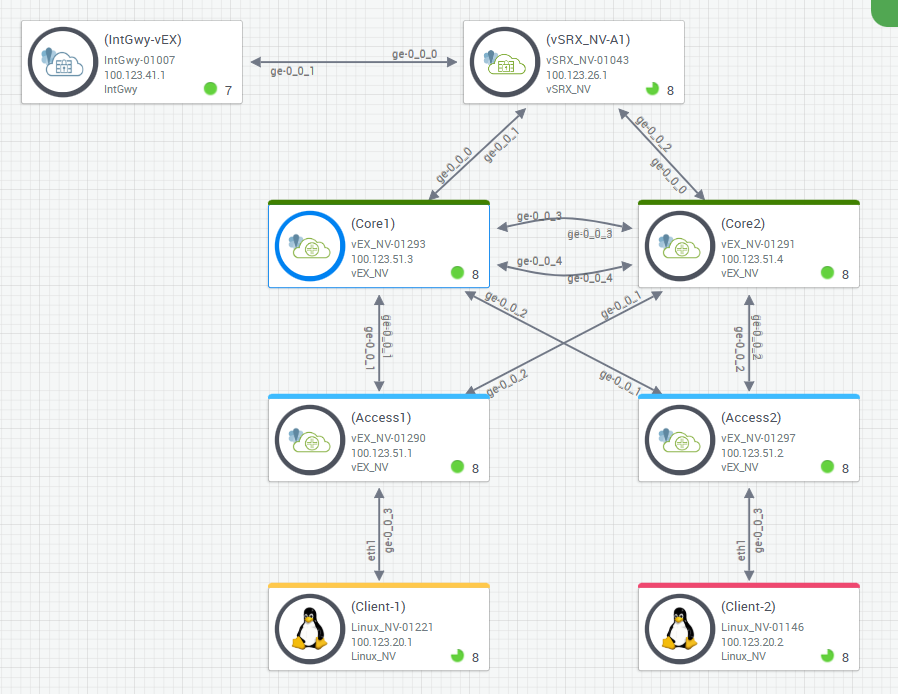
This is a Mist managed EVPN VXLAN Campus Fabric lab setup. The core and access layer switches are configured, managed and monitored using Mist Cloud.
This lab focuses on Multihoming Fabric type.
The setup also has Linux VMs as end-host clients to verify communication between hosts in different VRFs, followed by Mist NAC use case.
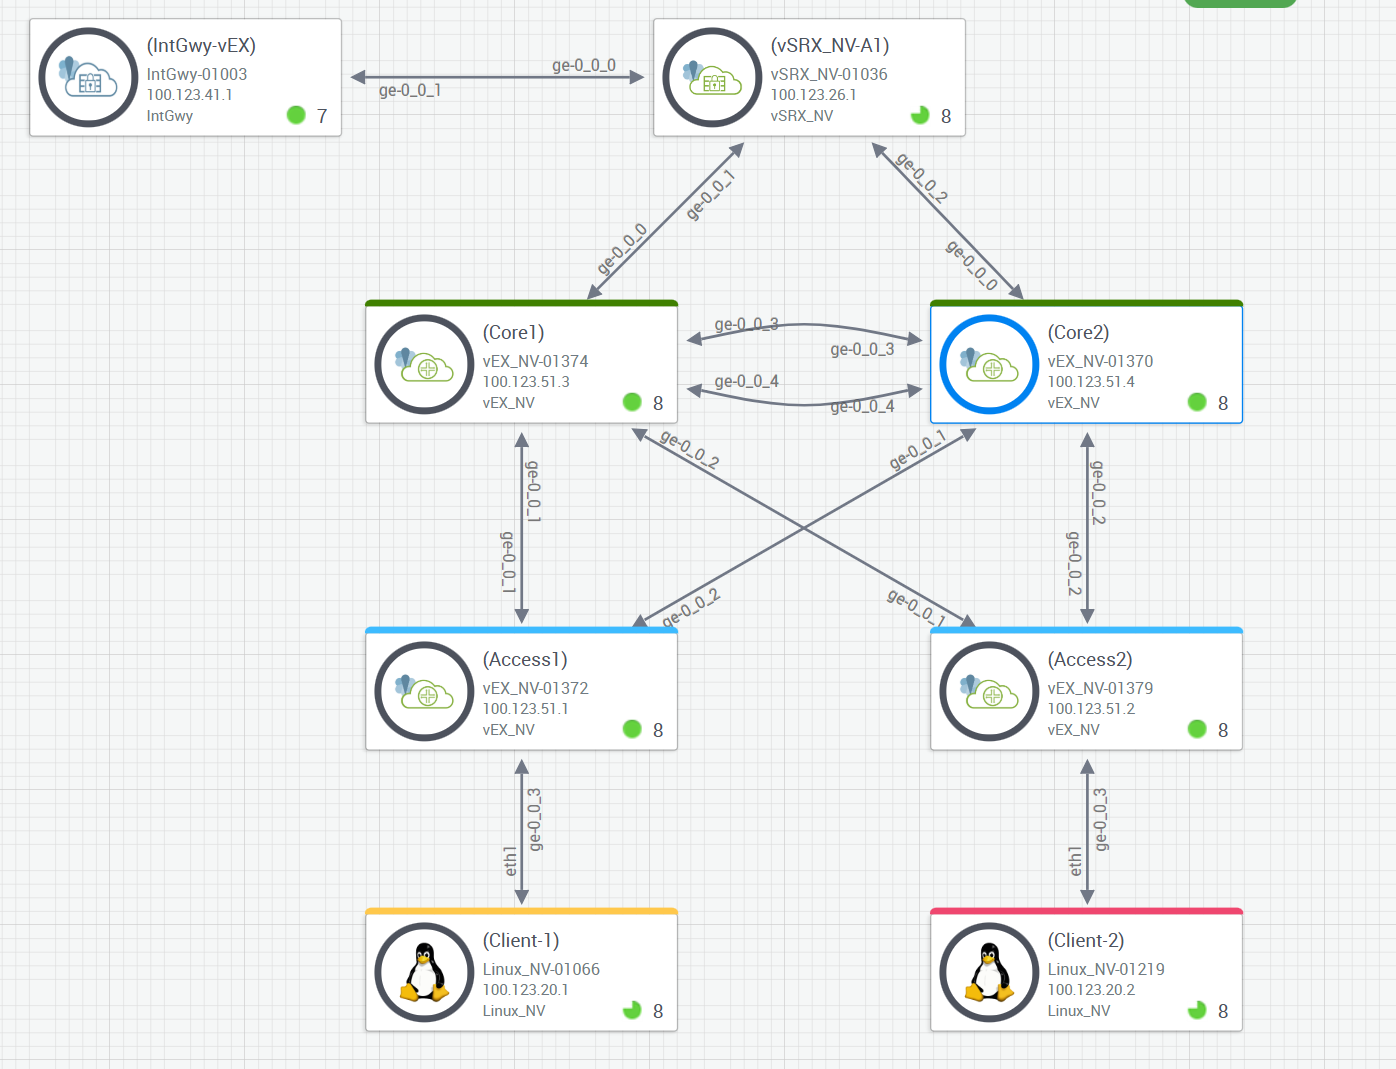
Topology
Known Limitations of Demos of this physical Sandbox Lab
No support for ZTP/Claim Method. Use the Adopt Method on those devices for now.
No support for virtual Chassis (vEX limit).
No support for GBP (vEX limit).
Please refer to the official mist guide to get the DAY-0, DAY-1 and DAY-2 operation information used in an actual deployment!
Starting Lab
Access to Lab
If you have not already signed up for the lab, please sign-up to get access.
You’ll receive an email with lab URL and credentials.
Access Devices
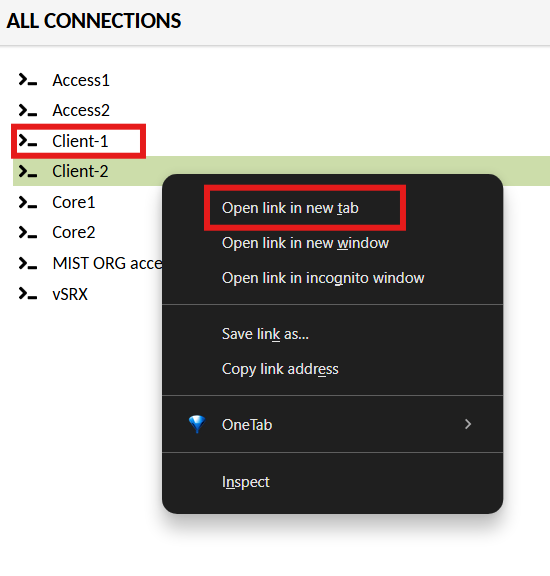
Open a browser and navigate to the URL provided to you
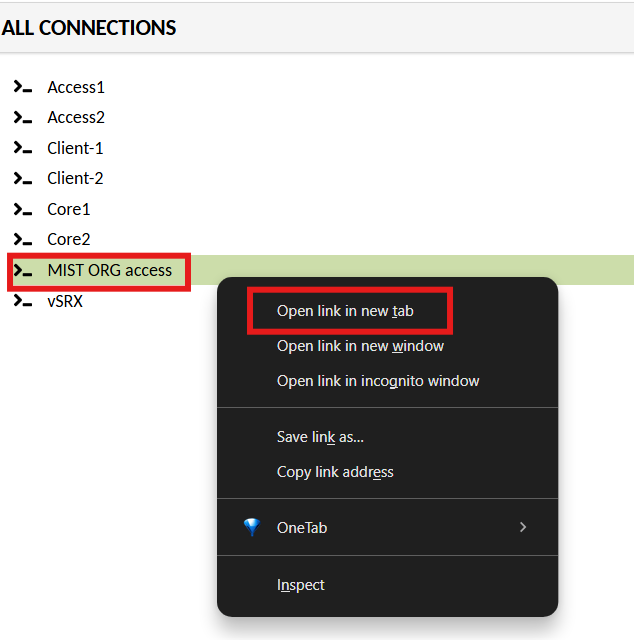
Once you login and see a screen like below. Right-click and Open in a new tab.
Mist Org Access
Sign up to create a Mist account at this URL: [https://manage.mist.com/signin.html#!signup/register]
If you do not have a Global01 account, please sign up.
If you have a Global01 mist account, skip to Sign-in step.
Fill in all the details:
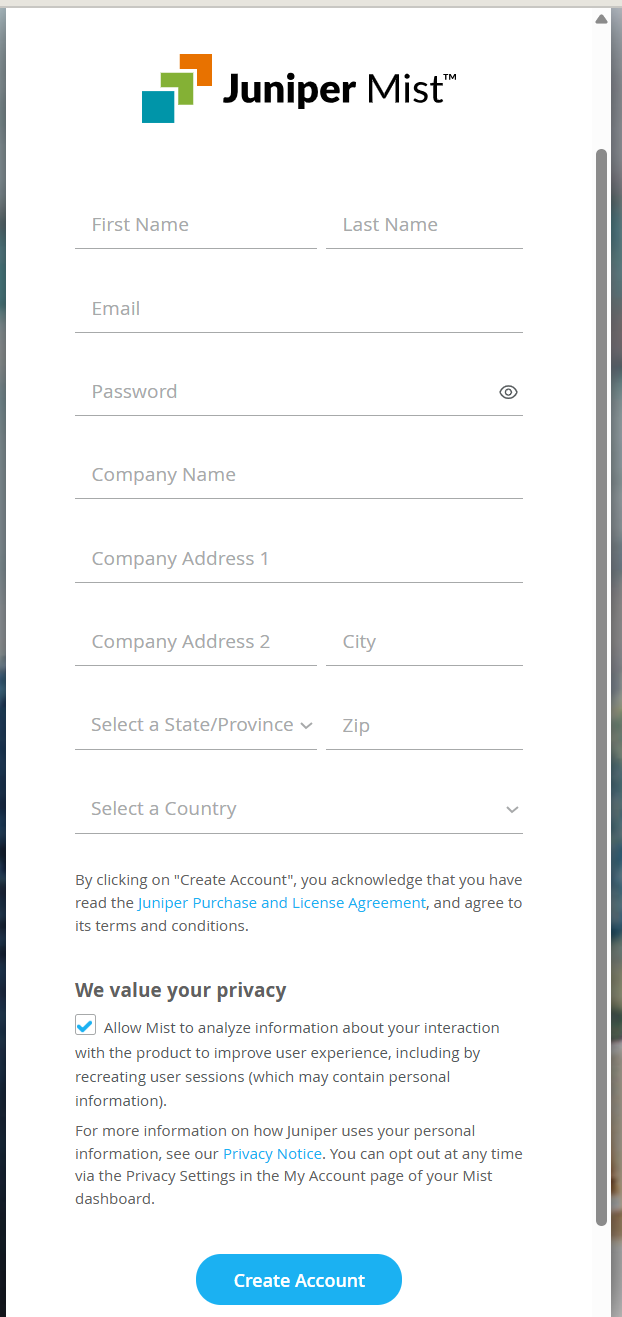
Click Create Account
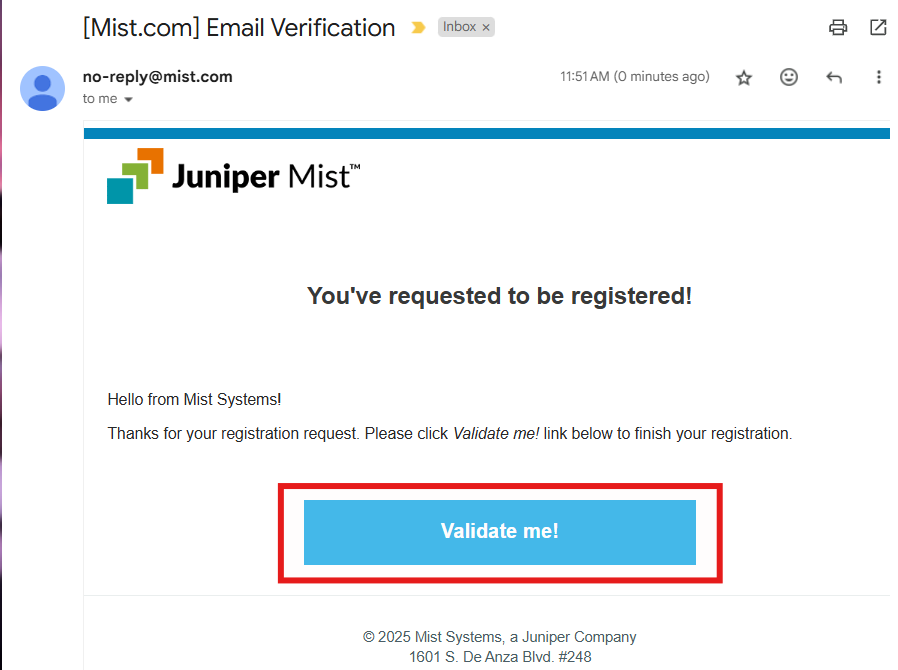
You’ll receive an email invite from [no-reply@mist.com] to a Mist Org to validate your account.
Click Validate Me!
Sign in to your mist account [https://manage.mist.com/#/]
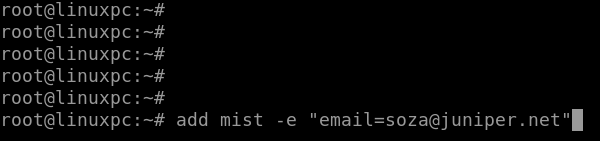
IMPORTANT: Open the MIST ORG access on the URL provided to you, use following command to get access to the mist org assigned to you for this lab:
add mist -e "email=YOUR_EMAIL_ID"
On a Windows device with an external keyboard, the guacamole menu is displayed by pressing Ctrl+Alt+Shift On a Mac device with an external keyboard, the guacamole menu is displayed by pressing Ctrl+Command+Shift
Paste the command in the clipboard box
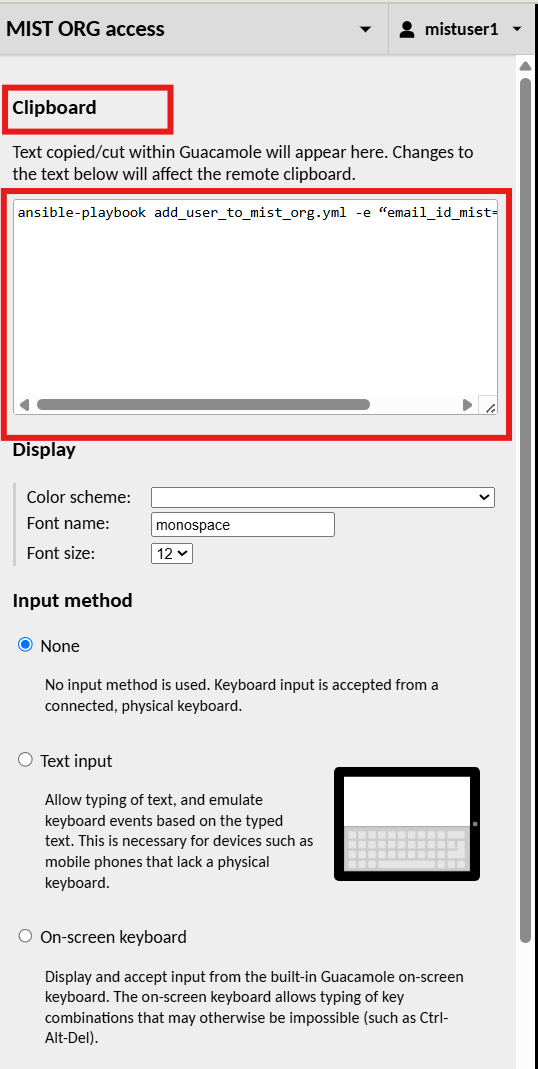
To get rid of the clipboard, use the same keys -Ctrl+Alt+Shift/Ctrl+Command+Shift.
You should be able to paste the text that you entered in the box.
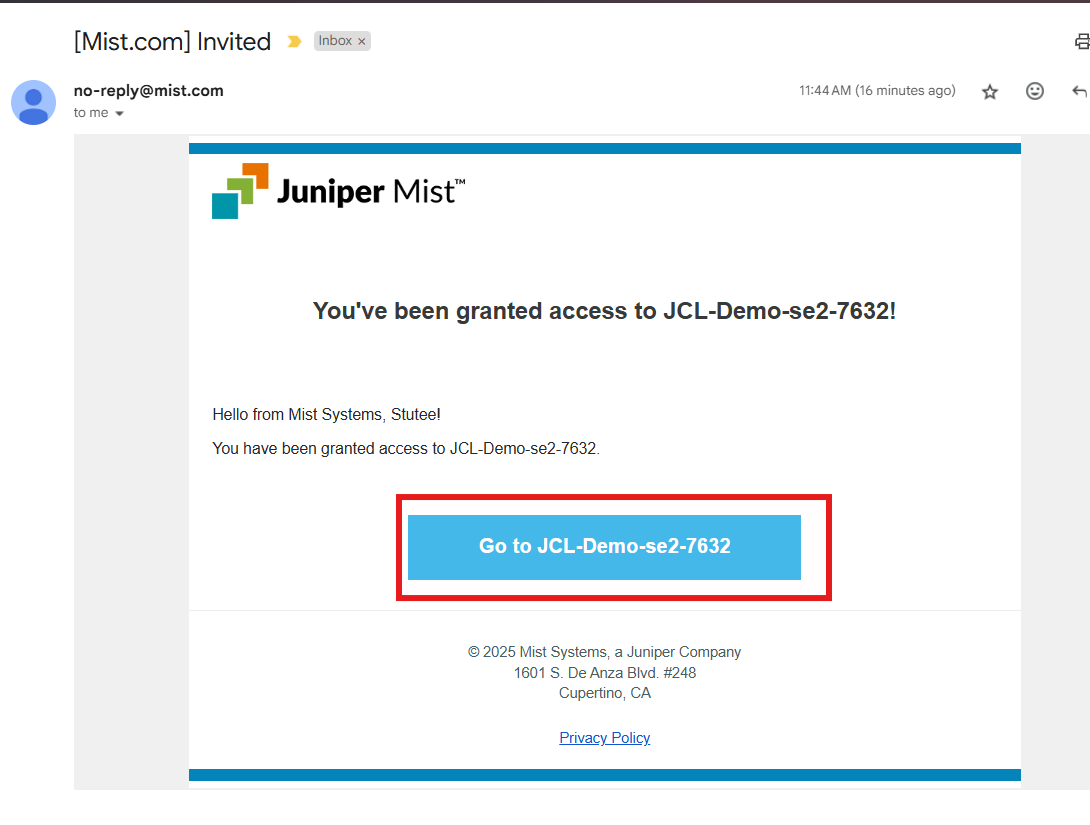
After running the command, you’ll receive an email from no-reply@mist.com
Click on the link in the email
Accept the invitation
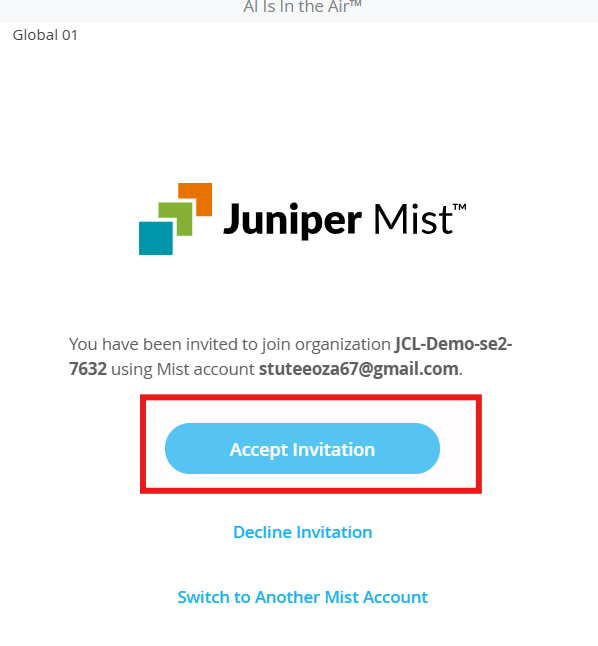
You should now be able to access the mist org.
Adding Switches to a Site
The switches will be adopted to the mist org by automation on setup. We need to assign the adopted switches to the site. On Mist Org:
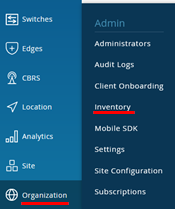
Click on Organization > Inventory
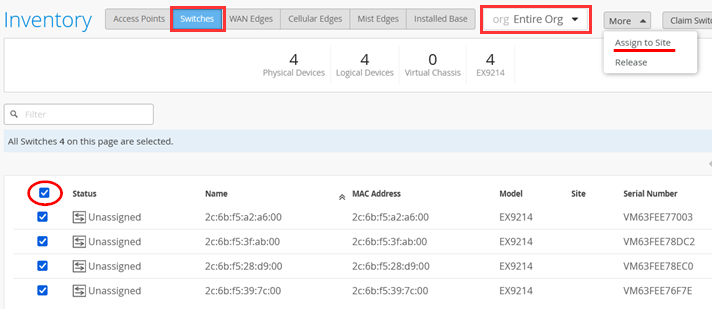
Select the Switches tab, and the Entire Org view.
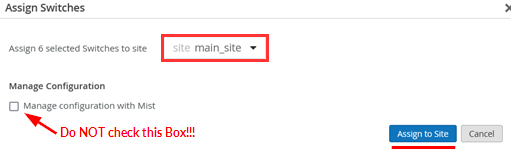
Select all Switches, and click Assign to Site .
Assign it to main_site
Create a Switch-Template
Here, we define configurations that are common to the devices across the site. This helps to minimize reconfiguration and errors, and helps with scaling.
We will define vlans, port profiles that applies to all the switches in site.
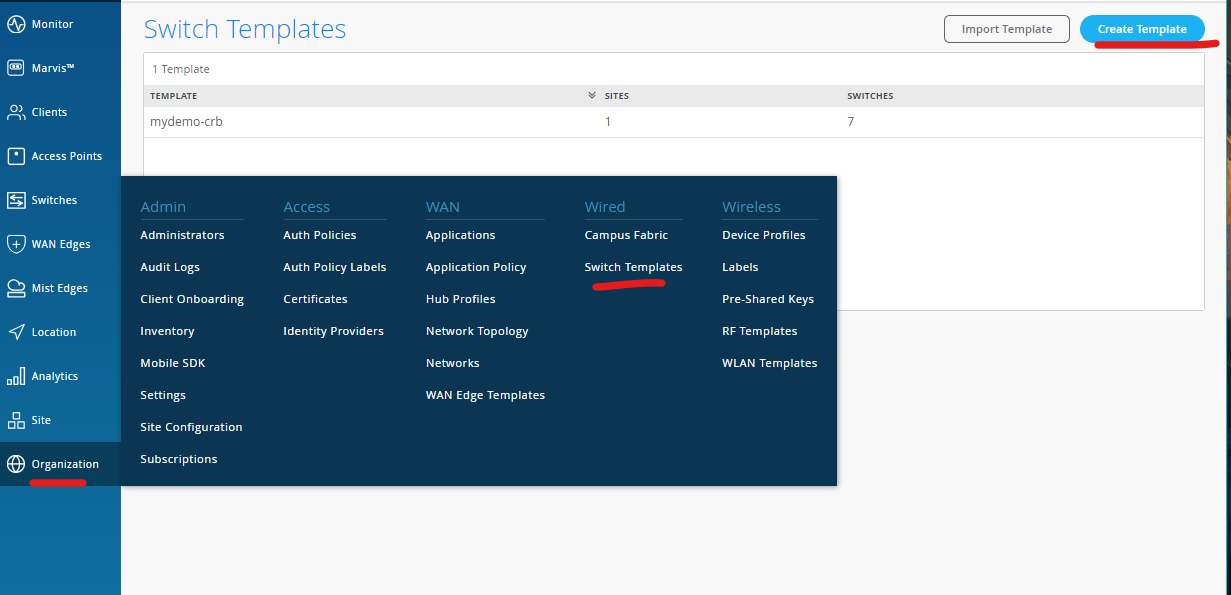
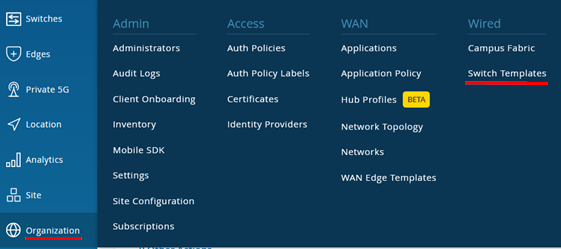
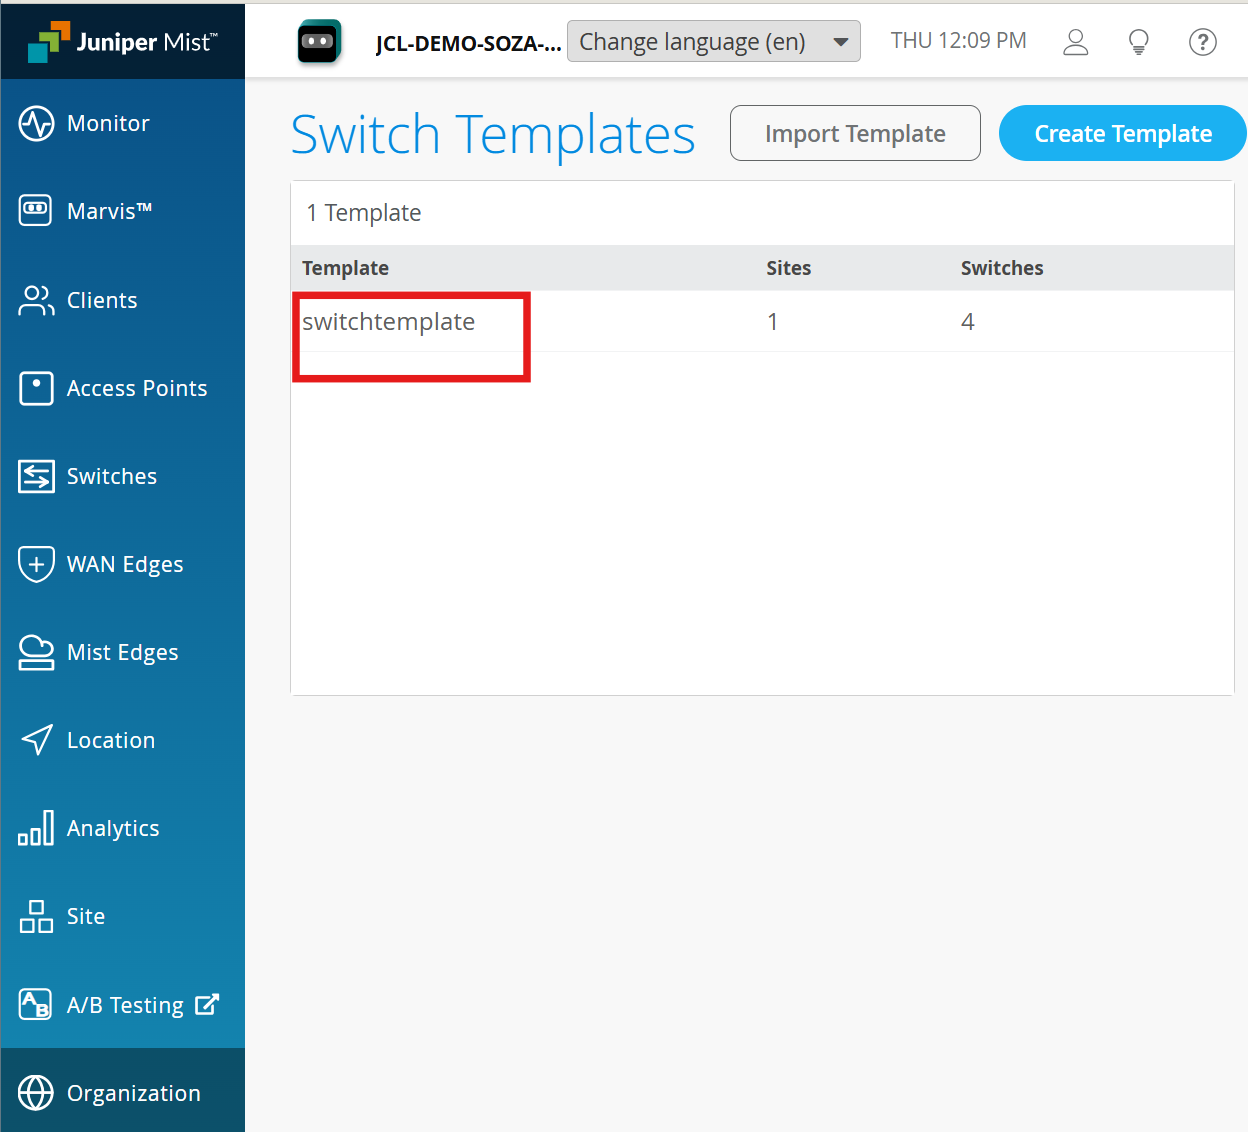
Navigate to Switch Template section Organization > Wired > Switch Templates
Click Create Template, and name it switch_template
Import Switch Template
Download this Switch template
Import the template.json to your mist org
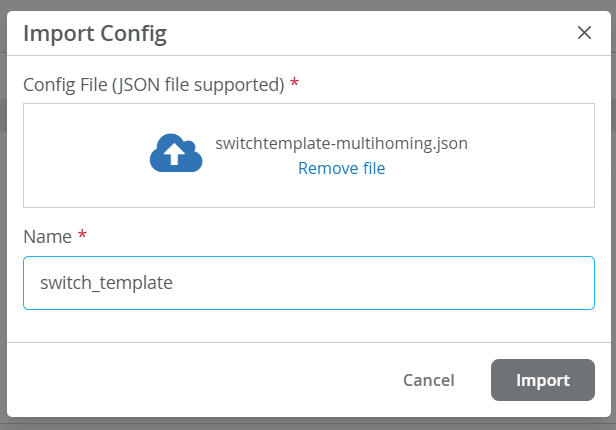
Skip to [Assign switch_template](### Assign switch-template to site) if your import was successful.
If your import of the switch template failed, please proceed to the next instructions.
Manual Switch Configuration
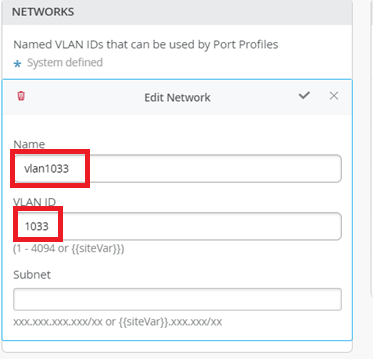
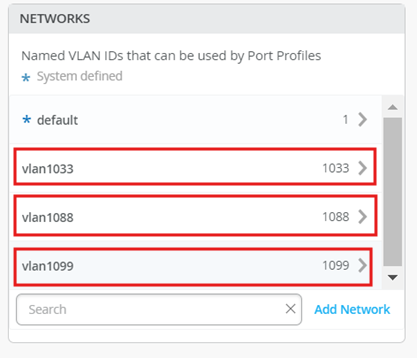
Define the following VLANs:
vlan1099
Name - vlan1099
ID - 1099
vlan1088
Name - vlan1088
ID - 1088
vlan1033
Name - vlan1033
ID - 1033
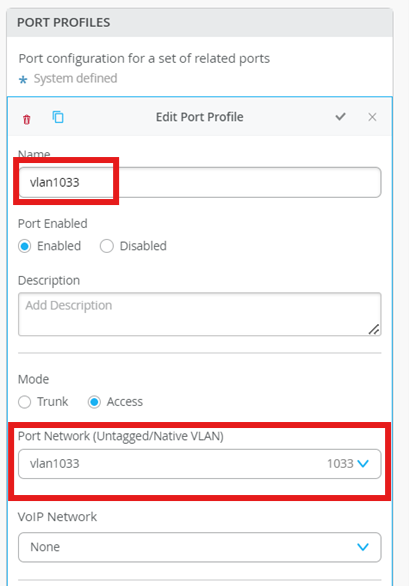
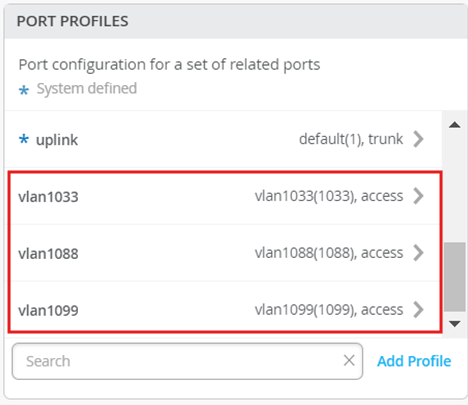
Define the following Port Profiles:
vlan1099
Name - vlan1099
Port Network - vlan1099
vlan1088
Name - vlan1088
Port Network - vlan1088
vlan1033
Name - vlan1033
Port Network - vlan1088
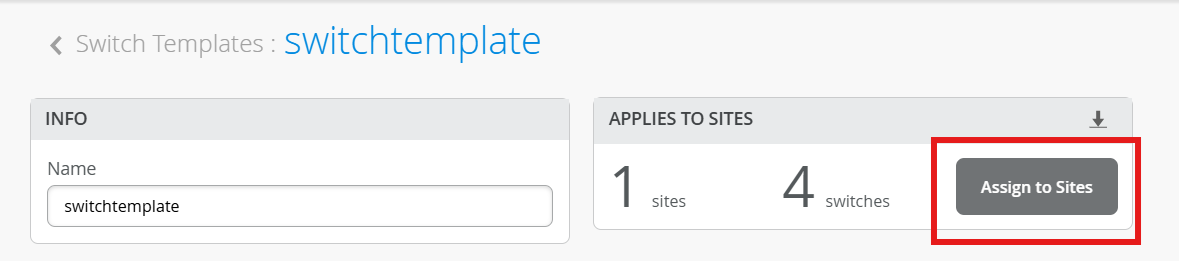
Assign switch_template to site
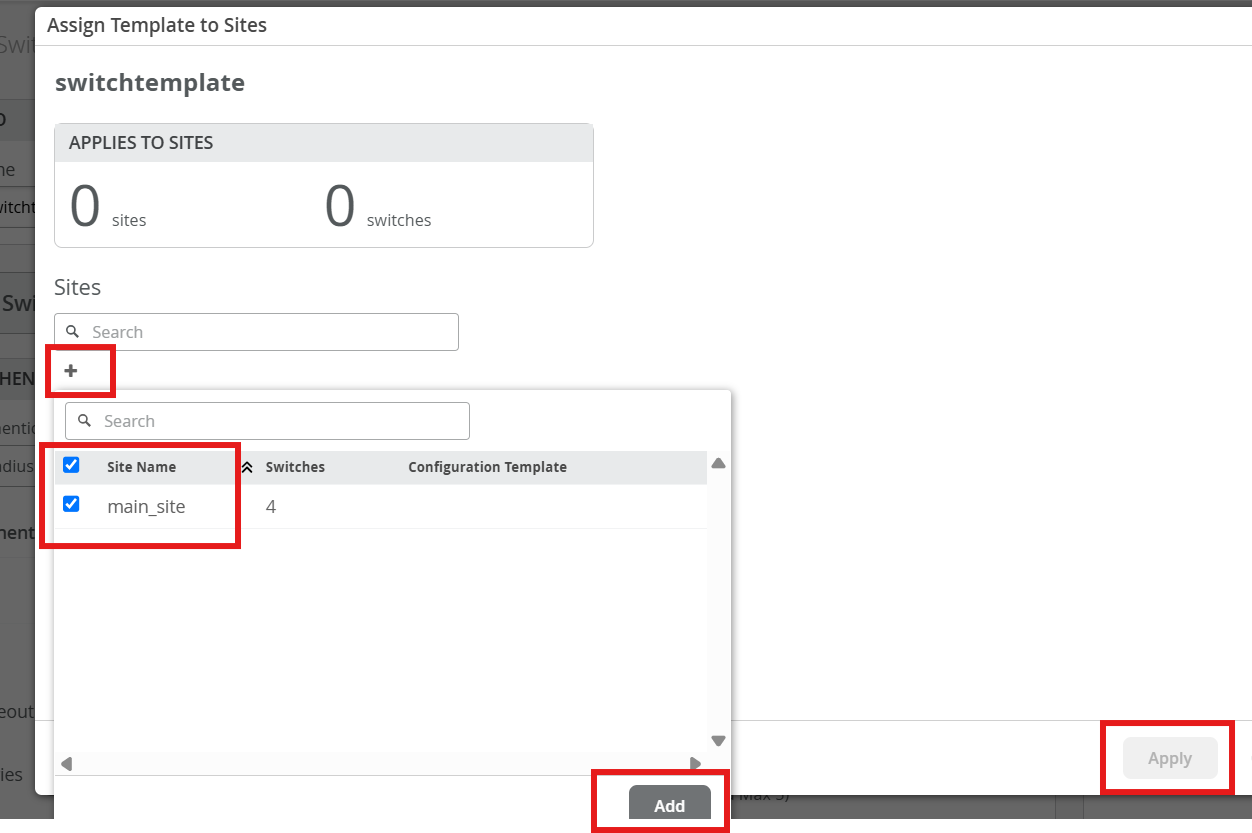
Click Assign to Site.
Select main_site, then click Add.
Manage the device via MIST
Before we proceed, let’s Manage all the devices via mist.
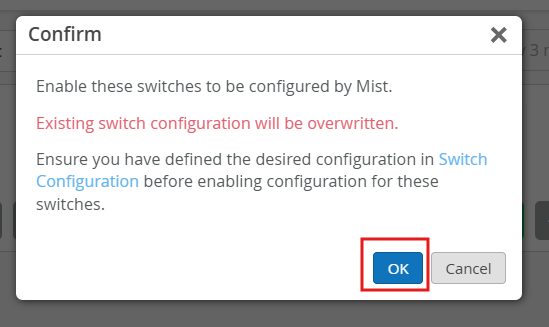
Click Enable Switch Configuration
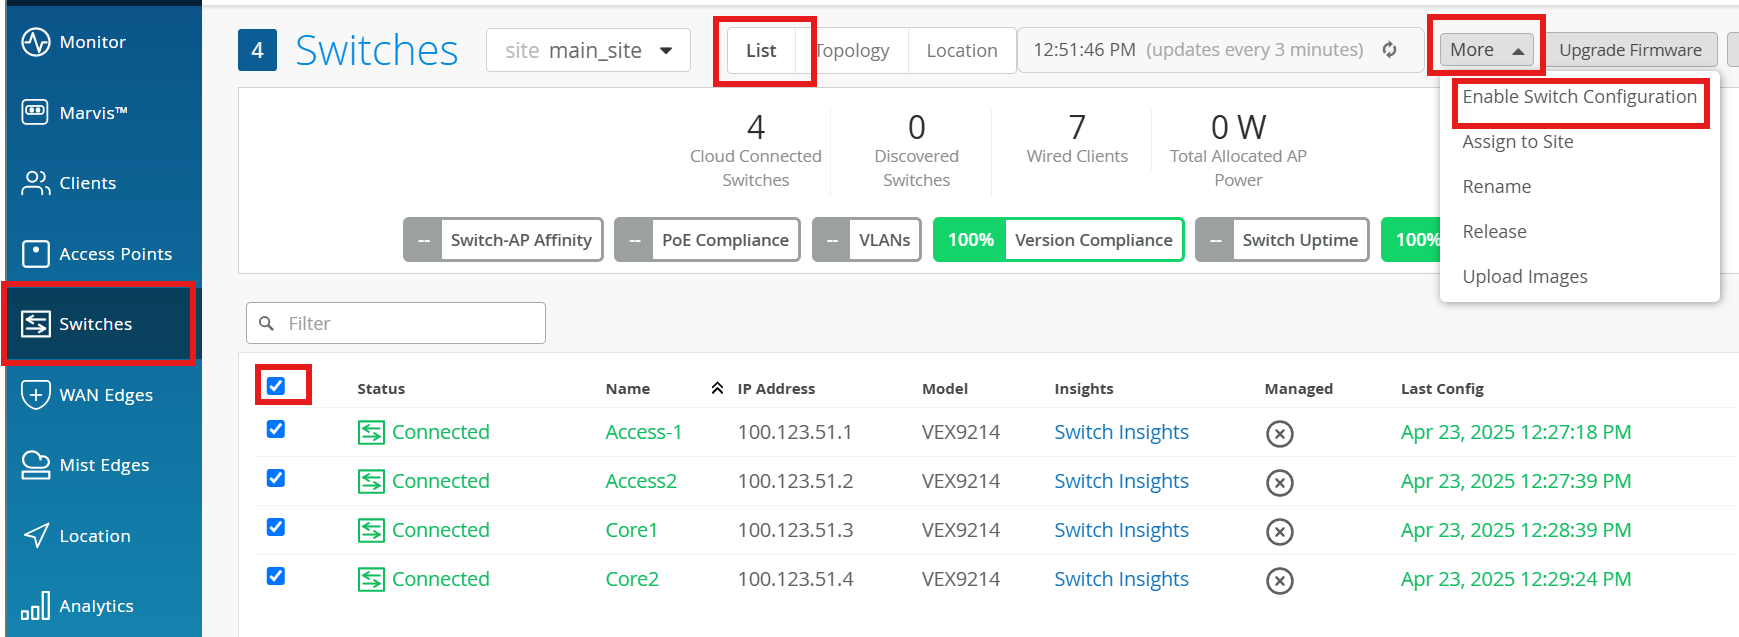
Acknowledge this message and proceed.
MULTIHOMING FABRIC with L2 Exit
Configure the fabric.
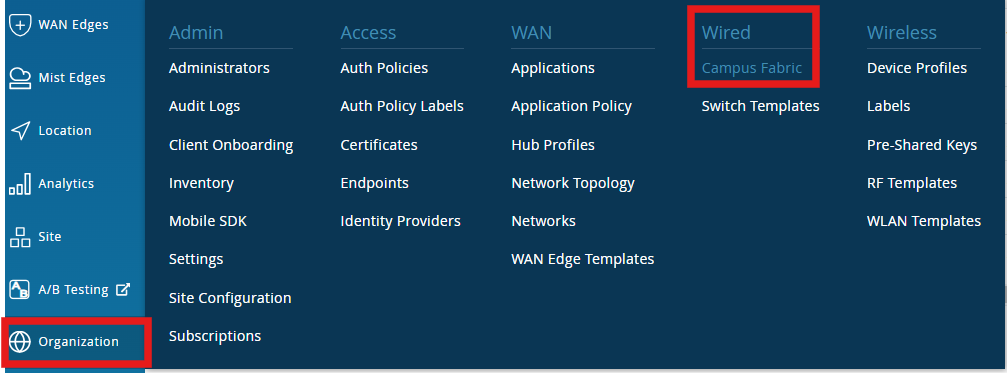
Navigate to Organization > Wired > Campus Fabric
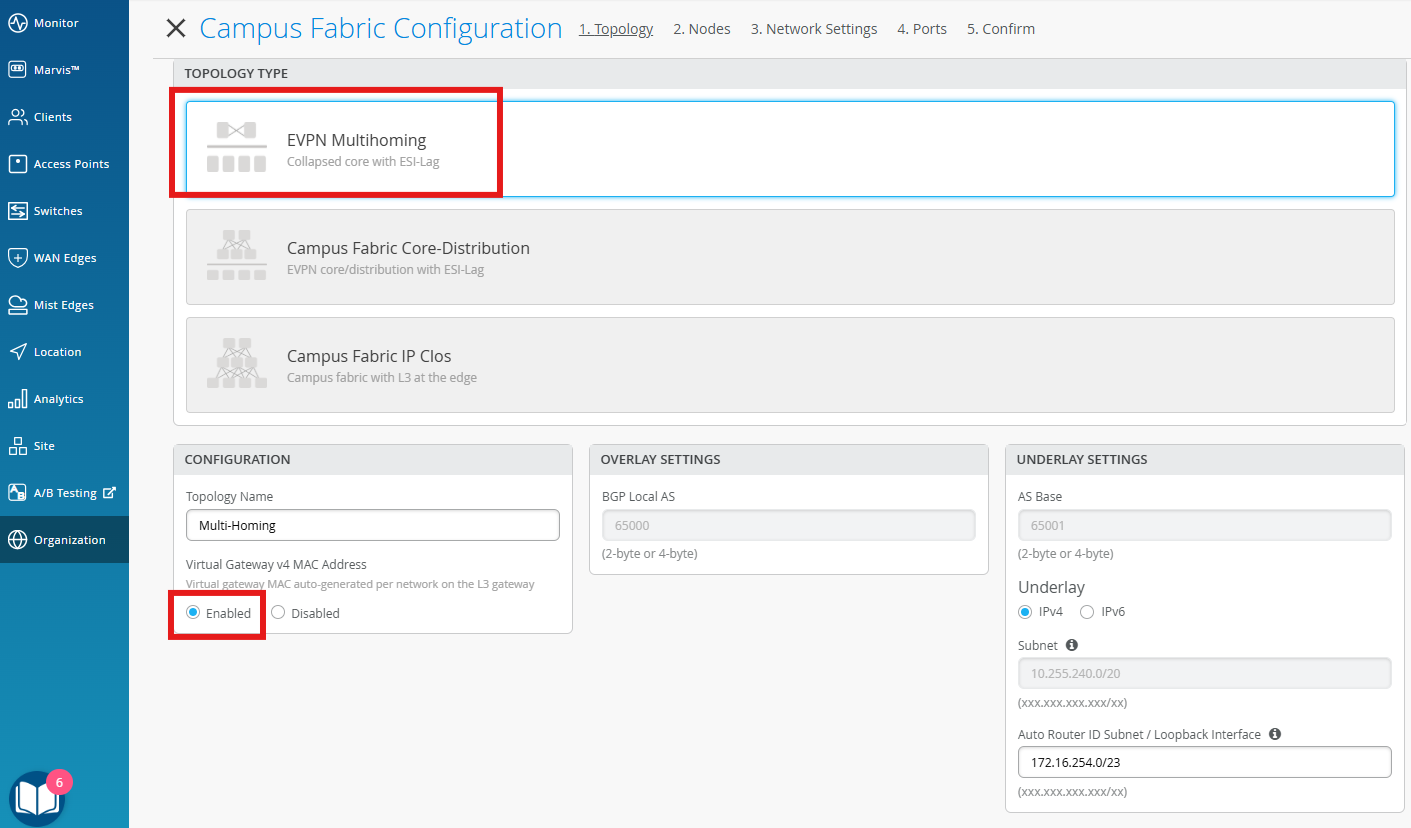
Enter the following under Topology:
Topology Type - EVPN Multihoming
Name - Multi-Homing
Virtual Gateway v4 MAC address - Enabled
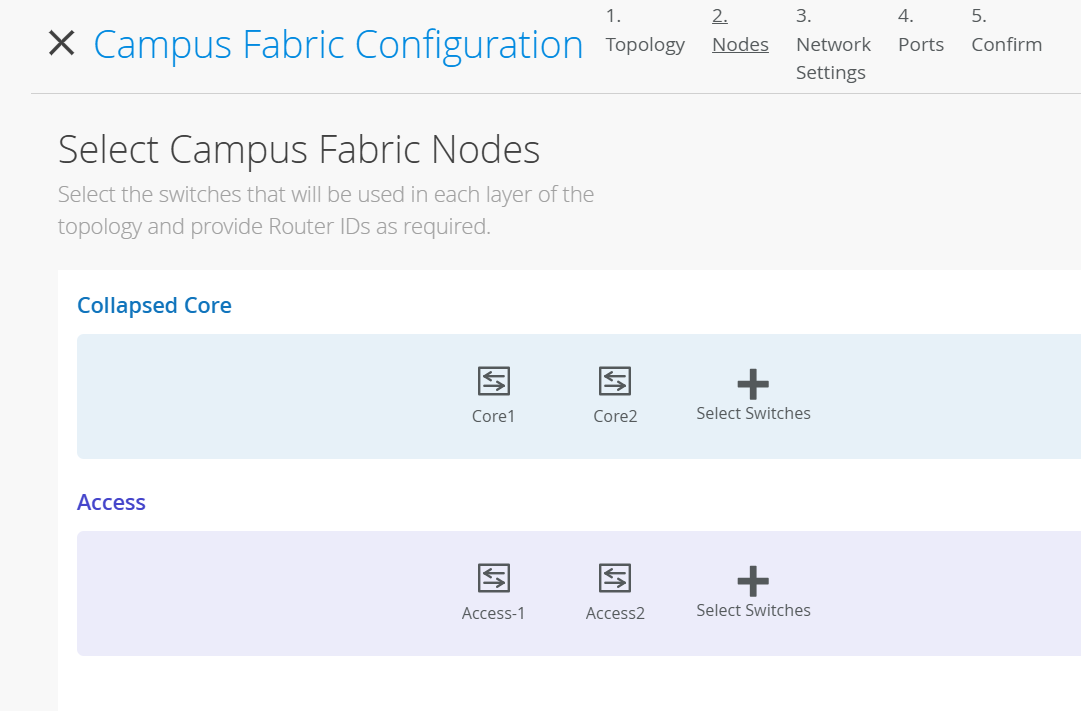
Add the following to Collapsed Core under Nodes:
Core1
Core2
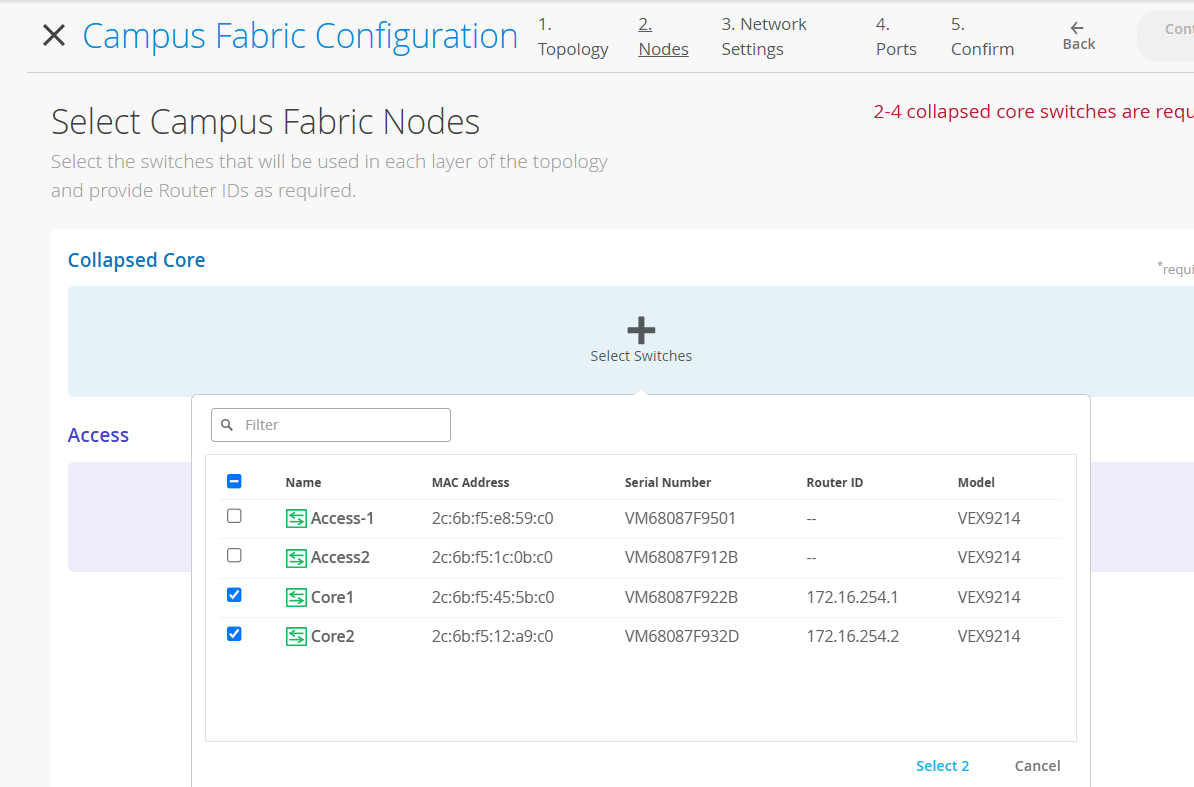
Add the following to Access under Nodes:
Access1
Access2
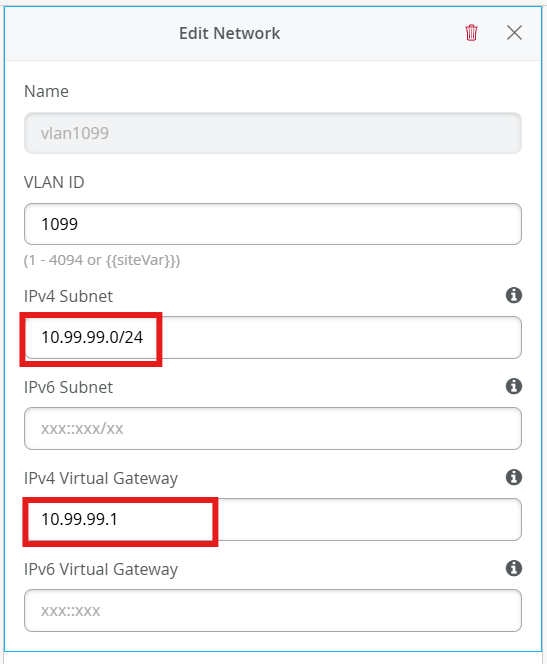
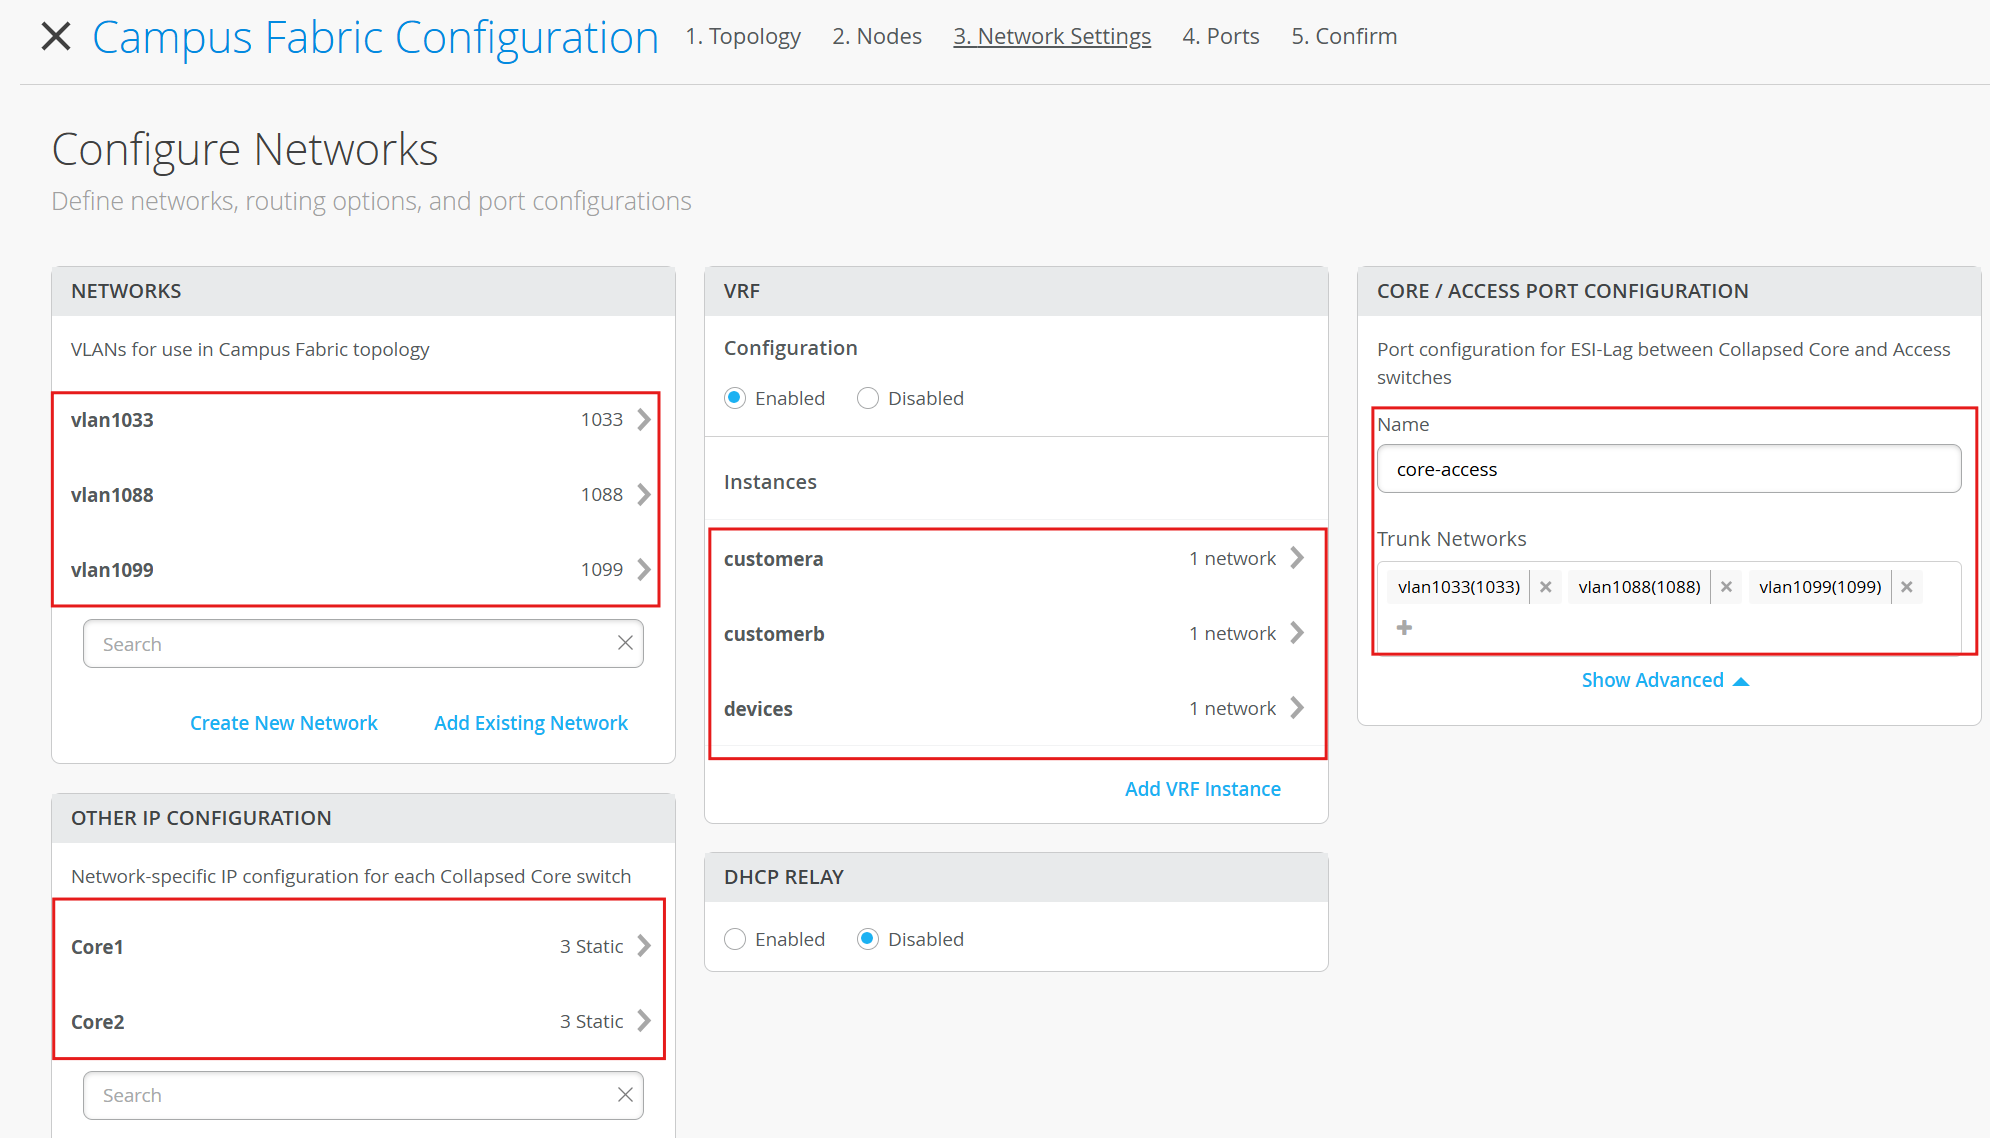
Add the following Networks under Network Settings:
vlan1099
Name - vlan1099
ID - 1099
IPv4 Subnet - 10.99.99.0/24
IPv4 Gateway - 10.99.99.1
vlan1088
Name - vlan1088
ID - 1088
IPv4 Subnet - 10.88.880/24
IPv4 Gateway - 10.88.88.1
vlan1033
Name - vlan1033
ID - 1033
IPv4 Subnet - 10.33.33.0/24
IPv4 Gateway - 10.33.33.1
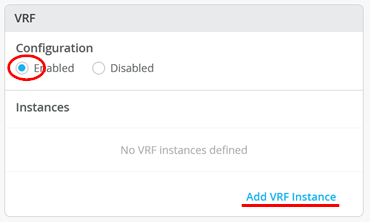
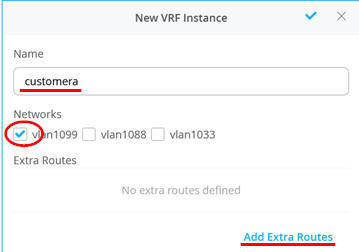
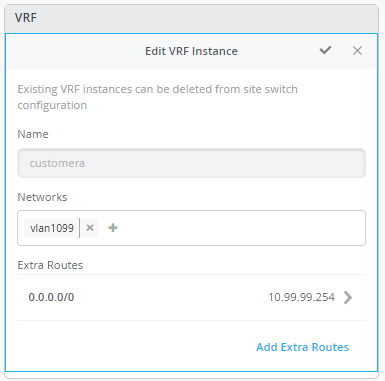
For L2 exit, we must define a default route towards gateway present on the external WAN router attached (MX in this lab). Add the following VRF Instances:
customera
Networks - vlan1099
Extra Routes - 0.0.0.0/0 via 10.99.99.254
customerb
Networks - vlan1088
Extra Routes - 0.0.0.0/0 via 10.88.88.254
devices
Networks - vlan1033
Extra Routes( - 0.0.0.0/0 via 10.33.33.254
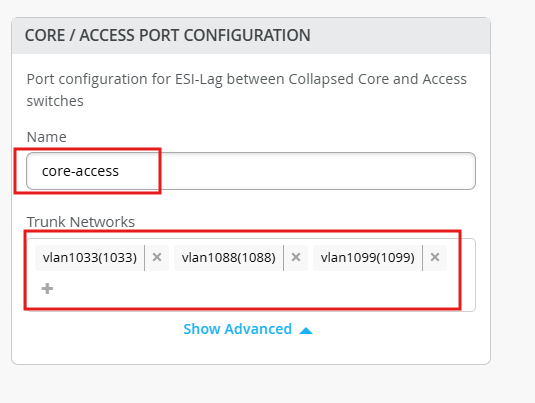
Give name for the links between core and access:
Name - core-access
Trunk Network vlan1099, vlan1088, vlan1033
Review the summary:
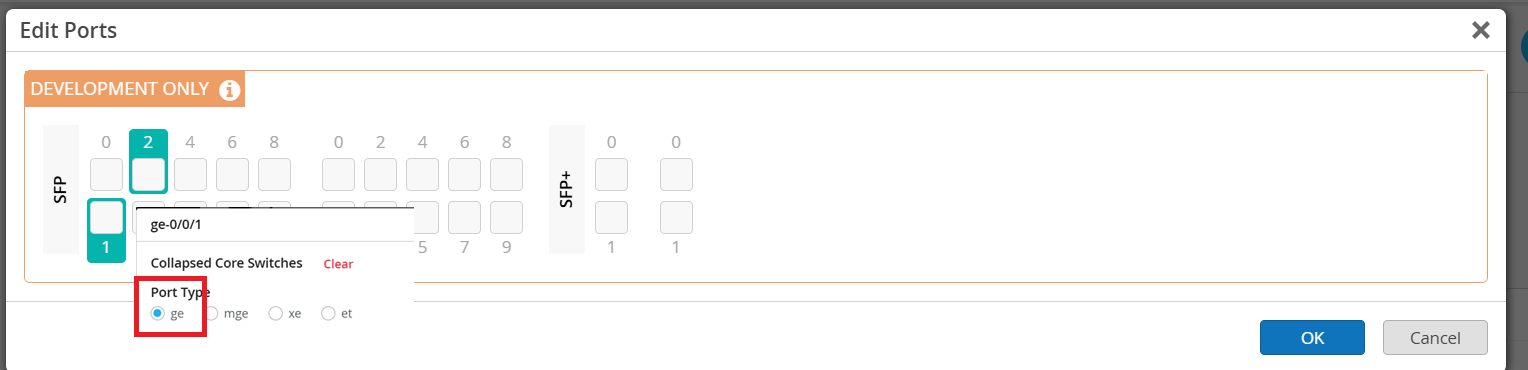
Now lets connect the port links
Example:
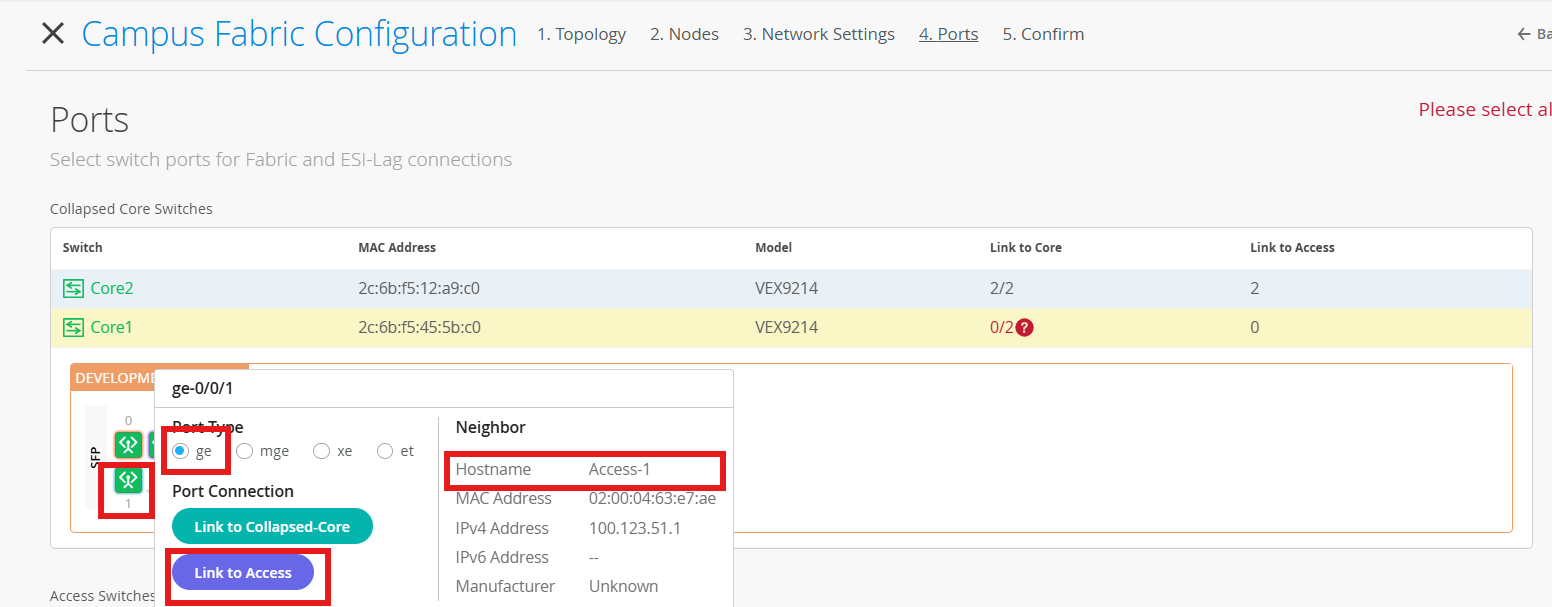
Core1

Core2
Access-switches

Confirm the configurations:

Once you have completed verification, select the Apply Changes

Campus Fabric configuration ends here.
WAN-Router (MX) Layer2 VLAN attached to Core
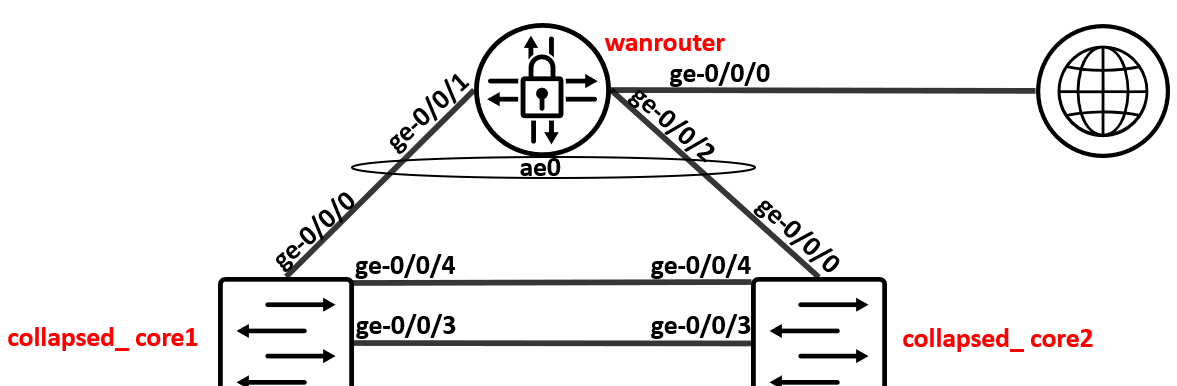
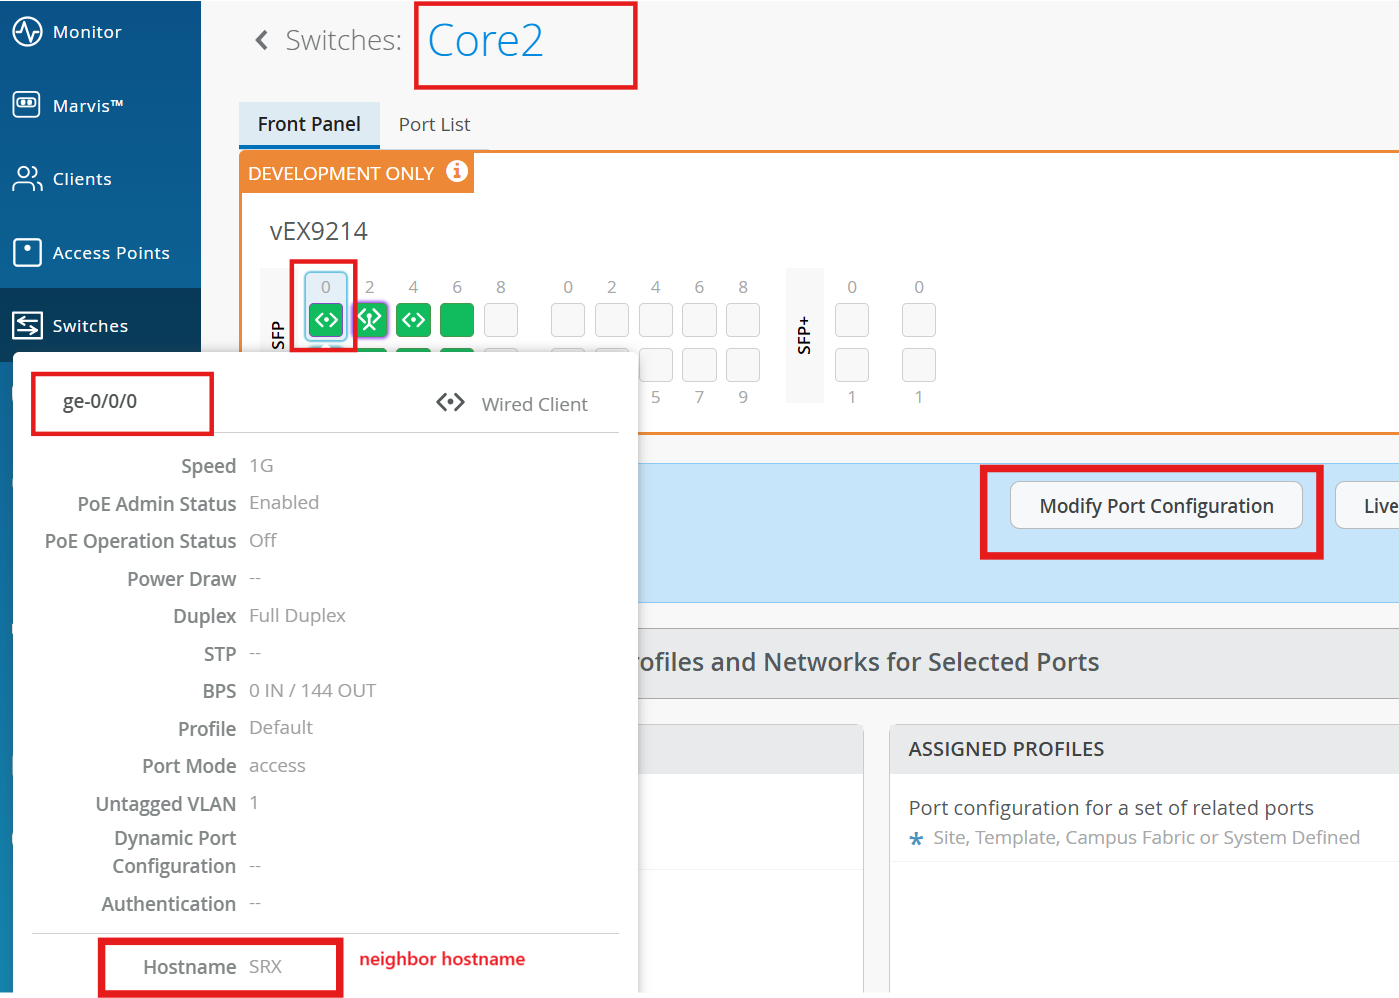
On mist, configure the Port on both of the Core switches.
Select Core1 > Interface ge-0/0/0, and click Modify Port Configuration
Configure the port with the following:
Port ID - ge-0/0/0
Interface - L2
Configuration Profile - core-access
Port Aggregation Enabled
AE Index - 0
ESI-LAG yes
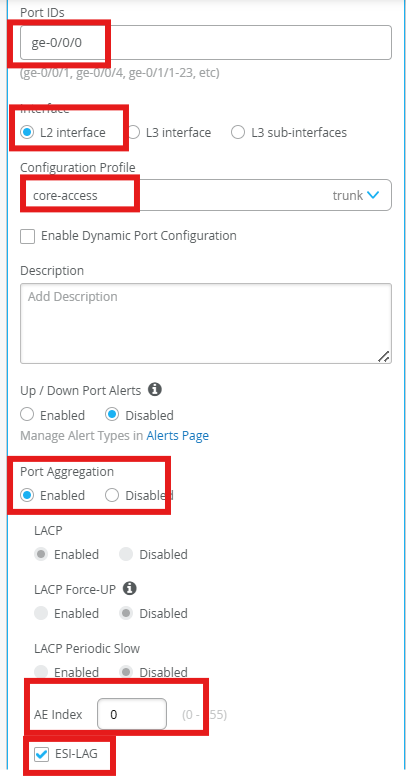
Repeat for Core2 > Interface ge-0/0/0
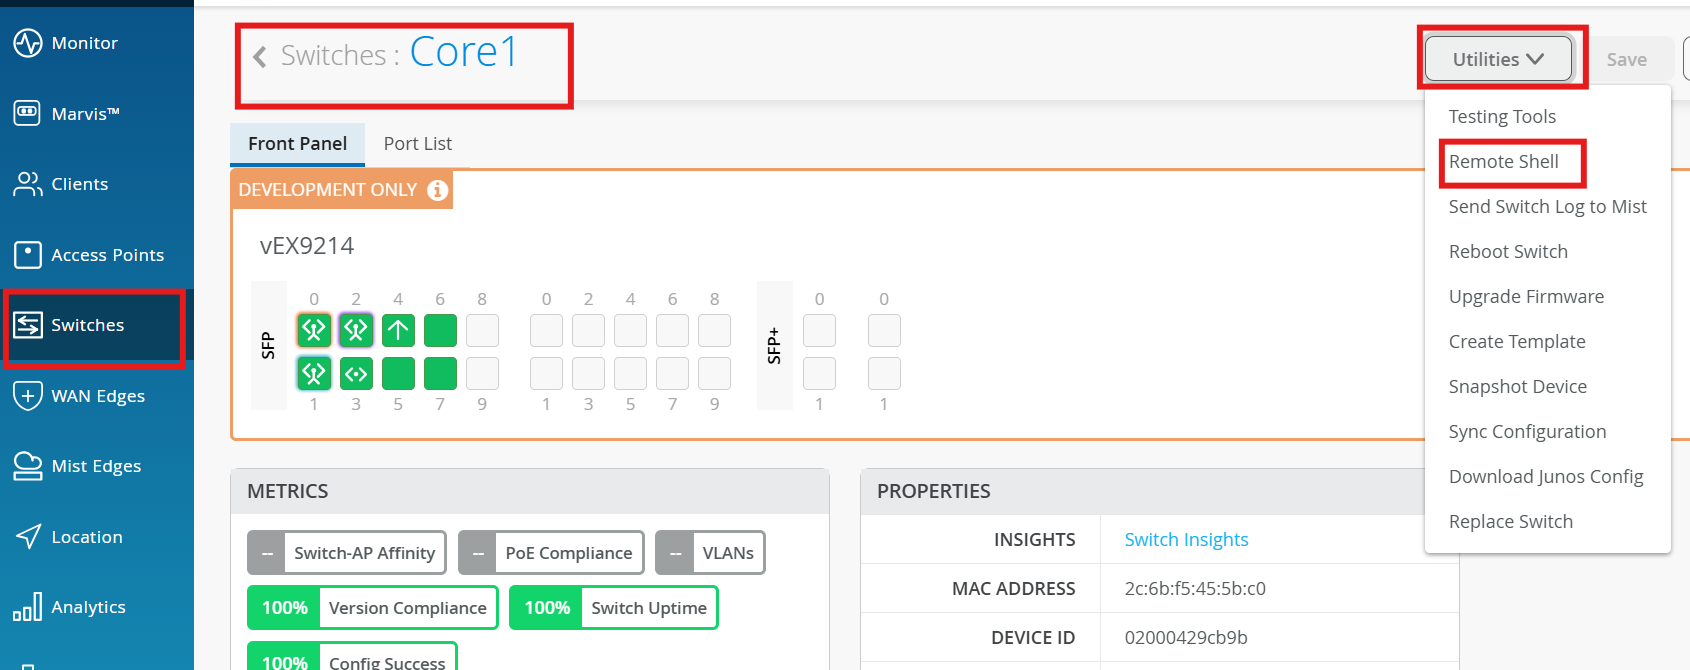
Verification
Access the switches from MIST, using Shell option.
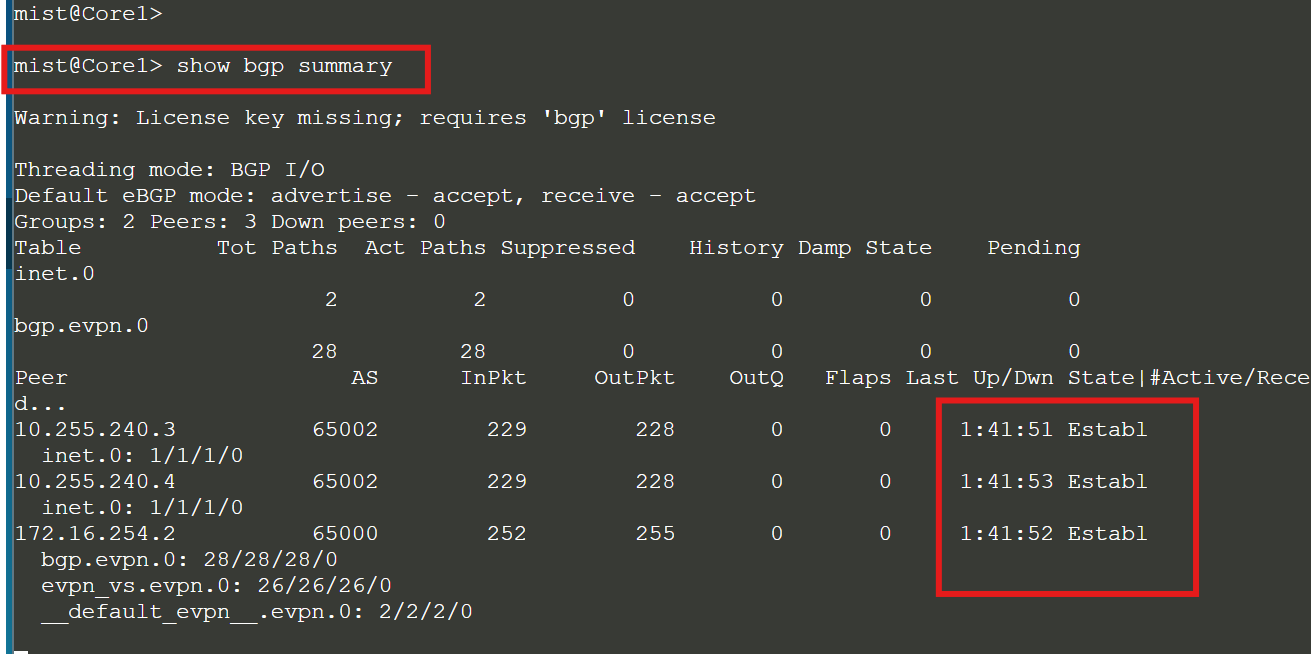
Check the BGP summary on all the switches:
show bgp summary
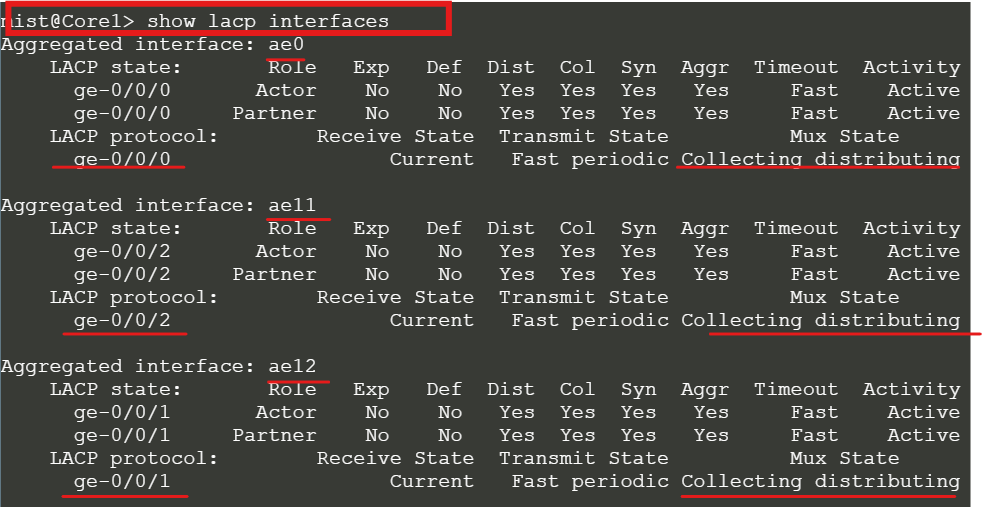
show lacp interfaces
Both are in different vlans and VRFs. We need to assign an IP to Client-1 and add port config on the corresponding switch.
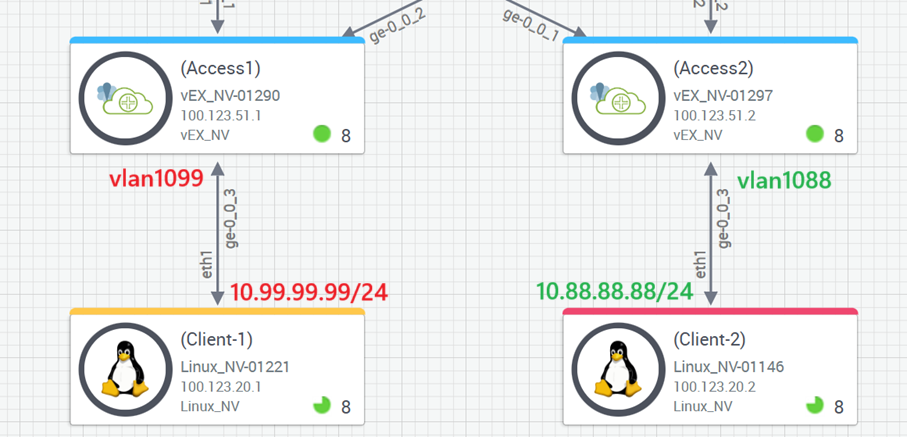
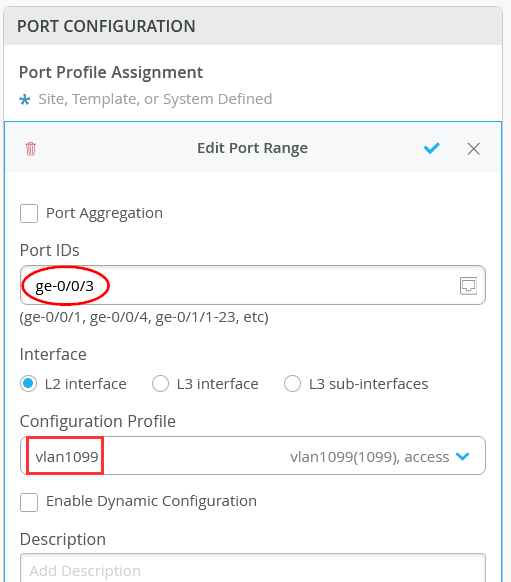
On Access-1, Configure port ge-0/0/3 with vlan1099 port profile.
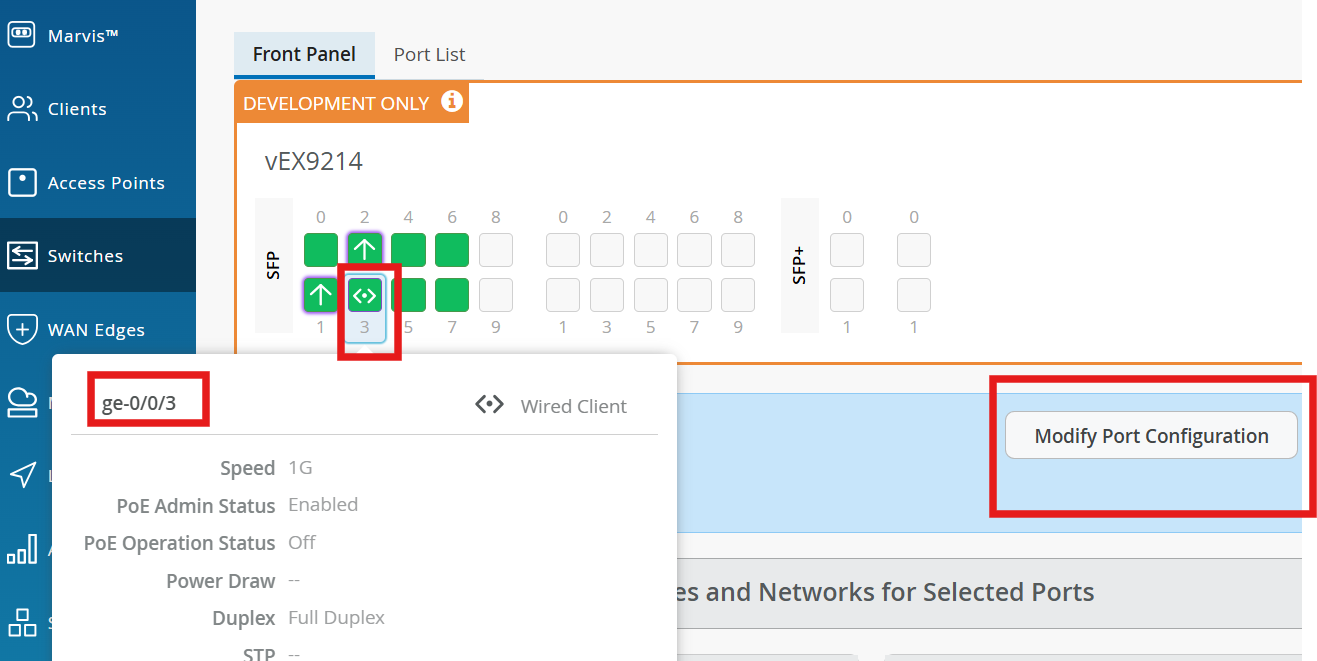
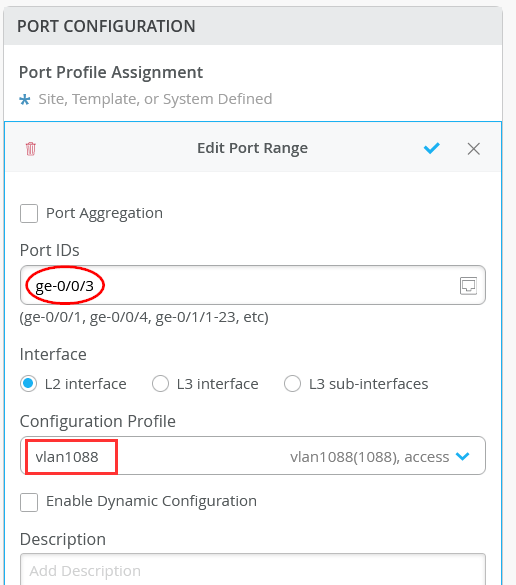
On Access-2, Configure port ge-0/0/3 with vlan1088 port profile.
Set a static IP-Address
Access Client-1, add IP addresses and default routes:
ip addr add 10.99.99.99/24 dev eth1
ip link set dev eth1 up
ip route del default
ip route add default via 10.99.99.1
ip route
output:
default via 10.99.99.1 dev eth1

10.99.99.0/24 dev eth1 proto kernel scope link src 10.99.99.99

100.123.0.0/16 dev eth0 proto kernel scope link src 100.123.20.1
On Client-2, add IP addresses and default routes:
ip addr add 10.88.88.88/24 dev eth1
ip link set dev eth1 up
ip route del default
ip route add default via 10.88.88.1
ip route
output:
default via 10.88.88.1 dev eth1

10.88.88.0/24 dev eth1 proto kernel scope link src 10.88.88.88

100.123.0.0/16 dev eth0 proto kernel scope link src 100.123.20.2
Now you need to configure end-hosts (wired clients)
On Client-1, ping the virtual GW of this subnet:
ping -c3 10.99.99.1
PING 10.99.99.1 (10.99.99.1) 56(84) bytes of data.
64 bytes from 10.99.99.1: icmp_seq=1 ttl=64 time=0.765 ms
64 bytes from 10.99.99.1: icmp_seq=2 ttl=64 time=0.781 ms
64 bytes from 10.99.99.1: icmp_seq=3 ttl=64 time=0.642 ms
-- 10.99.99.1 ping statistics --
 3 packets transmitted, 3 received, 0% packet loss, time 65ms
rtt min/avg/max/mdev = 0.642/0.729/0.781/0.065 ms
On Client-1, ping the static GW of core1 switch:
ping -c3 10.99.99.2
PING 10.99.99.2 (10.99.99.2) 56(84) bytes of data.
64 bytes from 10.99.99.2: icmp_seq=1 ttl=64 time=13.3 ms
64 bytes from 10.99.99.2: icmp_seq=2 ttl=64 time=4.31 ms
64 bytes from 10.99.99.2: icmp_seq=3 ttl=64 time=4.83 ms
On Client-1, ping the static GW of collapsed-core2 switch:
ping -c3 10.99.99.3
PING 10.99.99.3 (10.99.99.3) 56(84) bytes of data.
64 bytes from 10.99.99.3: icmp_seq=1 ttl=64 time=7.0 2 ms
64 bytes from 10.99.99.3: icmp_seq=2 ttl=64 time=3.69 ms
64 bytes from 10.99.99.3: icmp_seq=3 ttl=64 time=7.16 ms
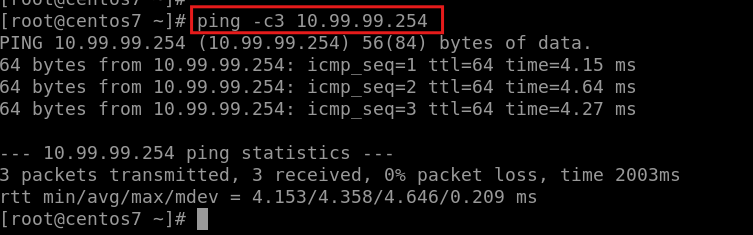
On Client-1, ping the vSRX-WAN Router:
ping -c3 10.99.99.254
PING 10.99.99.254 (10.99.99.254) 56(84) bytes of data.
64 bytes from 10.99.99.254: icmp_seq=1 ttl=64 time=19.4 ms
64 bytes from 10.99.99.254: icmp_seq=2 ttl=64 time=4.71 ms
64 bytes from 10.99.99.254: icmp_seq=3 ttl=64 time=5.17 ms
On Client-1, ping something in the internet:
ping -c3 8.8.8.8
PING 8.8.8.8 (8.8.8.8) 56(84) bytes of data.
64 bytes from 8.8.8.8: icmp_seq=1 ttl=113 time=20.1 ms
64 bytes from 8.8.8.8: icmp_seq=2 ttl=113 time=15.1 ms
64 bytes from 8.8.8.8: icmp_seq=3 ttl=113 time=13.2 ms
On Client-1, inspect the ARP-Table:
ip neigh show \| grep \"10.99\"
10.99.99.2 dev eth1 lladdr 2c:6b:f5:39:83:f0 STALE
10.99.99.254 dev eth1 lladdr 4c:96:14:1a:01:80 REACHABLE
10.99.99.3 dev eth1 lladdr 2c:6b:f5:a2:ad:f0 STALE
10.99.99.1 dev eth1 lladdr 00:00:5e:00:01:01 REACHABLE
On Client-2, ping the virtual GW of this subnet:
ping -c3 10.88.88.1
PING 10.88.88.1 (10.88.88.1) 56(84) bytes of data.
64 bytes from 10.88.88.1: icmp_seq=1 ttl=64 time=2.51 ms
64 bytes from 10.88.88.1: icmp_seq=2 ttl=64 time=2.75 ms
64 bytes from 10.88.88.1: icmp_seq=3 ttl=64 time=3.45 ms
On Client-2, ping the static GW of collapsed1 switch:
ping -c3 10.88.88.2
PING 10.88.88.2 (10.88.88.2) 56(84) bytes of data.
64 bytes from 10.88.88.2: icmp_seq=1 ttl=64 time=5.99 ms
64 bytes from 10.88.88.2: icmp_seq=2 ttl=64 time=3.68 ms
64 bytes from 10.88.88.2: icmp_seq=3 ttl=64 time=3.12 ms
On Client-2, ping the static GW of collapsed2 switch:
ping -c3 10.88.88.3
PING 10.88.88.3 (10.88.88.3) 56(84) bytes of data.
64 bytes from 10.88.88.3: icmp_seq=1 ttl=64 time=5.64 ms
64 bytes from 10.88.88.3: icmp_seq=2 ttl=64 time=3.67 ms
64 bytes from 10.88.88.3: icmp_seq=3 ttl=64 time=3.18 ms
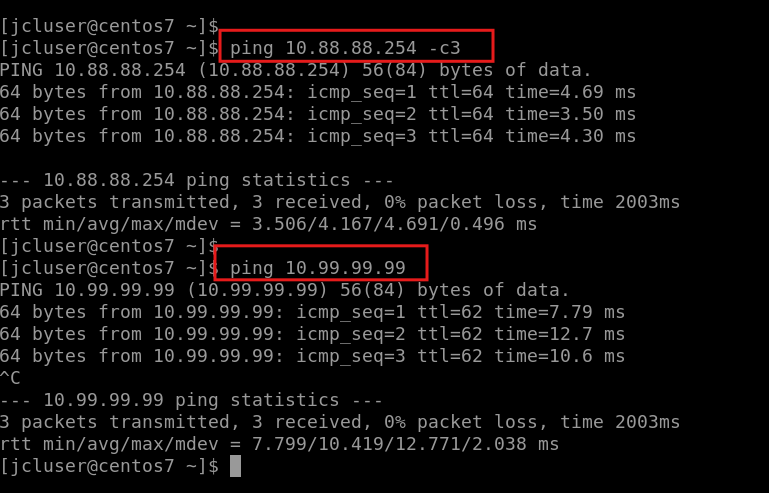
On Client-2, ping the vSRX-WAN Router:
ping -c3 10.88.88.254
PING 10.88.88.254 (10.88.88.254) 56(84) bytes of data.
64 bytes from 10.88.88.254: icmp_seq=1 ttl=64 time=4.16 ms
64 bytes from 10.88.88.254: icmp_seq=2 ttl=64 time=4.63 ms
64 bytes from 10.88.88.254: icmp_seq=3 ttl=64 time=4.49 ms
On Client-2, ping something in the internet:
ping -c3 8.8.8.8
PING 8.8.8.8 (8.8.8.8) 56(84) bytes of data.
64 bytes from 8.8.8.8: icmp_seq=1 ttl=113 time=14.9 ms
64 bytes from 8.8.8.8: icmp_seq=2 ttl=113 time=18.5 ms
64 bytes from 8.8.8.8: icmp_seq=3 ttl=113 time=13.1 ms
On Client-2, ping Client-1 in the other VRF (note that this traffic flows over WAN-Router):
ping -c3 10.99.99.99
PING 10.99.99.99 (10.99.99.99) 56(84) bytes of data.
64 bytes from 10.99.99.99: icmp_seq=1 ttl=62 time=10.2 ms
64 bytes from 10.99.99.99: icmp_seq=2 ttl=62 time=8.73 ms
64 bytes from 10.99.99.99: icmp_seq=3 ttl=62 time=9.11 ms
On Client-2, inspect the ARP-Table:
ip neigh show \| grep \"10.88\"
10.88.88.2 dev eth1 lladdr 2c:6b:f5:39:83:f0 STALE
10.88.88.254 dev eth1 lladdr 4c:96:14:1a:01:80 STALE
10.88.88.1 dev eth1 lladdr 00:00:5e:00:01:01 REACHABLE
10.88.88.3 dev eth1 lladdr 2c:6b:f5:a2:ad:f0 STALEs
Pings are successful across the VRFs. This verifies our fabric configuration and the wan router attachment.
EVPN Insights
Mist Wired Assurance provides the user with Realtime status related to the health of the Campus Fabric EVPN Multihoming deployment using telemetry such as BGP neighbor status and TX/RX port statistics. The following screenshots are taken from the Campus Fabric EVPN Multihoming build by accessing the Campus Fabric option under the Organization/Wired of the Mist Portal:
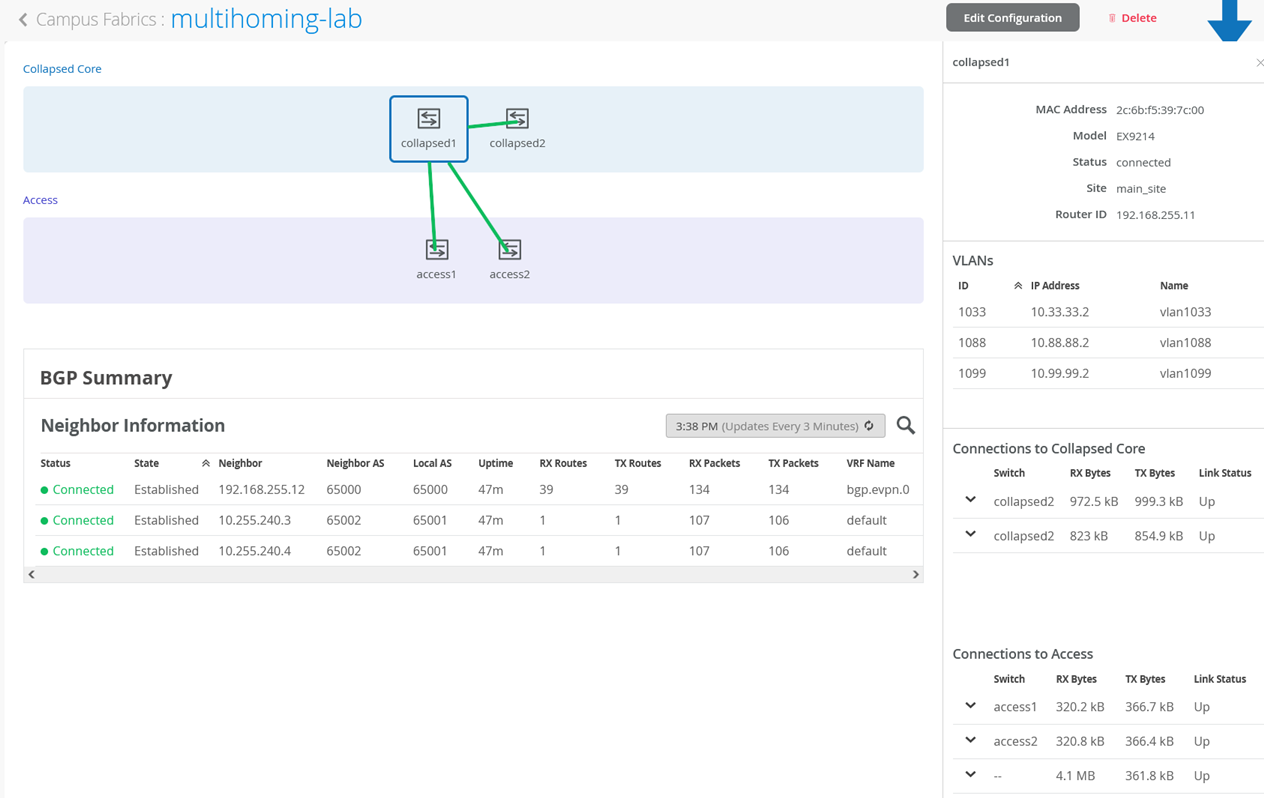

From this view, Mist also provides remote accessibility into each device’s console through the Remote Shell option as well as rich telemetry through the Switch Insights option. Remote Shell has been demonstrated throughout this document when displaying real time operational status of each device during the verification stage.
Usecase: MIST NAC
MIST NAC option allows users to configure authentication policies and authentication labels to allow/deny traffic.
Client-1 will be authenticated using the Client certificate
Client-2 will be authenticated using the mac
On MIST, navigate to Organization > Switch Templates
Edit your existing Switch Template
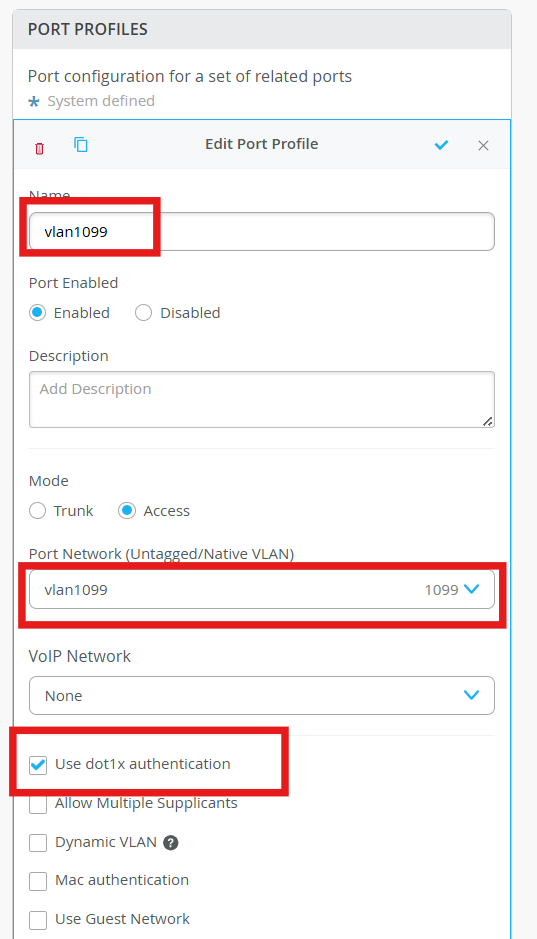
Under Port Profiles, edit the exiting vlan1099 and configure:
Use dot1x authentication - Checked
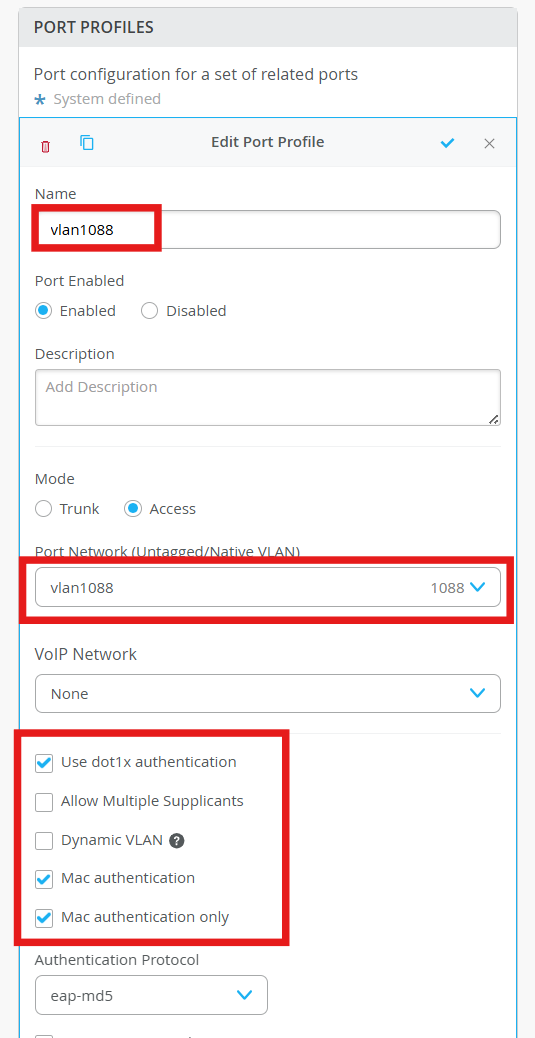
Under Port profiles edit the exiting vlan1088 and configure:
Use dot1x authentication - Checked
Mac authentication - Checked
Mac authentication only - Checked
Authentication Protocol - eap-md5
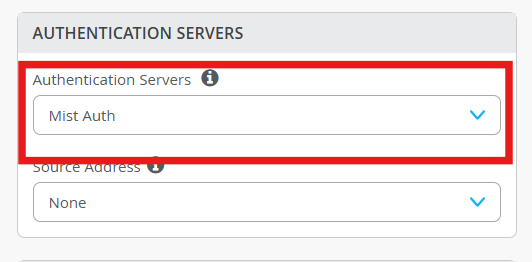
Define the mist Authentication Server
Authentication Server - Mist Auth
Save the changes.
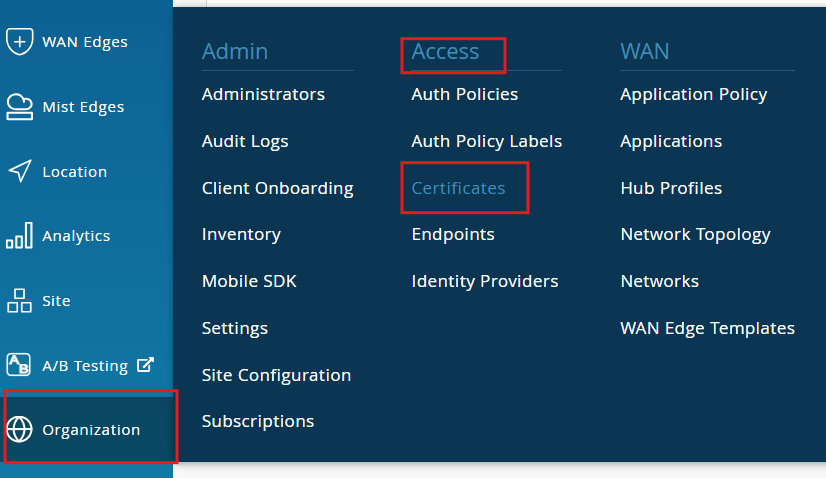
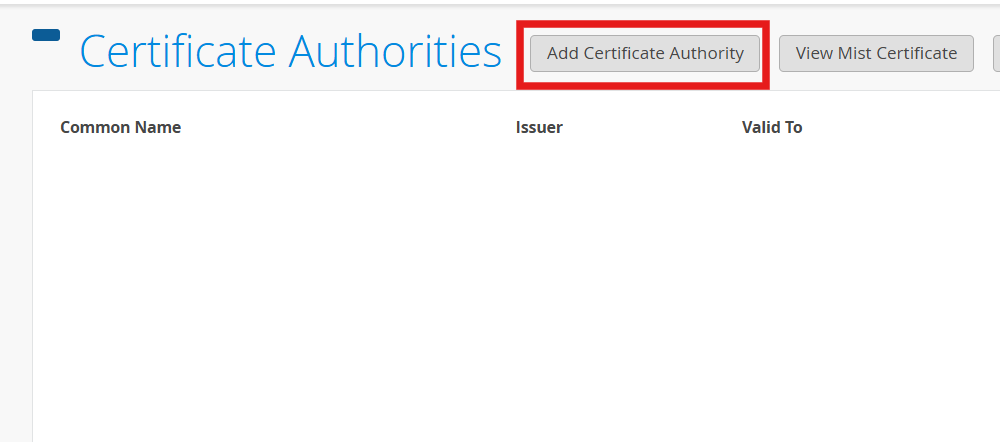
Navigate to Organization > Access > Certificates
Download the CA certificate here.
Copy the content and add as below:
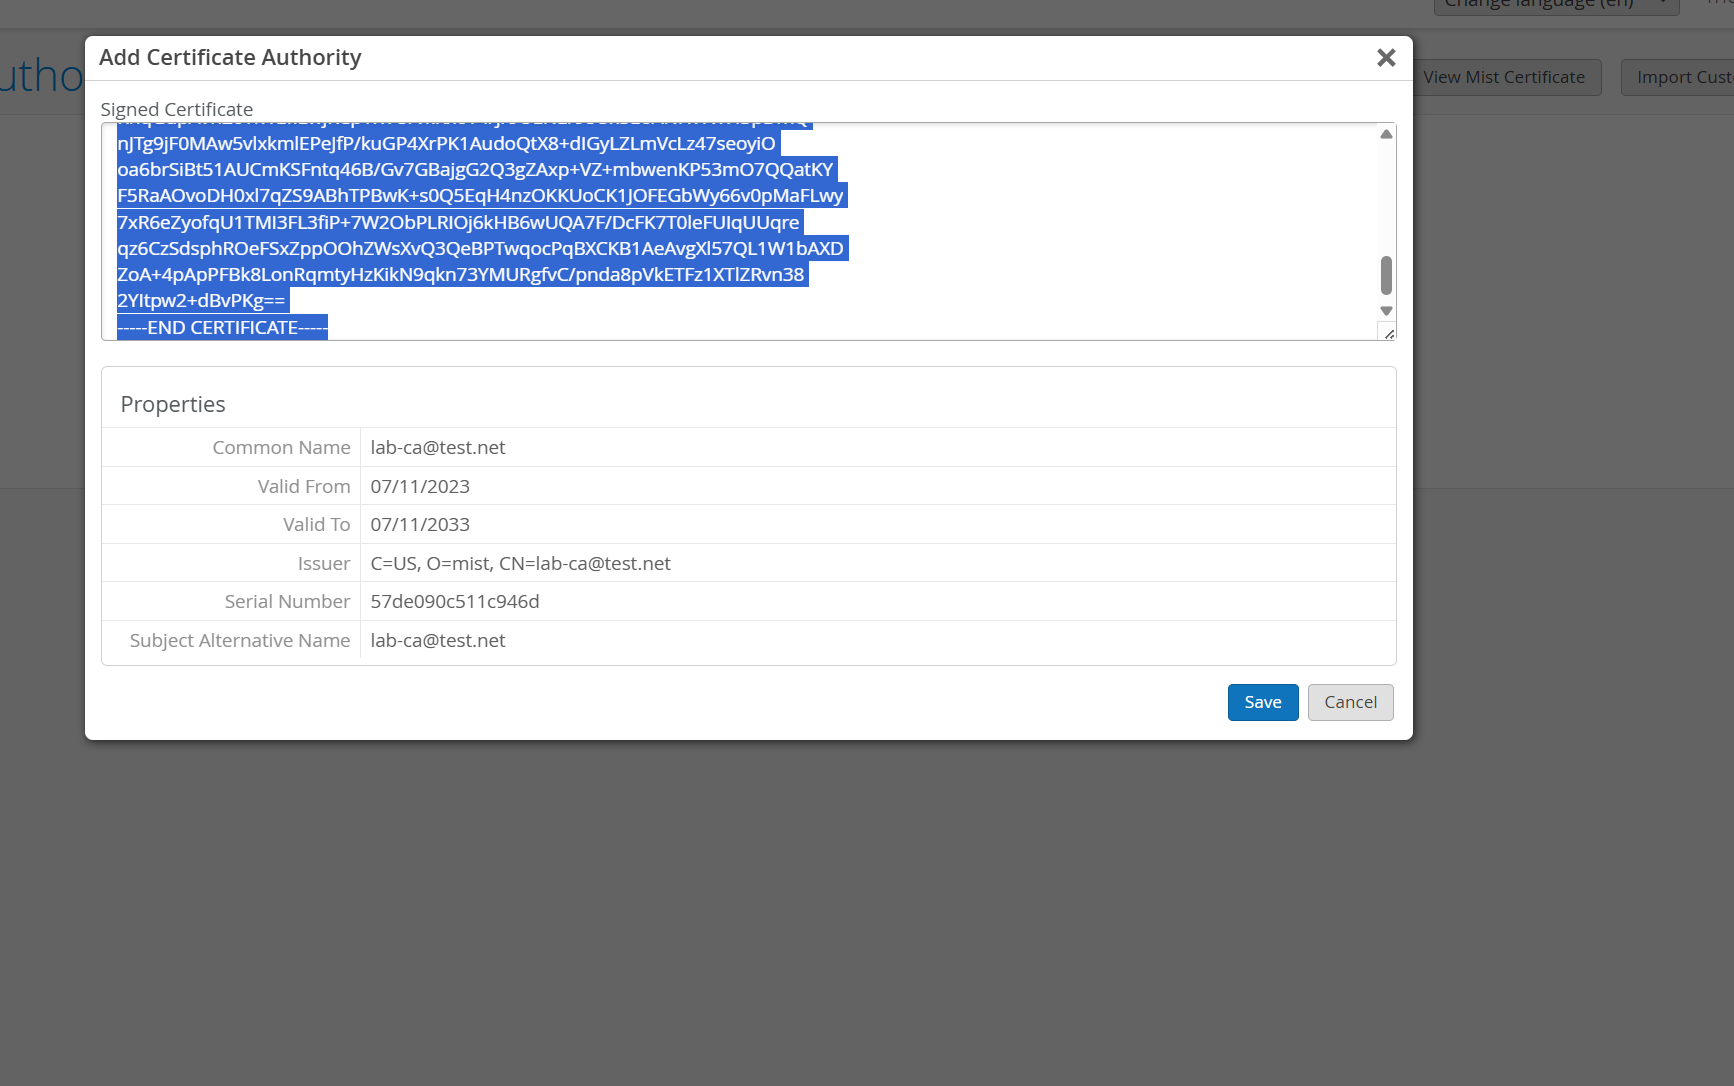
Click Save
We will define two auth labels, one for each client.
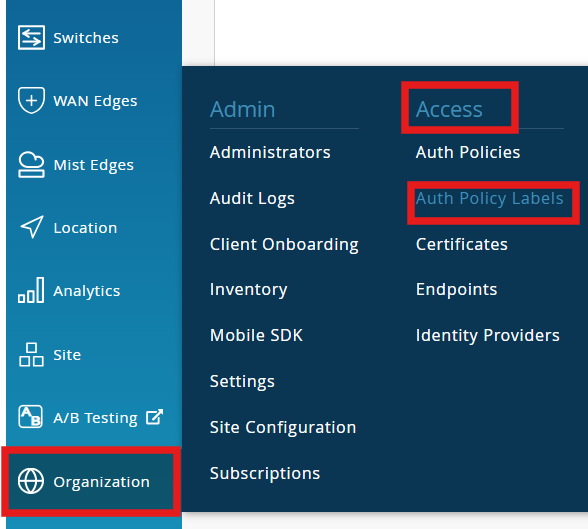
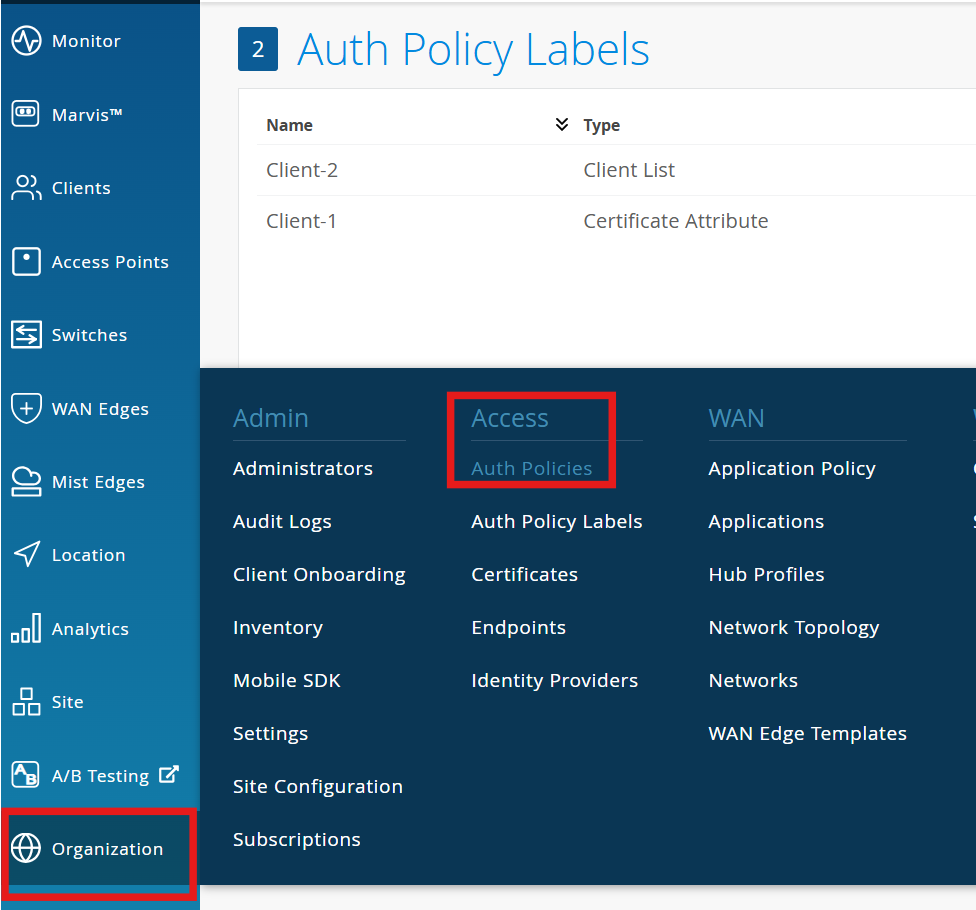
Navigate to Organization > Access > Auth Policy Labels
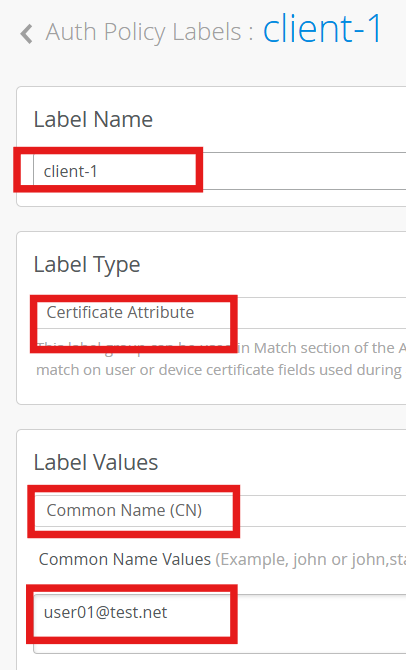
Add labels:
Name - Client-1
Label Type - Certificate Attribute
Label Value - Common Name
Common Name Value - user01@test.net
Name - client-2-mac
Label Type - Client List
Label Value - Client-2’s eth1’s mac address (example: 00:50:56:be:9b:99)
To get Client-2’s Mac address, SSH to Client-2 and run the following command (Copy eth1’s mac).
ip link show eth1

Paste the mac as the label value on mist

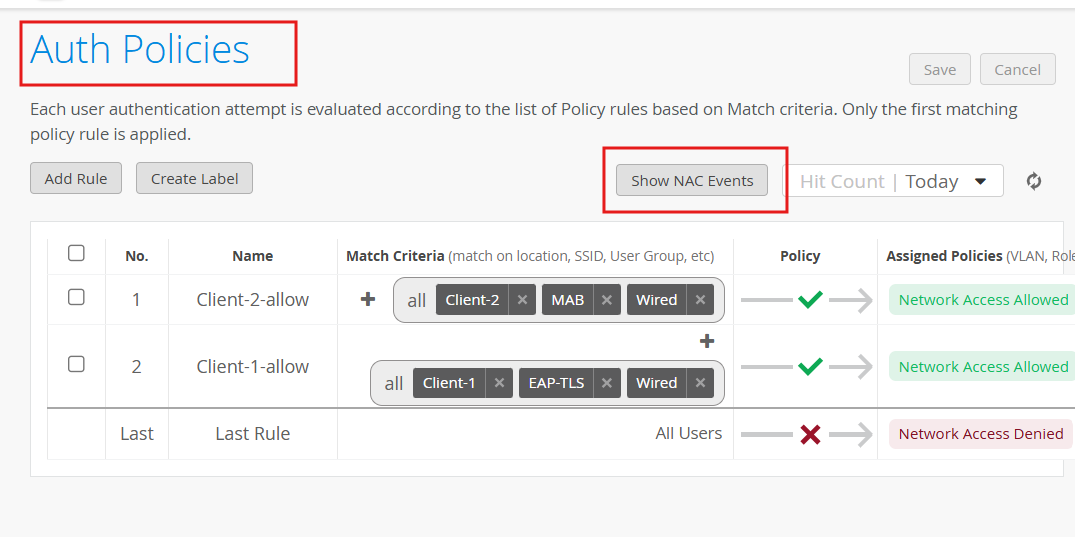
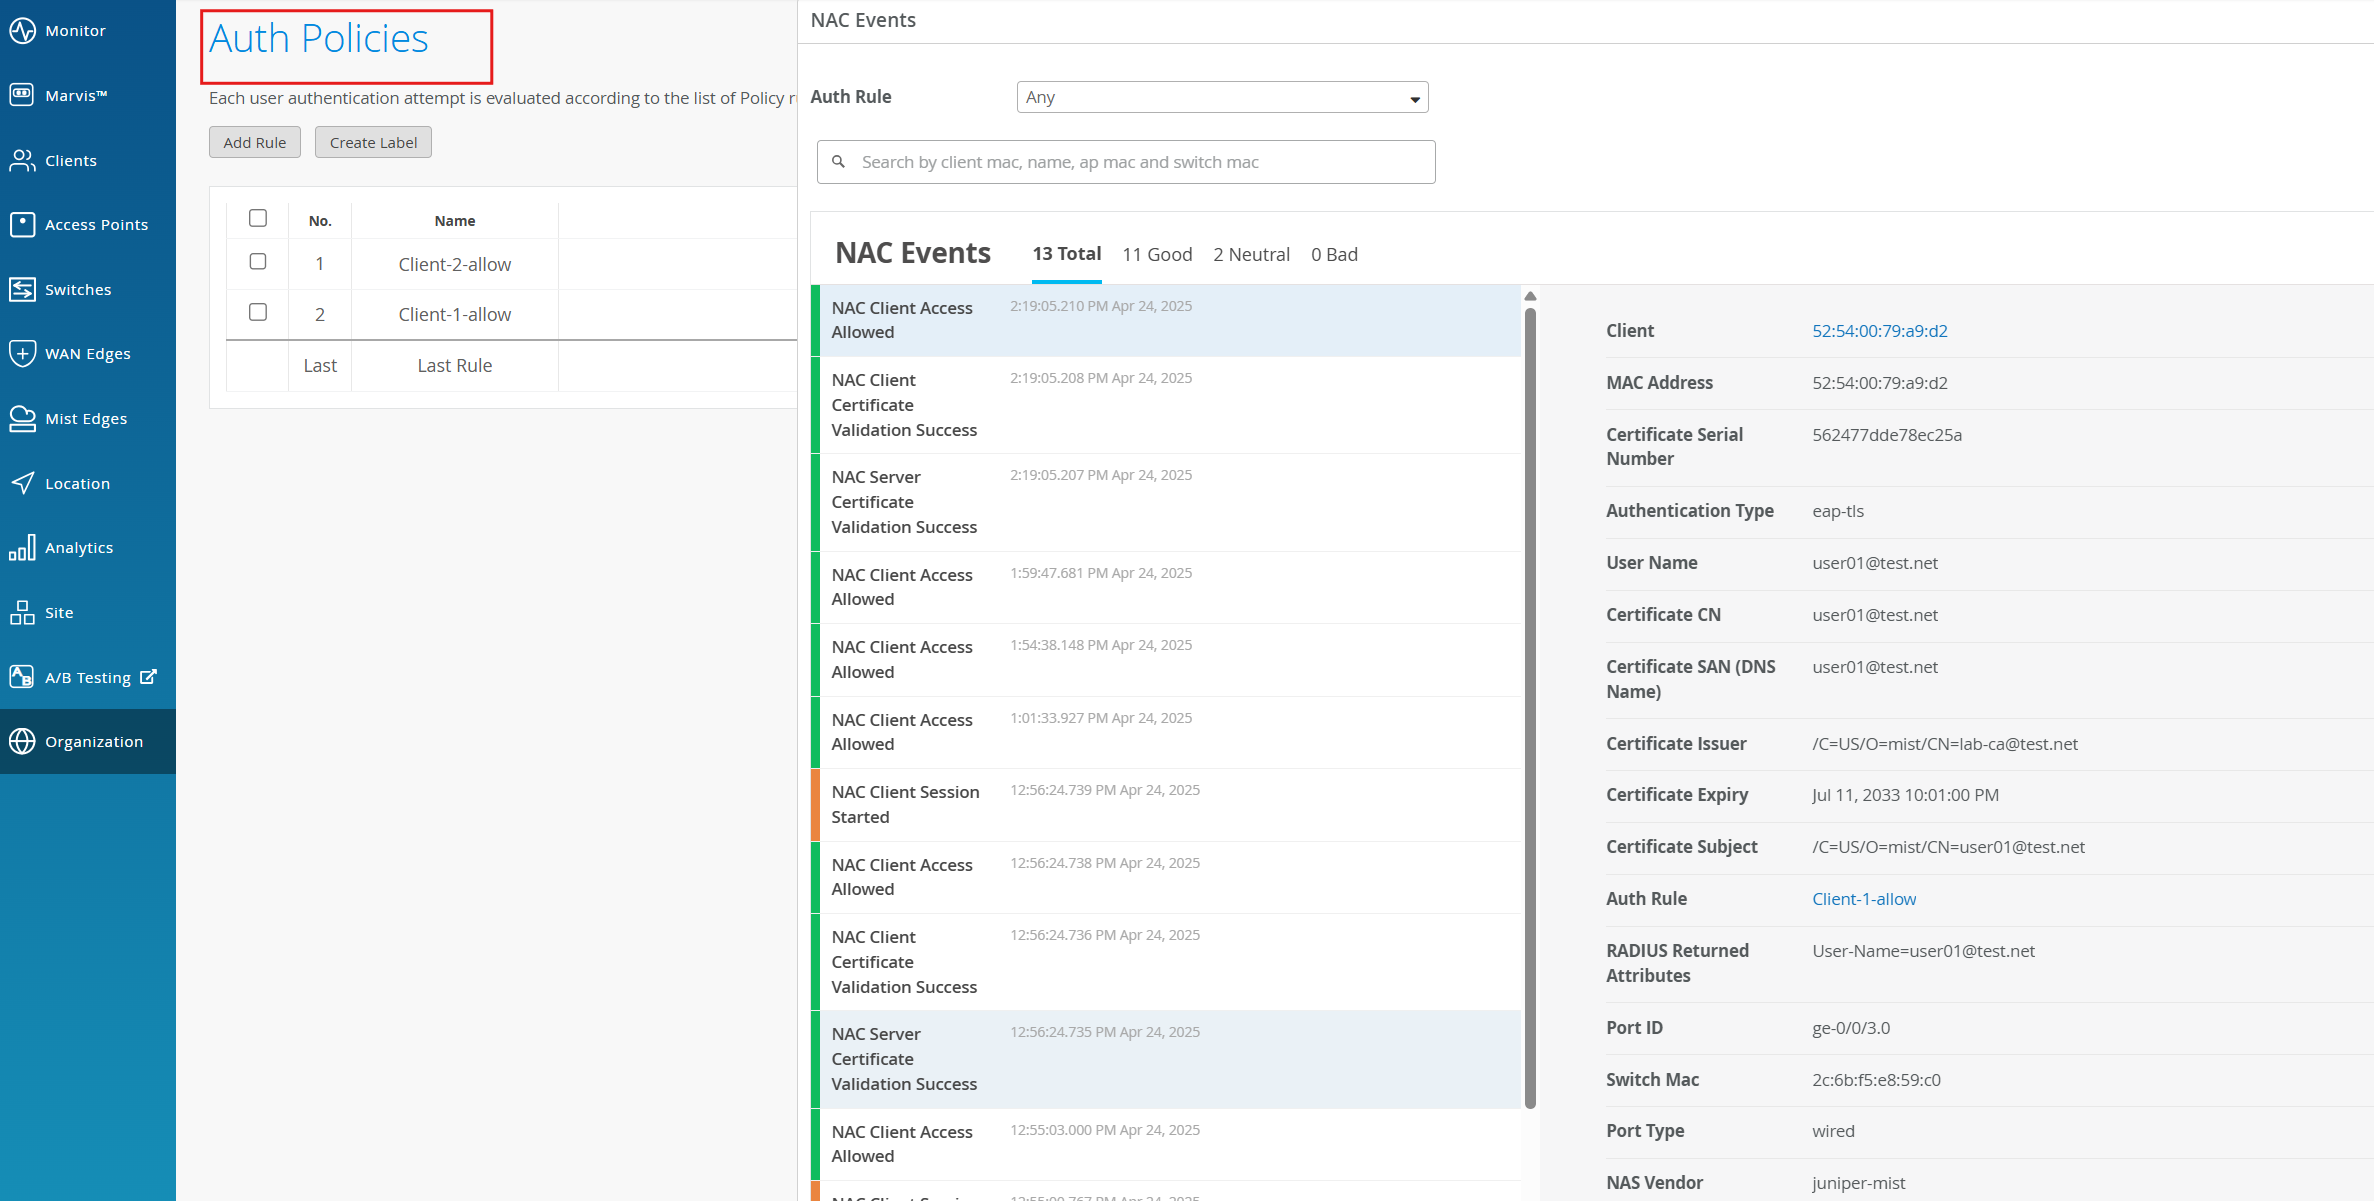
Navigate to Organization > Access > Auth Policies
Click Add Rule:
Name - Client-1-allow
Match Criteria - Client-1 , EAP-TLS, wired
Policy - Allow
Click Add Rule* to add the second rule:
Name - Client-2-allow
Match Criteria - Client-2 , MAB, wired
Policy - Allow
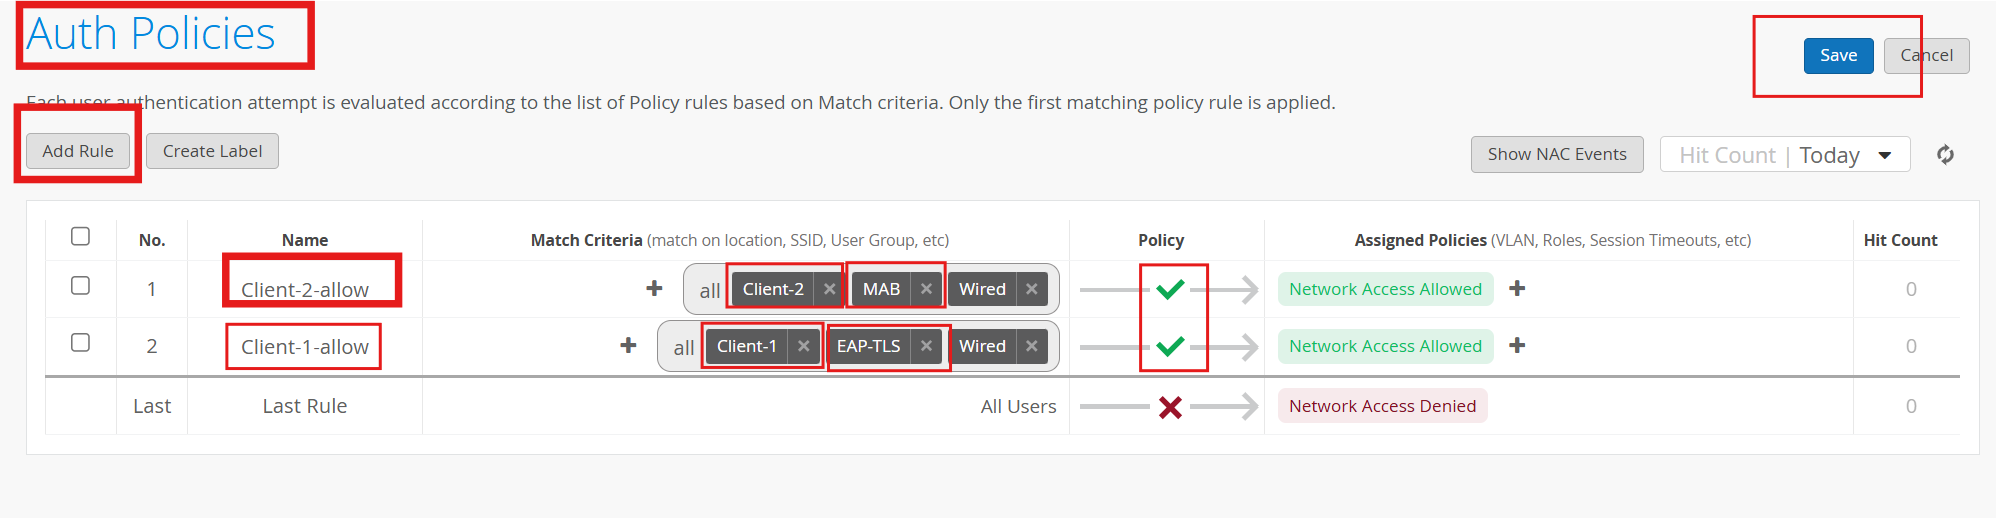
Click Save
Remote Shell to Access-1, and check the dot1x status:
show dot1x interface

Start a ping from Client-1
Lets configure the wpa_supplicant config file on Client-1:
vi /etc/wpa_supplicant/wpa_supplicant.conf
ctrl_interface=/var/run/wpa_supplicant
eapol_version=2
ap_scan=0
network={
key_mgmt=IEEE8021X
eap=TLS
identity=\"user01@test.net\"
private_key=\"/home/jcluser/DEMO-CERTIFICATES/lab-client-1.pfx\"
private_key_passwd=\"Juniper!1\"
eapol_flags=0
}
“Escape:wq” to save the file
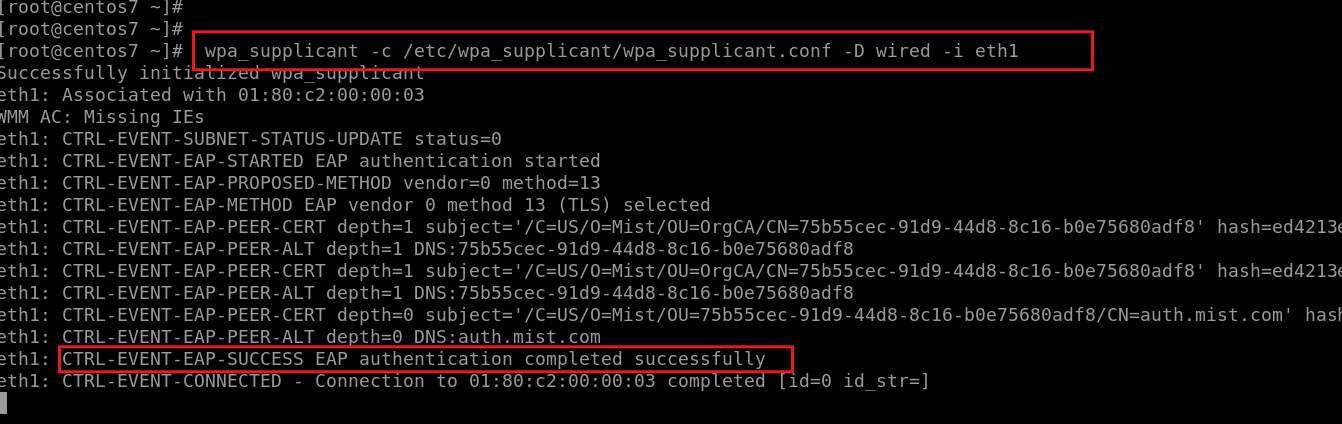
Initiate a requets towards Access-1 via eth1:
wpa_supplicant -c /etc/wpa_supplicant/wpa_supplicant.conf -D wired -i eth1
Output:
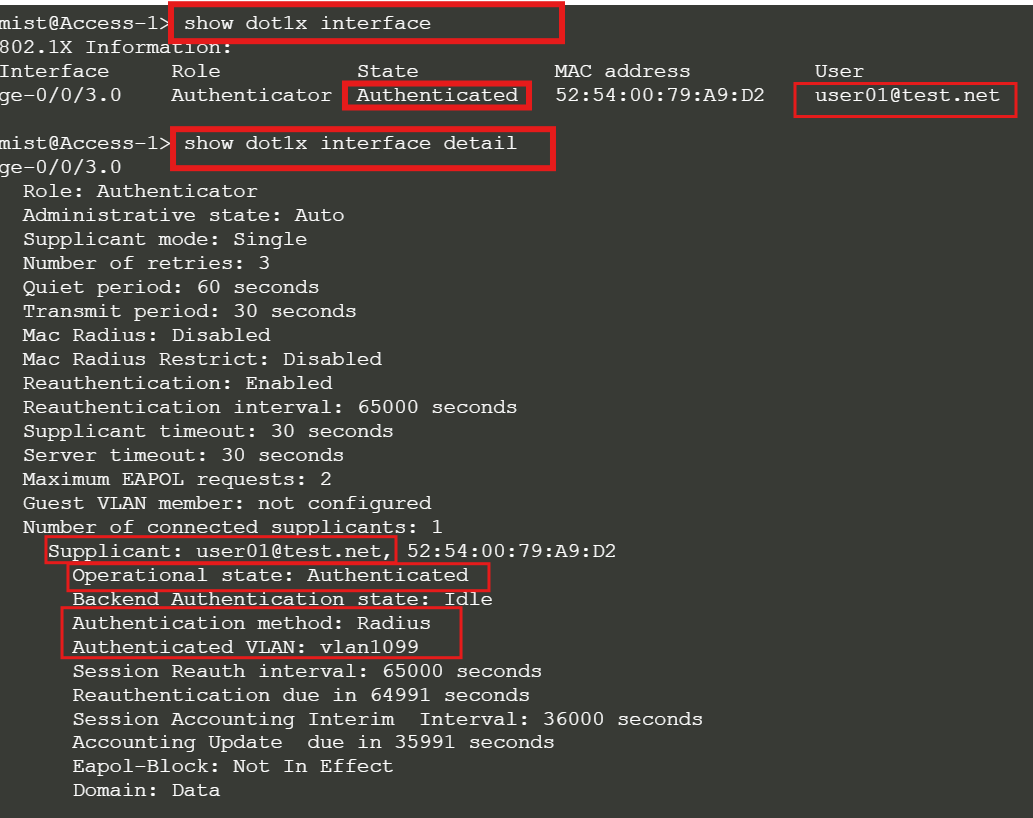
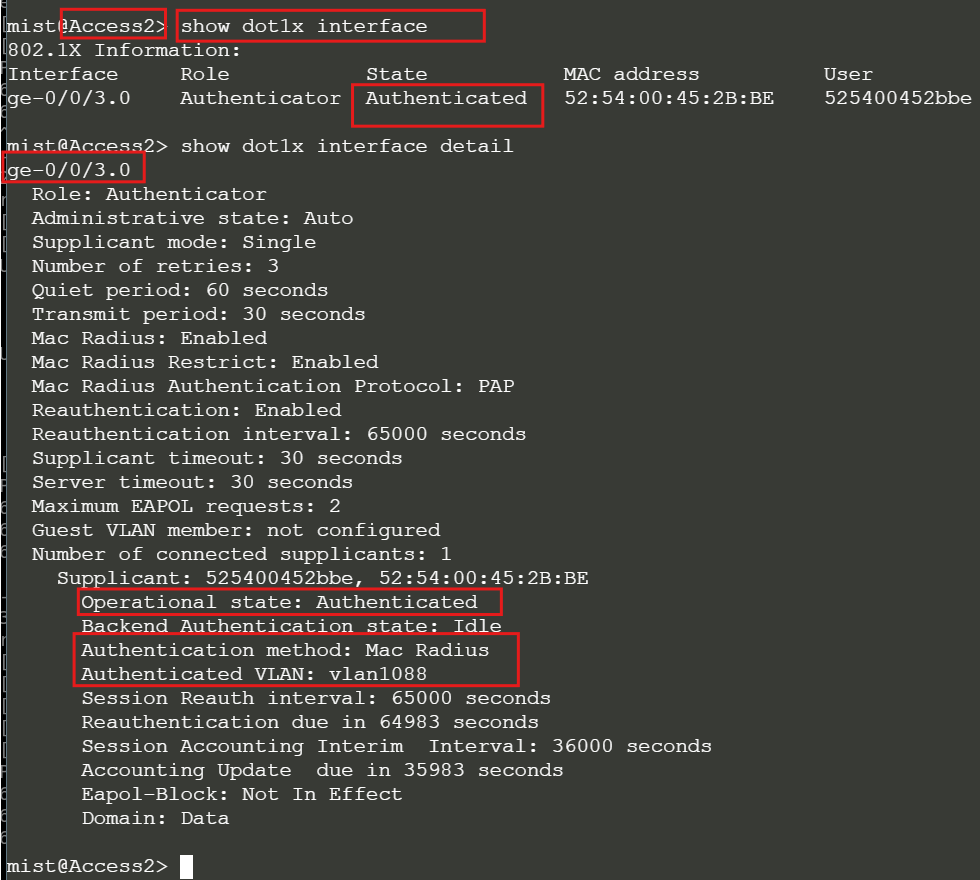
Remote shell to Access-1, Check the dot1x status:
show dot1x interface
Ping from Client-1
Ping from Client-2

Wait a minute and check the dot1x status on Access-2 using remote shell
Check the pings from Client-2
To see all the NAC events, navigate to Auth Policies > Show NAC Events
You have successfully completed this Hands-On Lab!
Lab Survey
Please take 2 minutes and complet the Mist Multihoming Fabric Hands-On Lab Survey