Campus and Branch Fullstack Lab
Lab Summary
The switch and MistAP in this lab are managed, configured and monitored using Mist.
This is an introductory lab, walking you through how to navigate through mist portal for configuring interfaces, hostname, define switch templates, port profile, radius server and authentication methods.
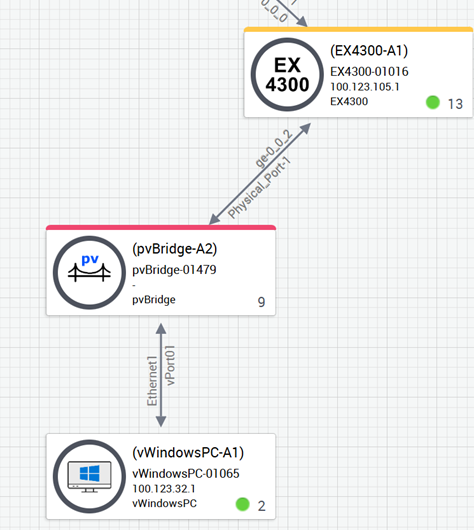
Topology
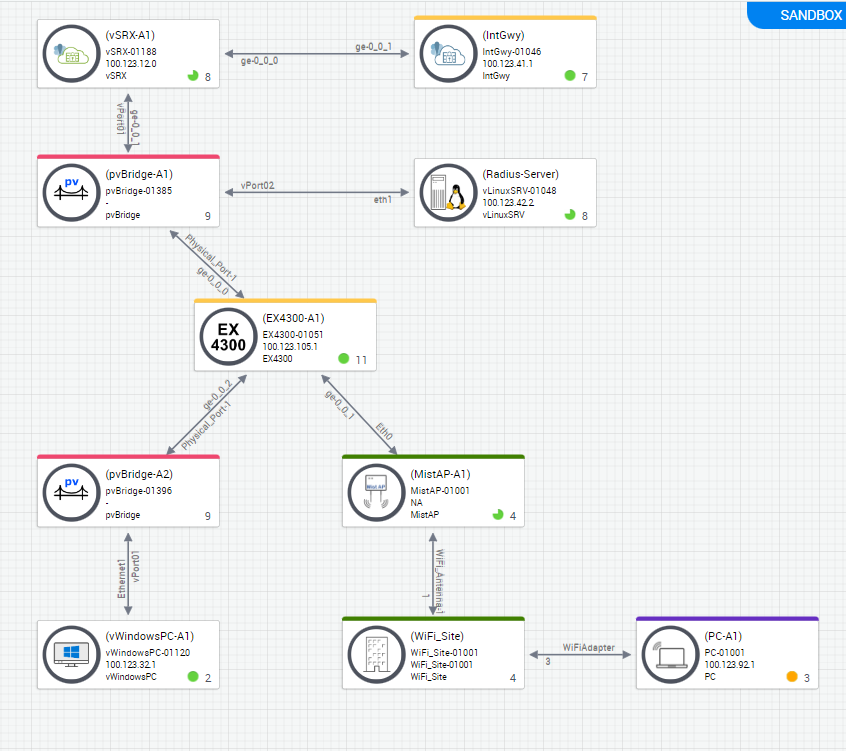
Access Devices
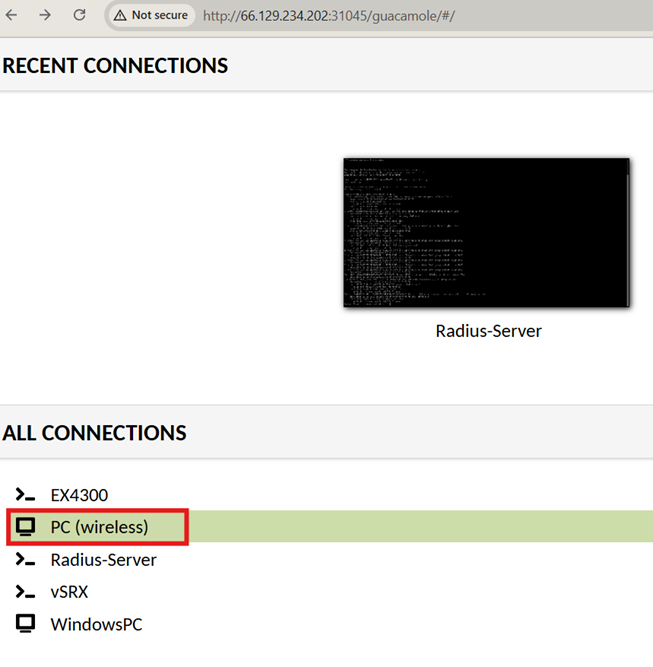
Open a browser and navigate to the URL provided to you
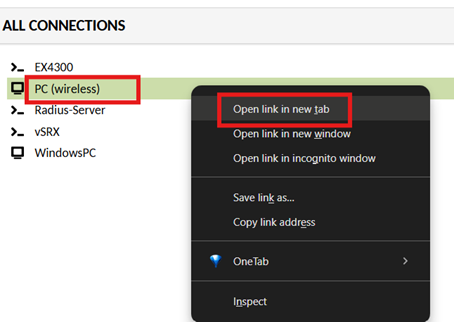
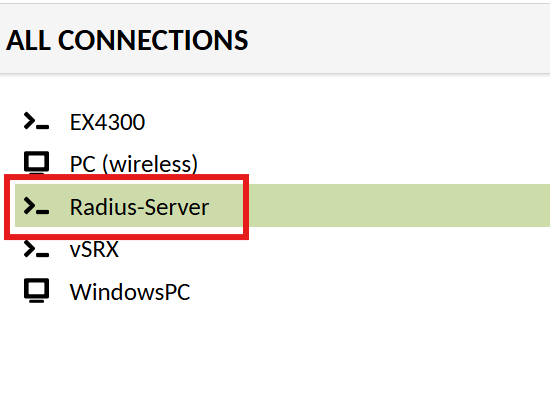
Use the crendentials provided to you for login. Once logged in, you should able to list the device list as below:
Right click on the devices listed and ‘open in a new tab’ to access the resources.
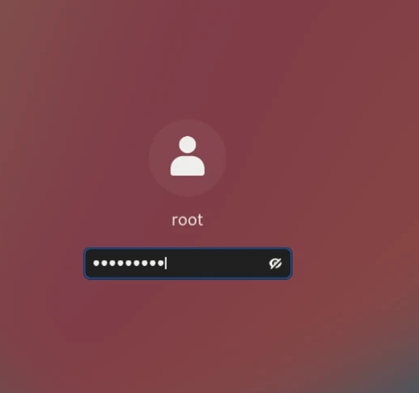
Use Juniper!1 as the password:
Mist Org Access
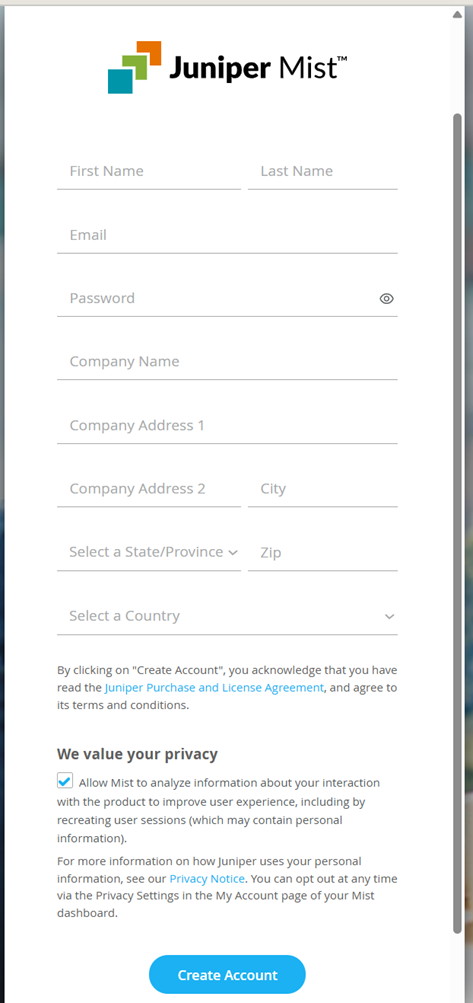
Sign up to create a Mist account.
ULR: https://manage.mist.com/signin.html#!signup/register
Fill in all the details:
Click on ‘Create Account’
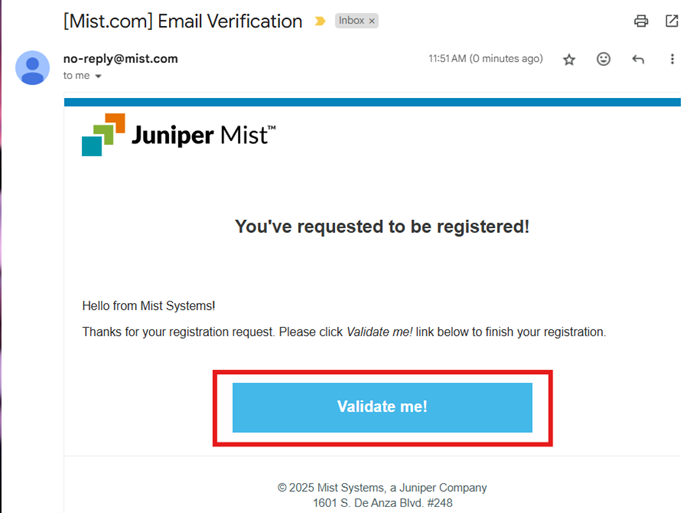
Validate your account
You’ll receive an email invite from no-reply@mist.com to a Mist Org to validate your account:
Sign-in
Sign in to your mist account: https://manage.mist.com/#/
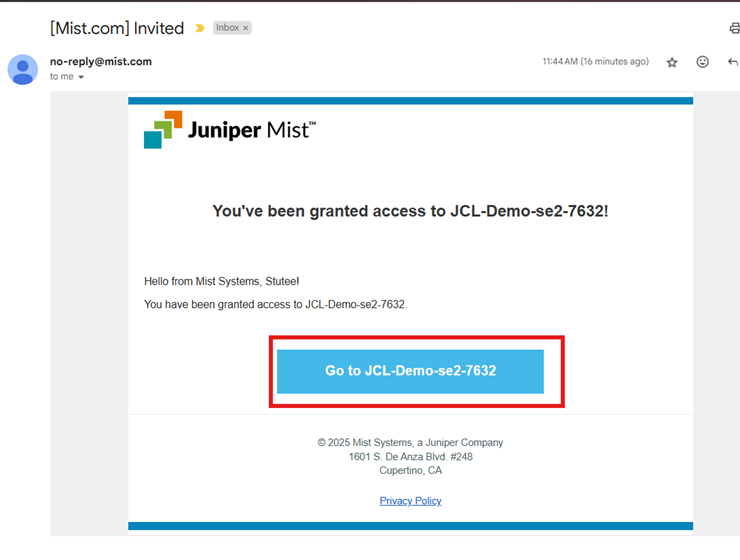
Get access to your Mist Org:
To get access to the mist org assigned to you for this lab, provide the on-site Lab representative with the your email address.
As soon as they add you, you’ll receive another email from no-reply@mist.com
Click on the link on the link
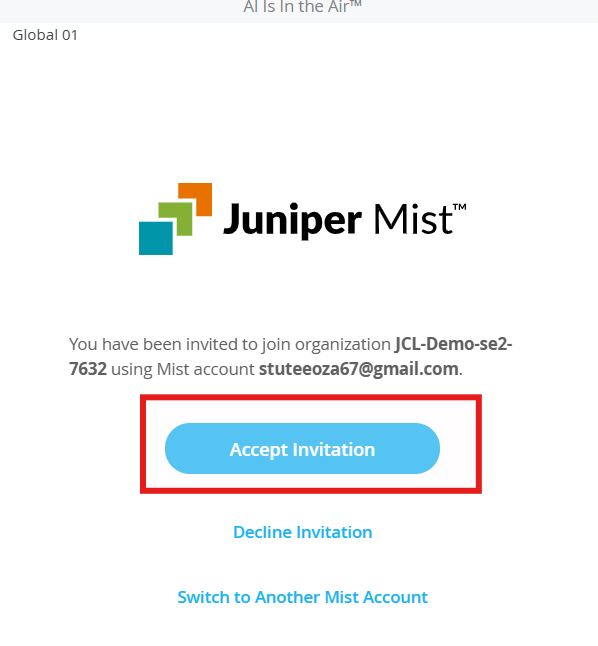
Accept the invitation
You should now be able to access the mist org.
Lab instructions:
Initial Configuration on Switch
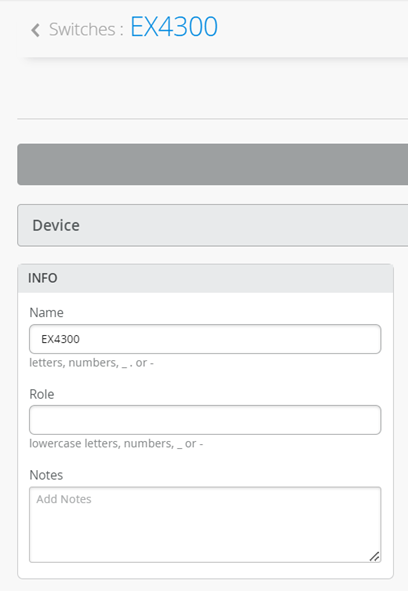
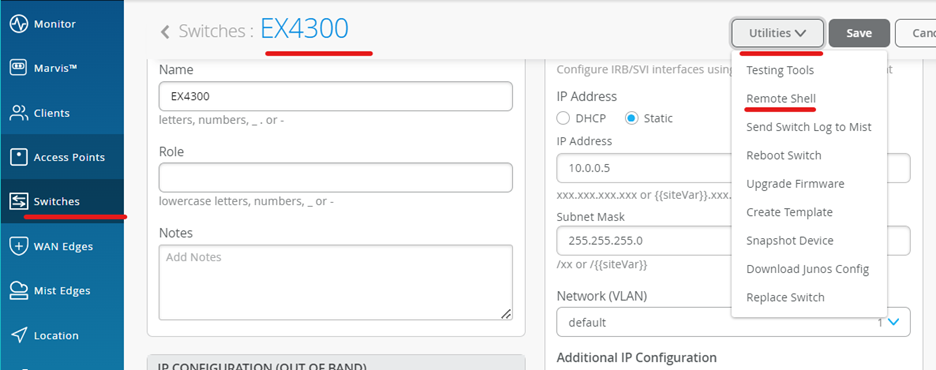
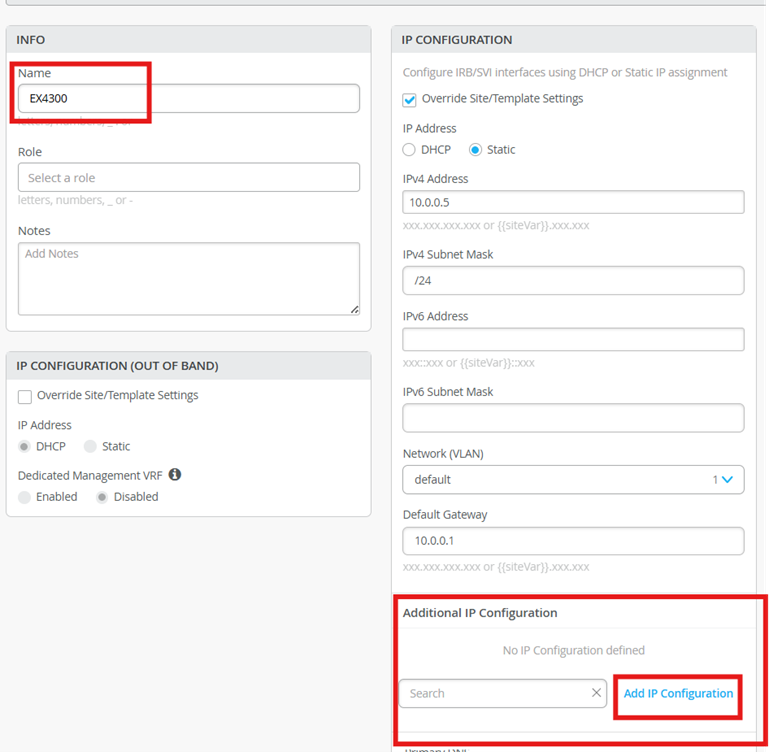
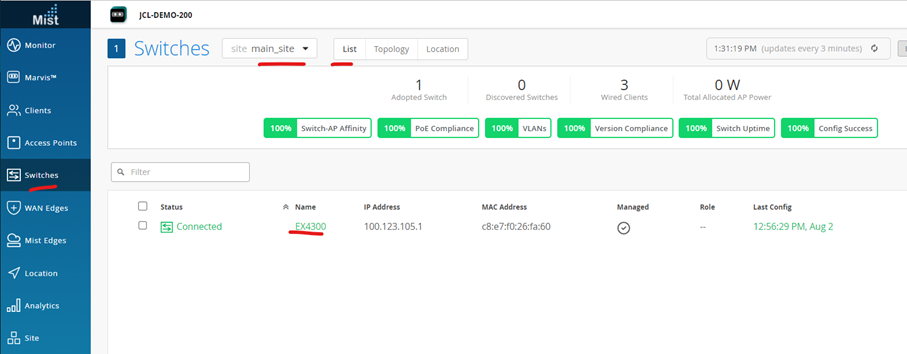
On Mist portal, navigate to the Switch section and select the onboarded switch.
Give it a name: EX4300
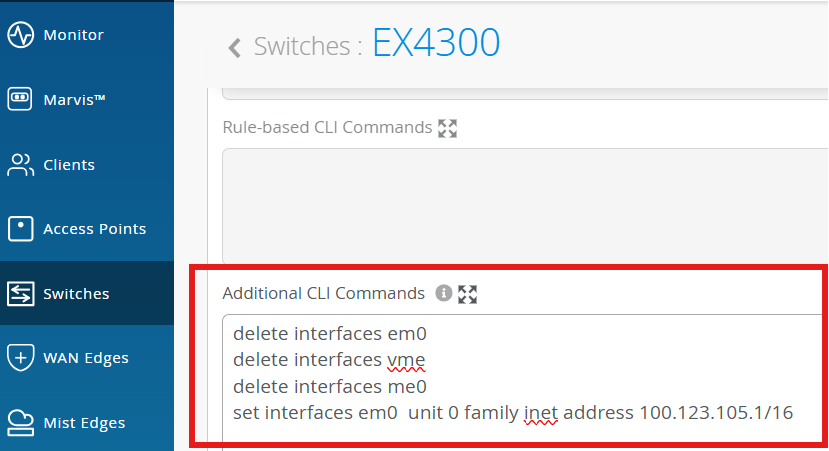
Add management IP config in Additional CLI:
delete interfaces em0
delete interfaces vme
delete interfaces me0
set interfaces me0 unit 0 family inet address 100.123.105.1/16
Manage the Switch via Mist:
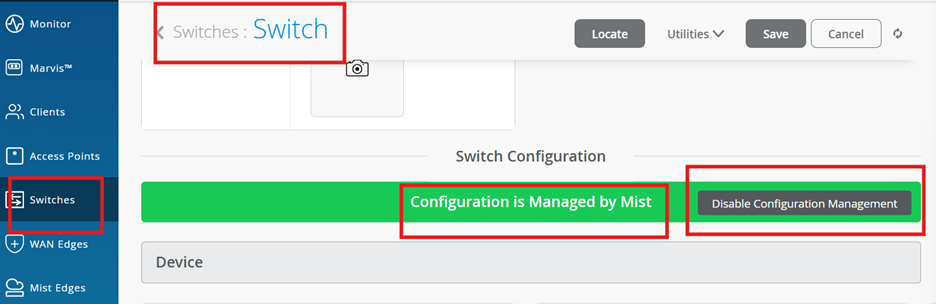
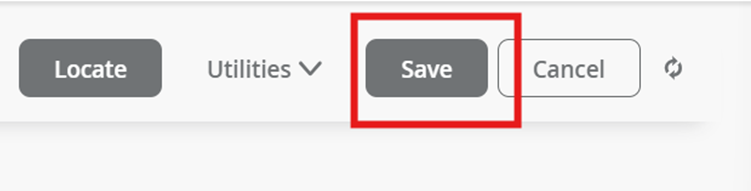
Save the changes and wait for it to push the config to the device.
Create and configure a switch template for the site
A switch template makes scaling easier.
On Mist:
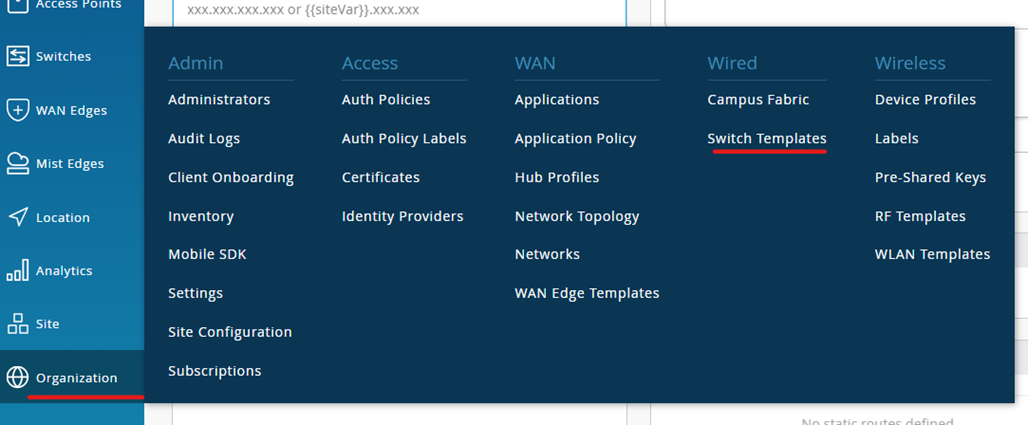
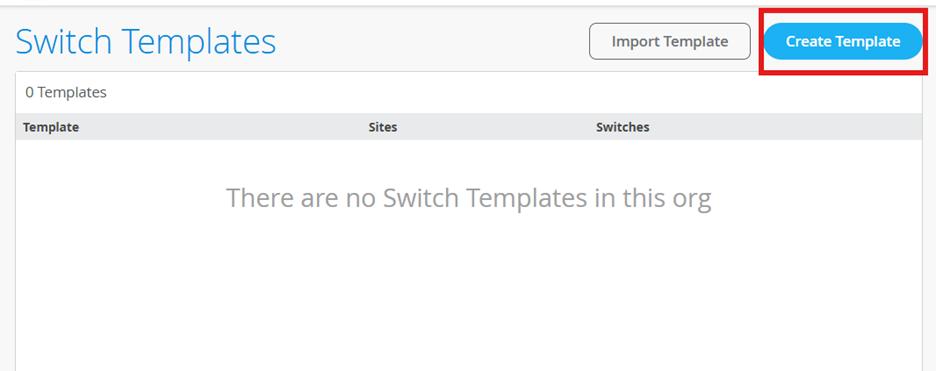
Create Switch template
Navigate to Organization 🡪 Switch templates
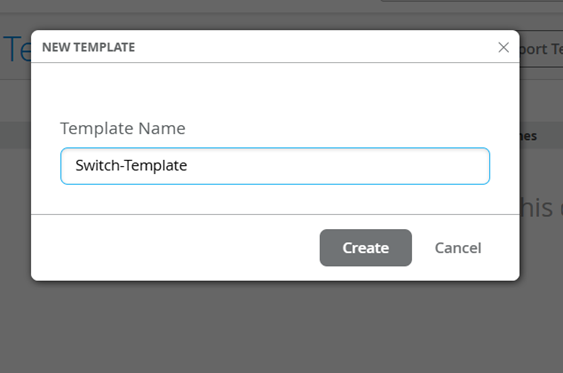
Click on the create option and give a name to it.
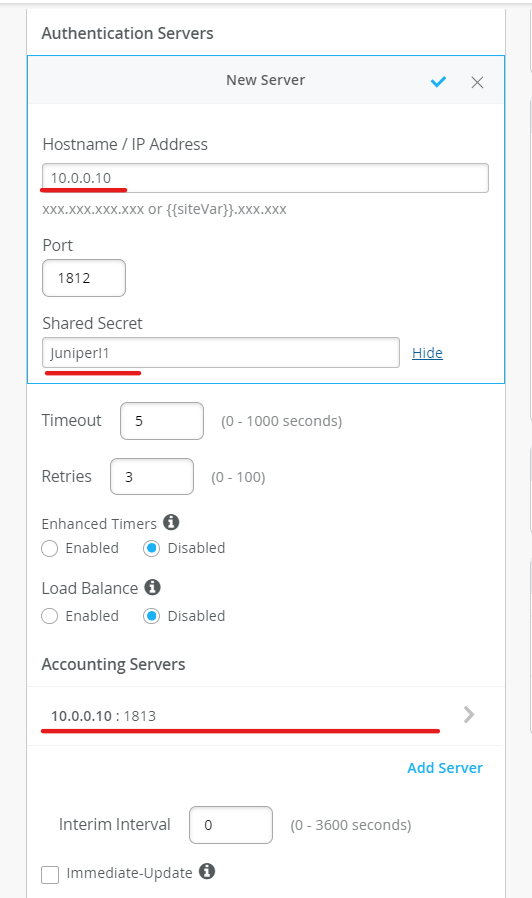
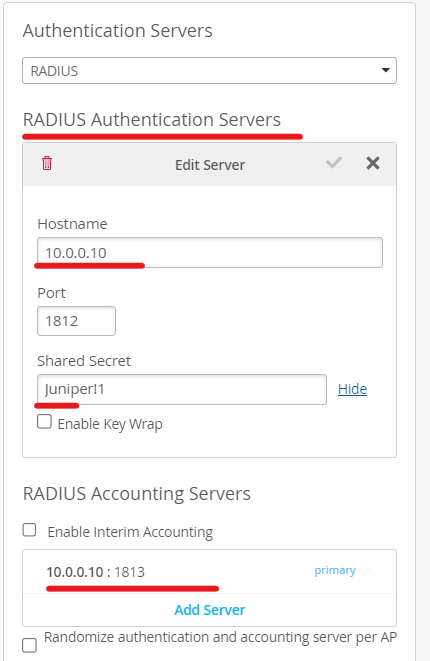
Configure Radius Server
10.0.0.10 is an external radius server in the lab.
Use password: Juniper!1
Configure VLANs
VLAN 1 is defined by default. We are defining another vlan with name lan and vlan-id as 2.

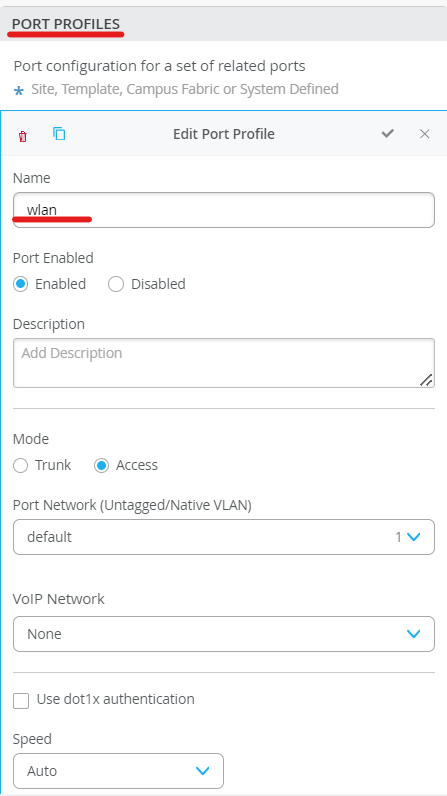
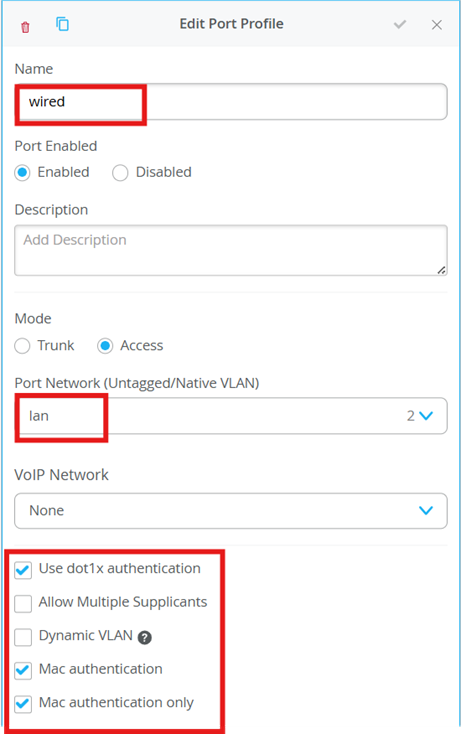
Configure Port Profiles
We define port profiles for wired and wireless networks so we can assign them to the interfaces based on our topology connecting to AP and a wired client.
Assign the switch template to the site.
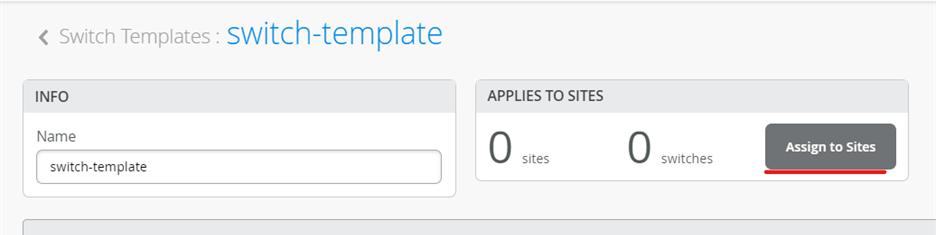
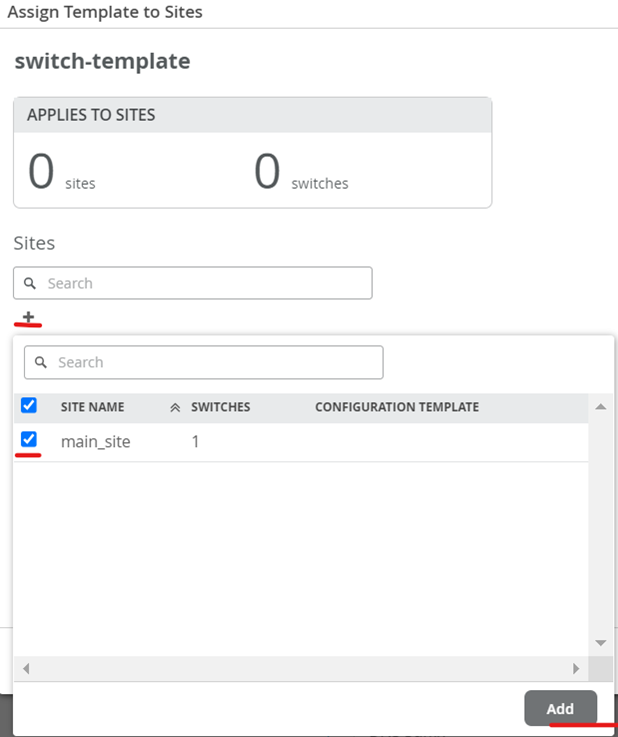
Save the changes.
Configure the Switch
On Mist:
Assign a new Static IP to the switch.
The switch does get an IP lease on irb.0 interface from the DHCP server .
We will see how we can add a static IP to the switch.
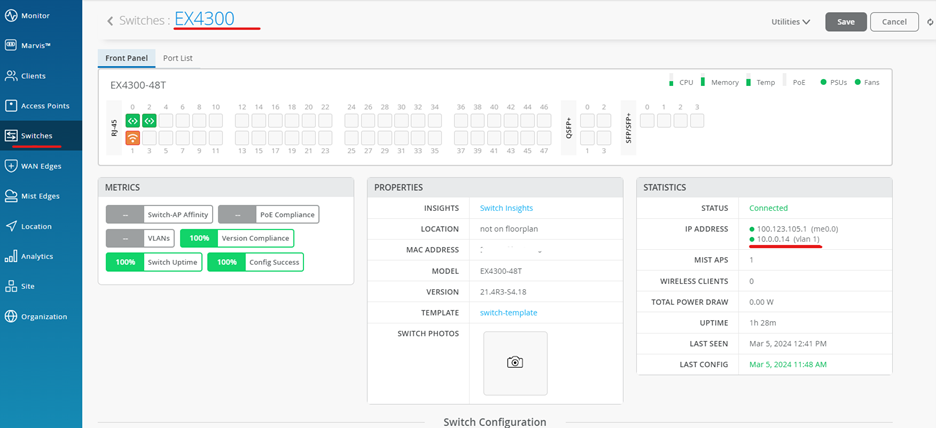
Navigate to Switch 🡪 EX4300
You can see the DHCP lease IP as below:
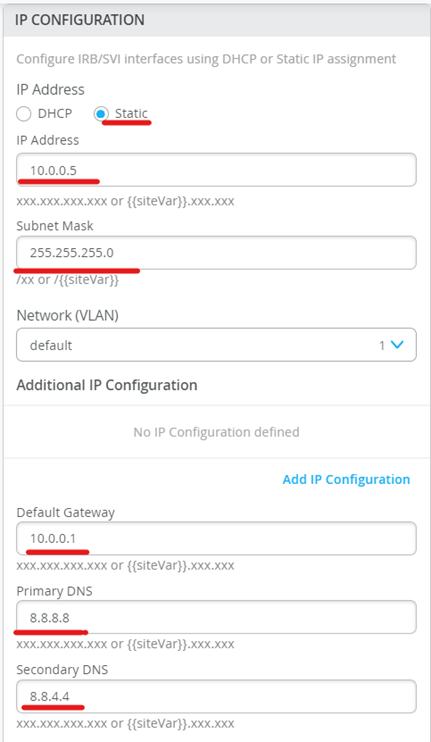
Add static IP as below:
IP: 10.0.0.5
Subnet: /16
Default Gateway: 10.0.0.1
Primary DNS: 8.8.8.8
Secondary DNS: 8.8.4.4
Save the changes and wait for it to reflect on the switch.
Verify the changes
Use the remote shell option to SSH into the switch.
The changes expected in the switch after the last push should be as below:
Configure Interfaces on Switch
We configure ge-0/0/1 with vlan-1( default) port profile – lan. This interface is connected to AP
We configure ge-0/0/2 with vlan-2 port profile – lan. This interface is connected to a wired client (windowsPC)
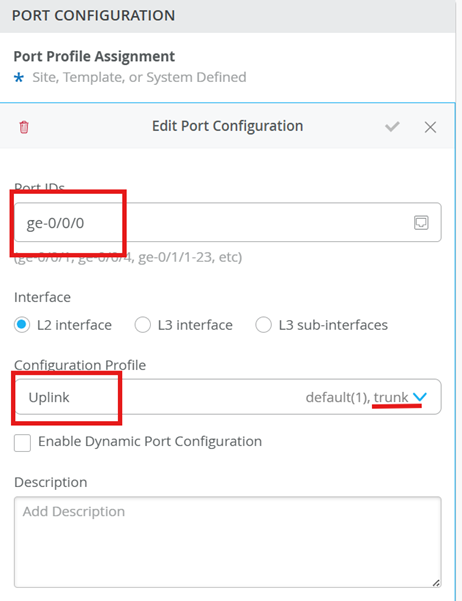
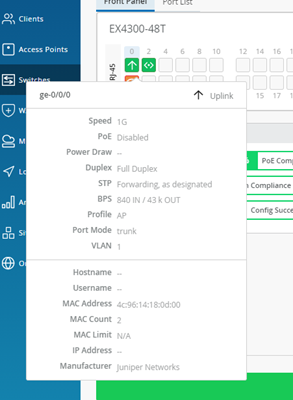
ge0/0/0 is a trunk port connecting to WAN.
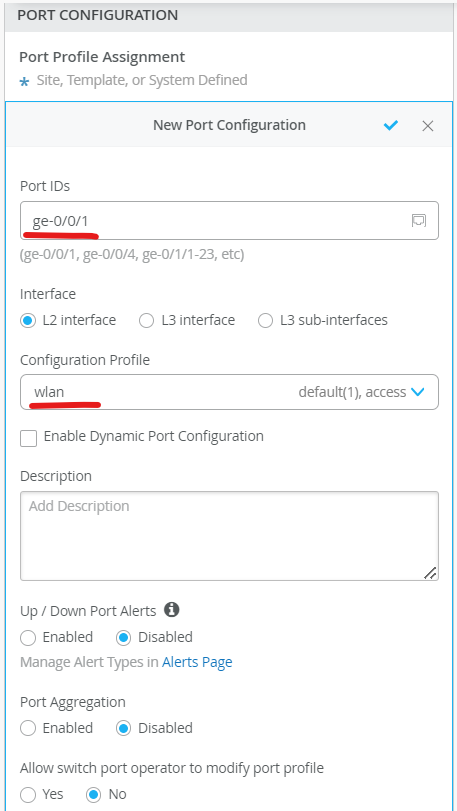
ge-0/0/1 is an access port, connected to the AP in default vlan

ge-0/0/2 is also an access port, connected to the wired client (windows PC)
Let’s configure DHCP server
On the Mist 🡪 Switch, configure DHCP server to hand out lease for devices in vlan-id 2 network.
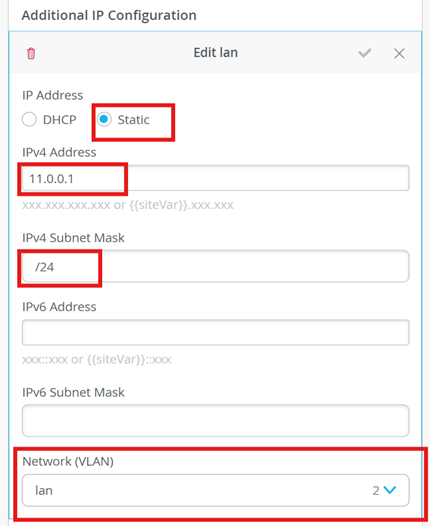
Configure irb.2 with L3 network
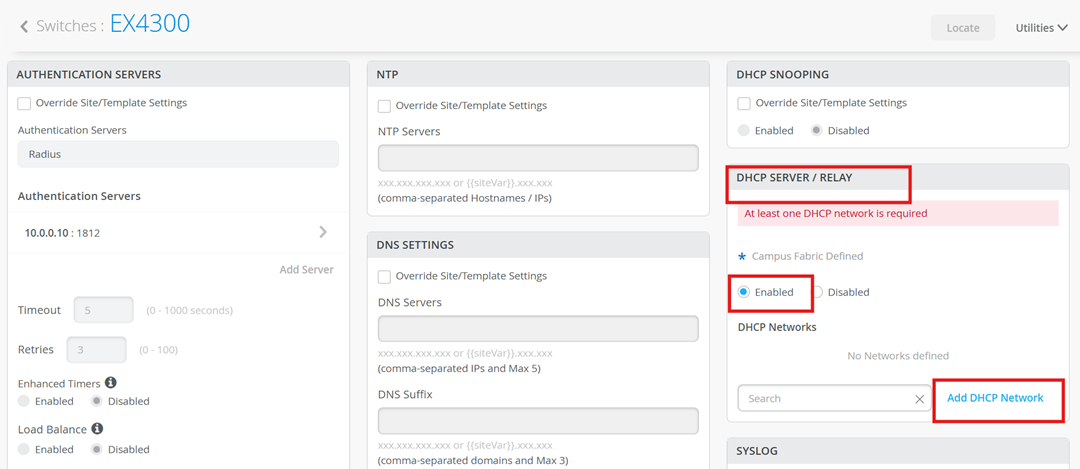
Configure the DHCP server:
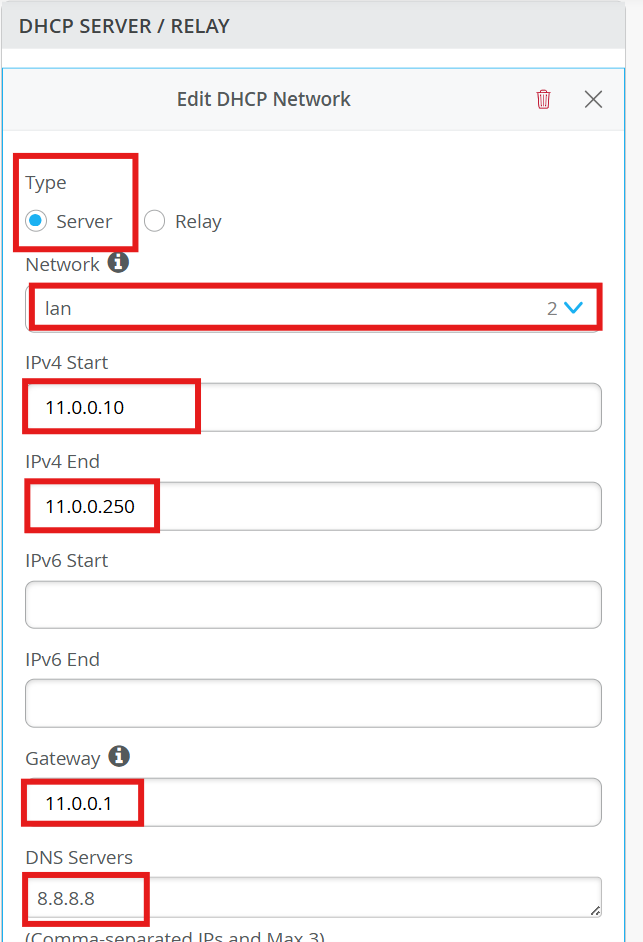

Save the changes.
We have now configured our required network (vlan 2), port profiles(wlan and wan profiles), configured interfaces with port profiles and configured a DHCP server for handing out lease to devices in vlan-2.
Create WLAN on Mist
Navigate to Site -> WLAN
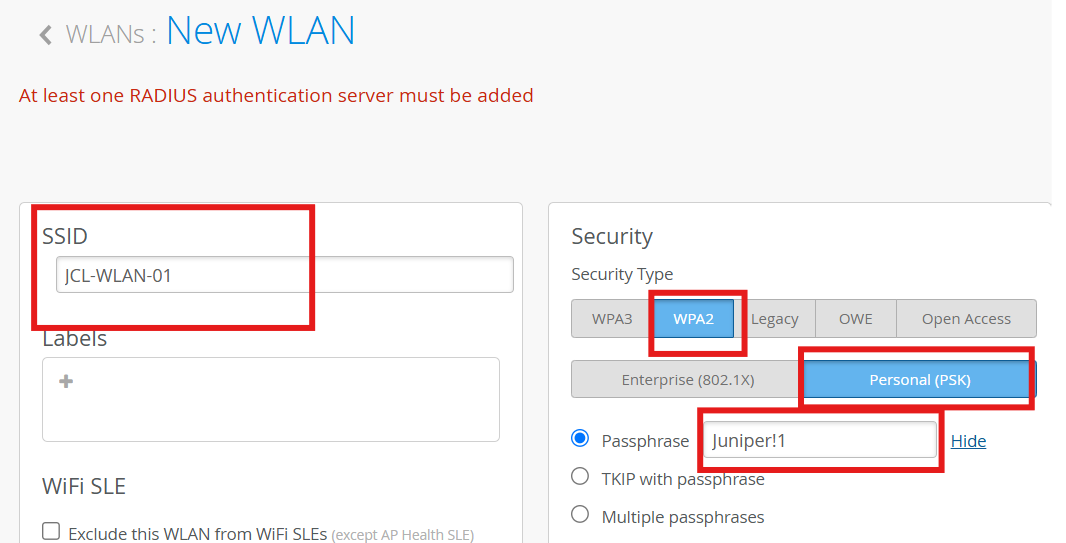
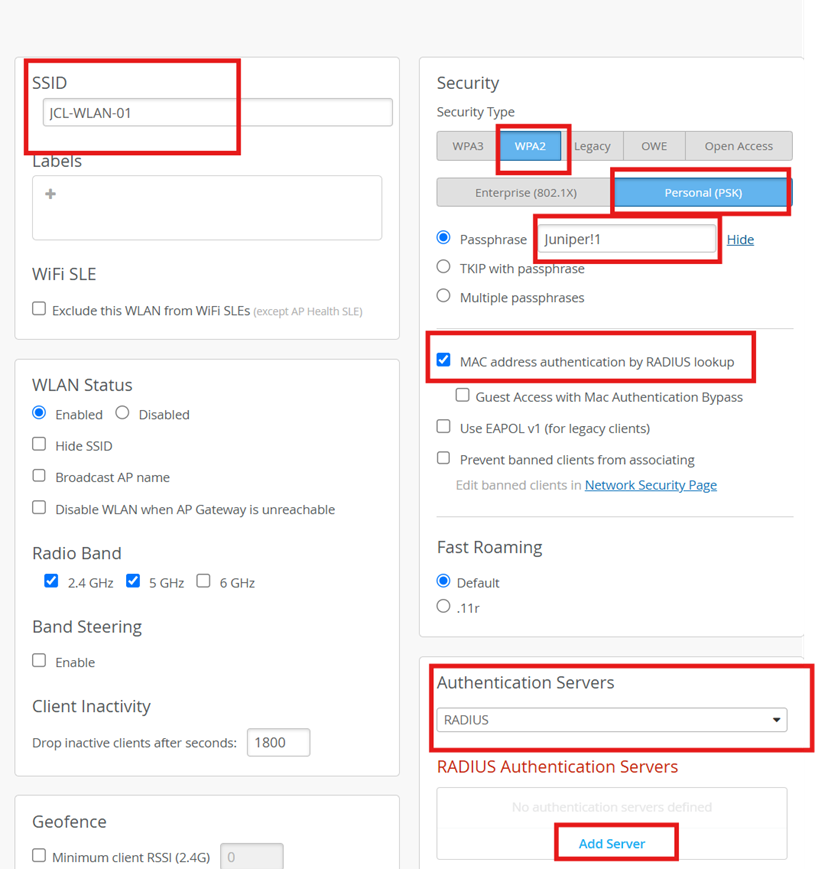
Create WLAN:
Provide a custom SSID : WLAN-xyz
Define the Security type
In the security section, use the PSK option to define the type of pf security and provide a password. We have used “Juniper!1” as the password. It can be any value you prefer.
Click on create to finish setting up the WLAN.
Connect PC to MistAP Wi-Fi
Let’s try to connect to WLAN using the PC in the setup.
The Wi-Fi adapter will list the WLAN SSID that you created.
Access PC
Open in a new window
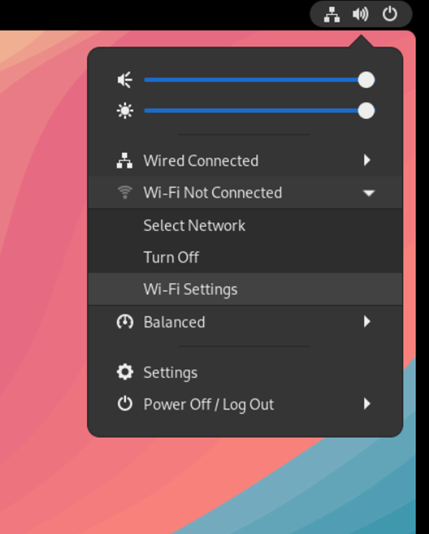
Connect to SSID
Look for the SSID to connect to the Wi-Fi.
Go to Wi-Fi settings and connect to WLAN.
We are using Juniper!1 as password. It was set during the WLAN creation on mist org.
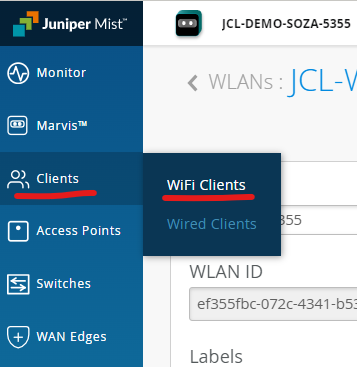
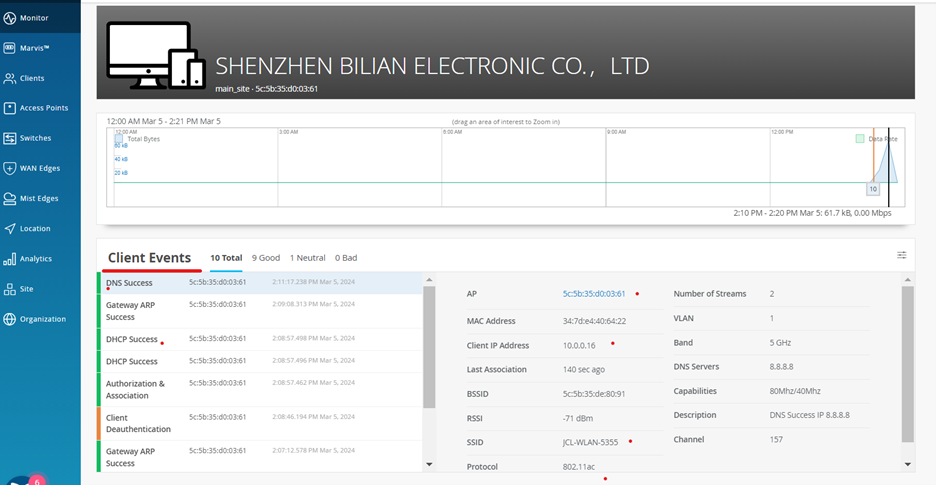
Check Wi-Fi Client Insights
On Mist:
Click on the client-insights to get more information
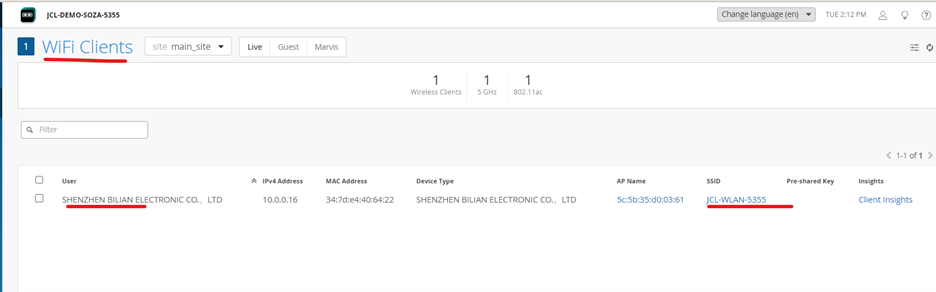
Wired Assurance
Windows PC is our wired client for this section.
We want this WindowsPC to be able to access our network based on mac authentication criteria. So, we configure the file on the radius server.
Configure Radius Server file to allow authentication for WindowsPC
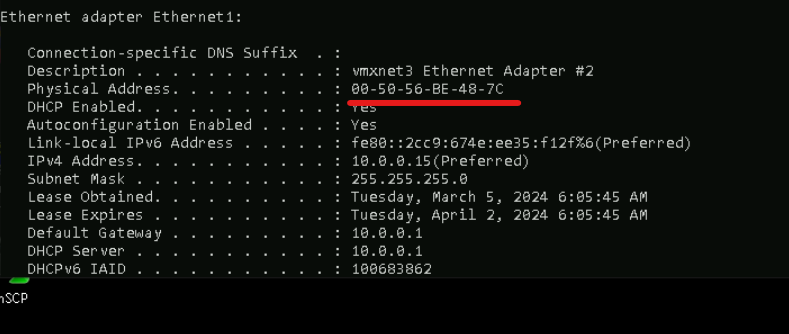
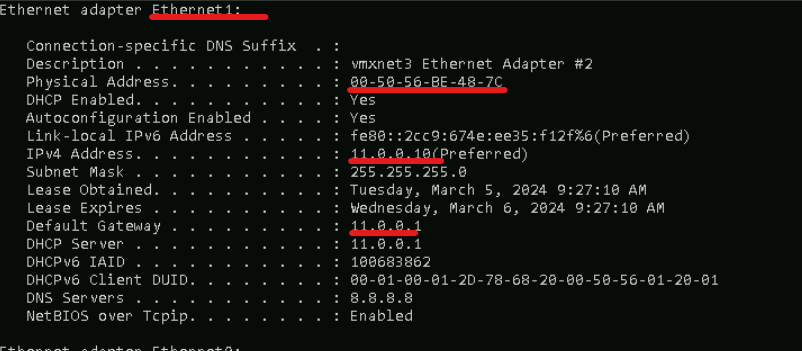
Get mac address of Ethernet1 on Windows-PC
Access WindowPCs and open command prompt.
Copy the mac on Eth1
Use command ipconfig /all. Note the mac on Ethernet1 adapter.
Configure radius server
Access the radius server
Edit the file on radius server
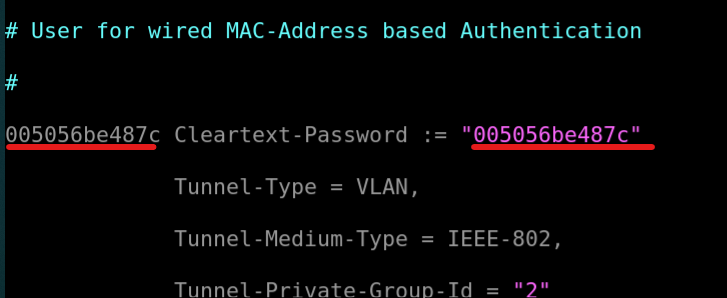
Add the mac in the wired section of the preconfigured file.
jcluser@Template-LinuxJumpStation:~$ sudo -i
[sudo] password for jcluser: Juniper!1
root@Template-LinuxJumpStation:~# vi /root/freeradius/raddb/mods-config/files/authorize
Edit the mac in the file.
Make sure it’s all lower-case. Else the authentication will fail.
Save the file and restart the radius docker container using the commands below.
docker rm -f radius
cd freeradius
docker build -t freeradius/freeradius-server .
docker run –restart=always –name=radius -t -d -p 1812-1813:1812-1813/udp freeradius/freeradius-server -X
Verify:
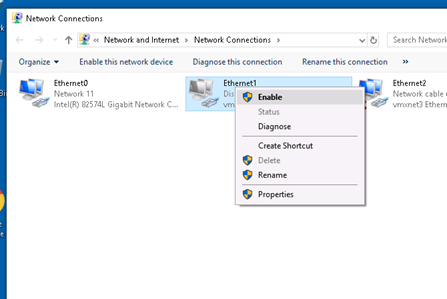
Access WindowsPC and open network connections.
Disable and then enable Ethernet1 interface.
The ethernet1 on windows PC will receive a new IP, once it gets authenticated by the server.

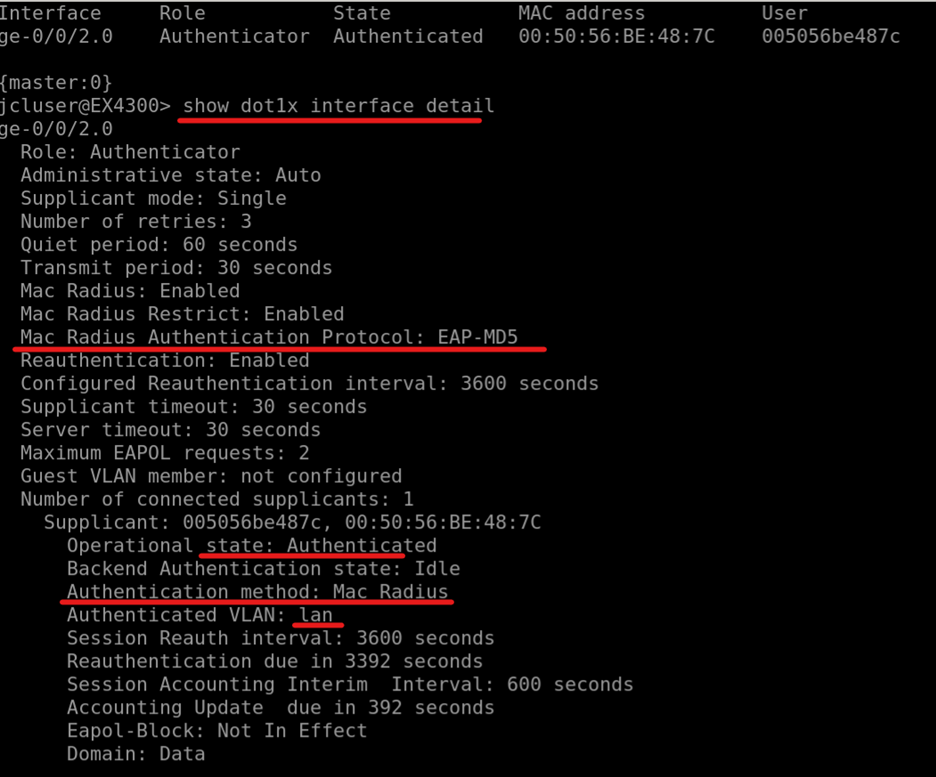
Check the authentication status on the switch.
Use the remote shell option for Switch
mist@EX4300> show dot1x interface detail

On mist, check the wired client insights
Wireless Client Assurance
This use case shows the mac-based authentication for wireless clients.
Modify the existing WLAN configuration to include mac authentication option and the radius server configuration.
First, we configure and then we verify
Configure
On Mist:
Edit WLAN
Navigate to Site 🡪 WLAN 🡪 edit the existing one
Save the configs.
Configure radius server file
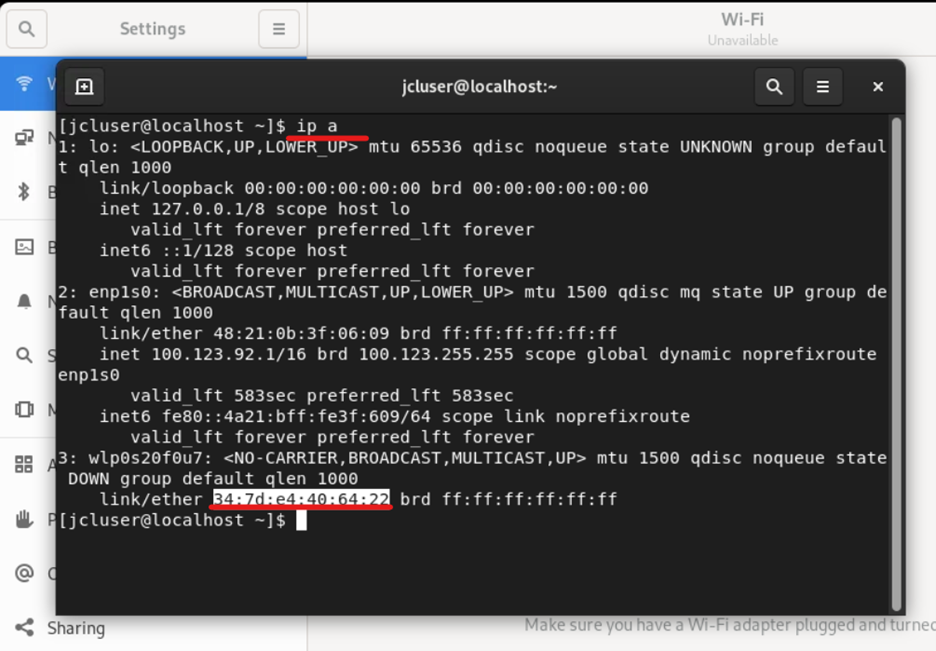
Add PC’s Wi-Fi adapter’s mac address to the radius server.
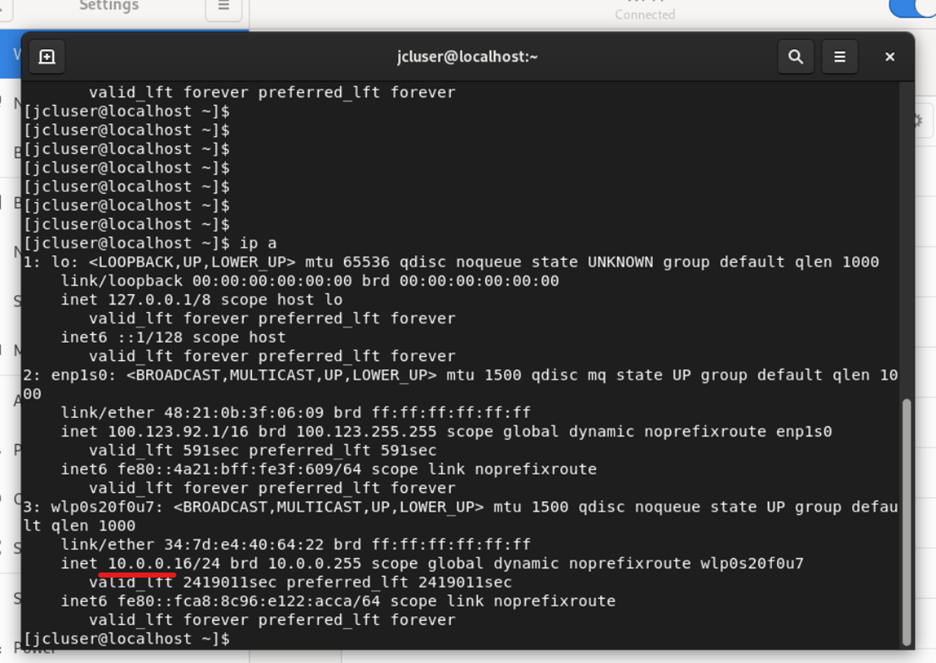
Access PC
Retrieve the mac from the command prompt on PC
Access the radius server
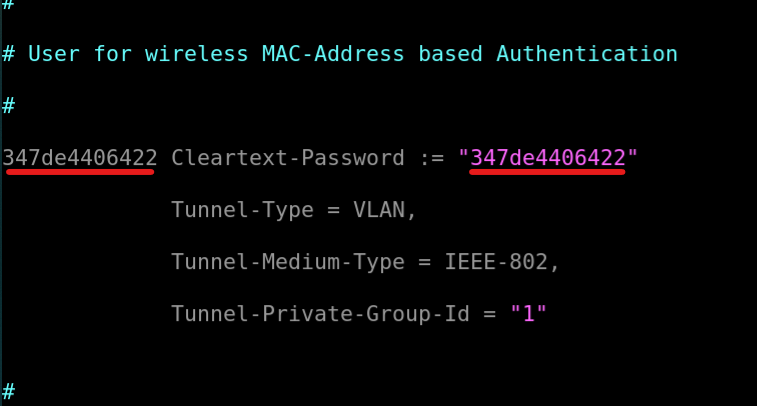
Modify the ‘authorize’ file as shown below.
Add the mac address in the wireless section of the preconfigured file.
labuser@Template-LinuxJumpStation:~$ sudo -i
[sudo] password for labuser: Juniper!1
root@Template-LinuxJumpStation:~# vi /root/freeradius/raddb/mods-config/files/authorize
Save the file and restart the radius docker container using the below commands
docker rm -f radius
cd freeradius
docker build -t freeradius/freeradius-server .
docker run –restart=always –name=radius -t -d -p 1812-1813:1812-1813/udp freeradius/freeradius-server -X
Verify
Connect to the wireless network again on PC.
Once connected, you can check the dhcp leased IP on the Wi-Fi adapter and also check the wireless client insights.
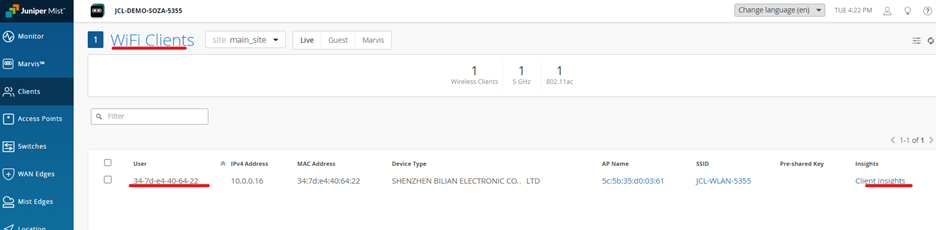
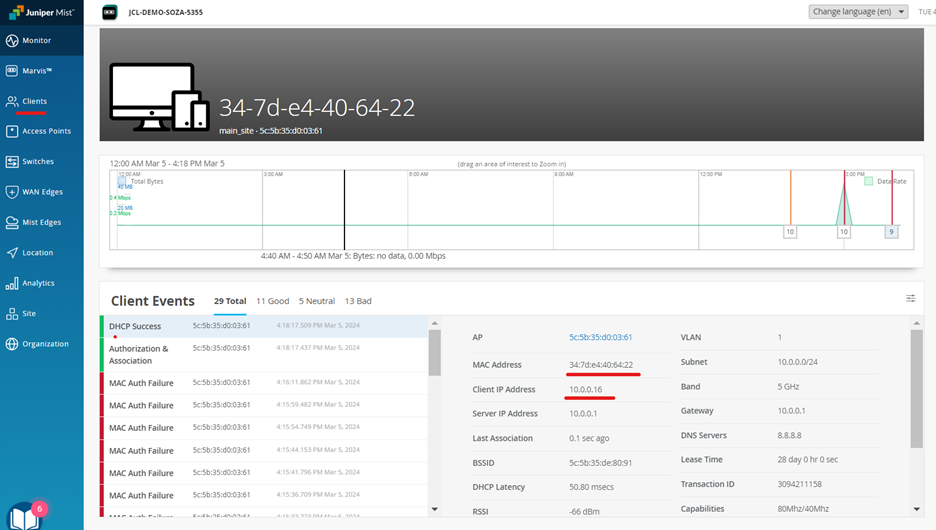
Check Client Insights on Mist
On mist: navigate to Clients 🡪 Wireless Clients 🡪 Client Insights
WAN Assurance
Let’s check junos CLI of the device and check that the autogenerated Certificates are in bound
SSH to vSRX or get access to it via Remote shell
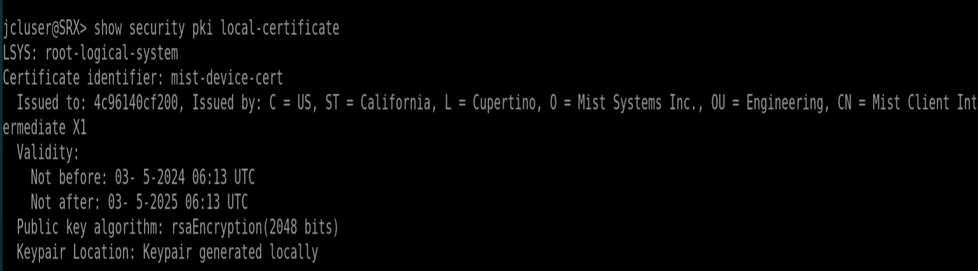
Check pki local certificate information
Access vSRX
mist@SRX> show security pki local-certificate
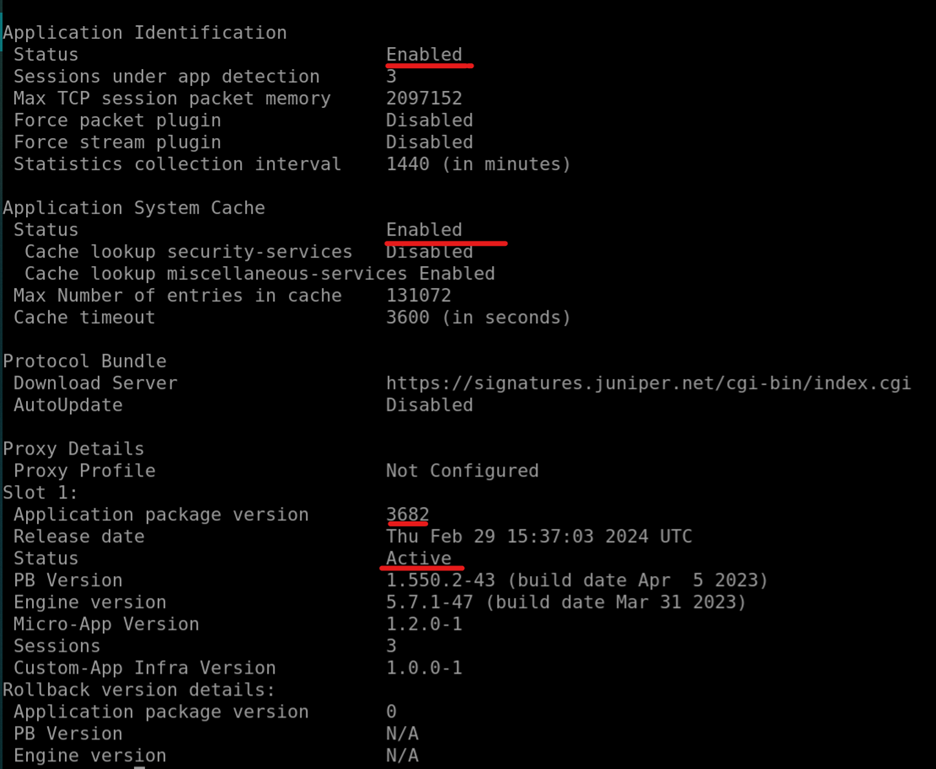
We need to check if Application IDs are loaded, the Tracking is enabled and that there is now a TLS connection via destination-port 6514 to the Mist Portal.
mist@SRX> show services application-identification status
Open another SSH session for vSRX
telnet signatures.juniper.net port 443
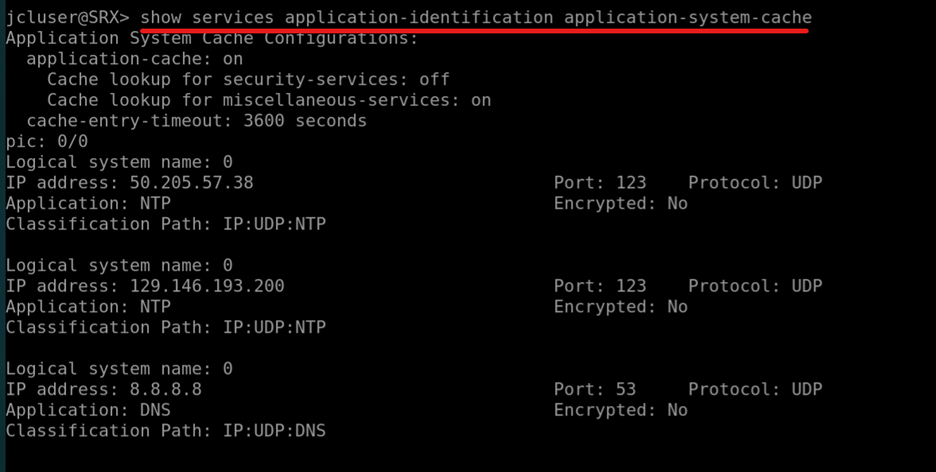
Check if there are already Applications detected
Monitoring, Reporting and Debugging
EX-Switch Port Statistics and Debugging (basic)
This is an overview on how to utilize mist for monitoring.
Here you see the summary on the available items you can see in the overview.
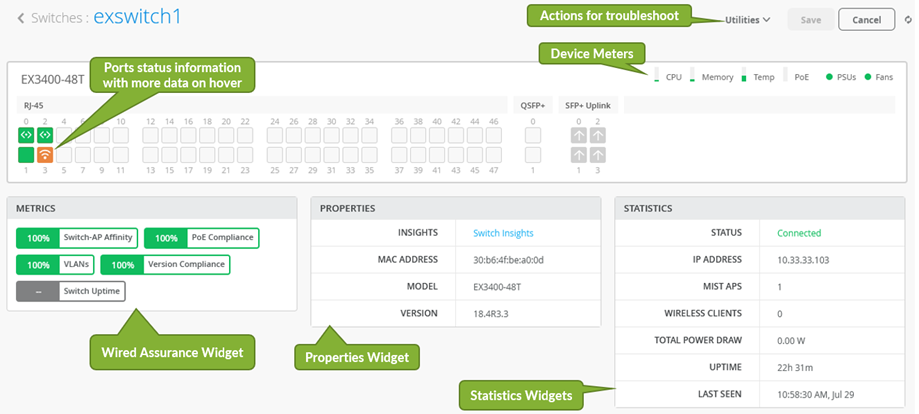
Let’s focus on the Ports status first to find what it provides as information.
Hover with the Mouse over some Ports. In this example you see a wired Port:
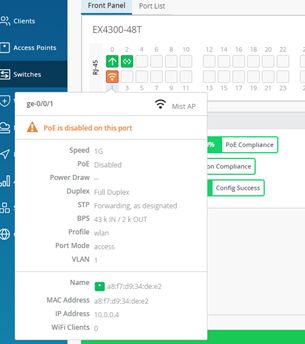
Next is a Port where an AP is connected to (we have no PoE in this Switch).
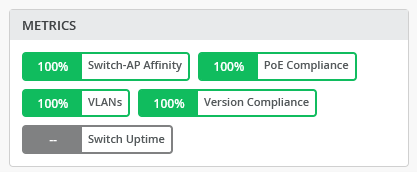
Next is the overview about the measured assurance compliance.
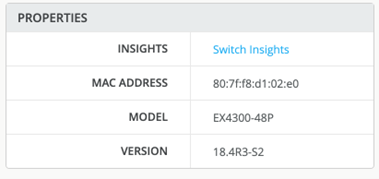
Check the Switch properties like the Junos Version that is on it and the Model.
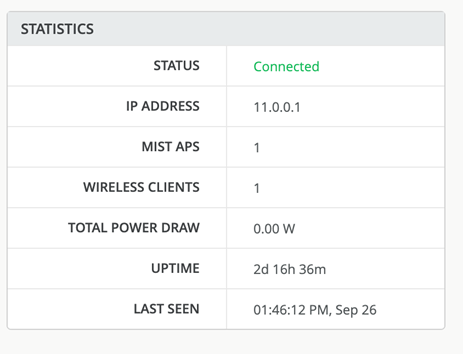
Review the Switch statistics next:
Now check out the testing Tools that are available to you
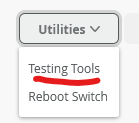
You see a couple of those Testing Tools available to you so let’s try some.
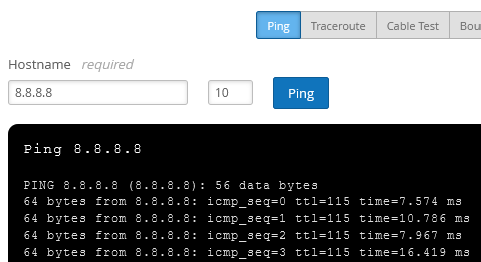
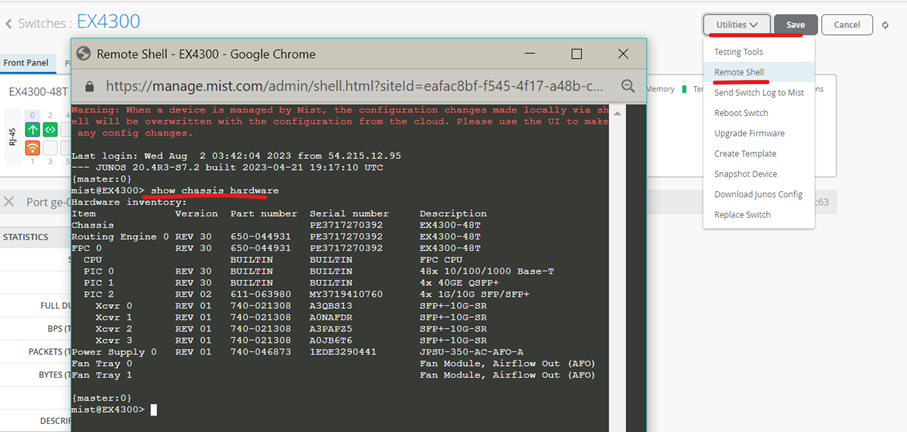
If those Testing Tools do not give you information you are looking for the alternative offered here would be a remote SSH-Shell to the Device and then you can use the local CLI on the Device as you can see in the example below
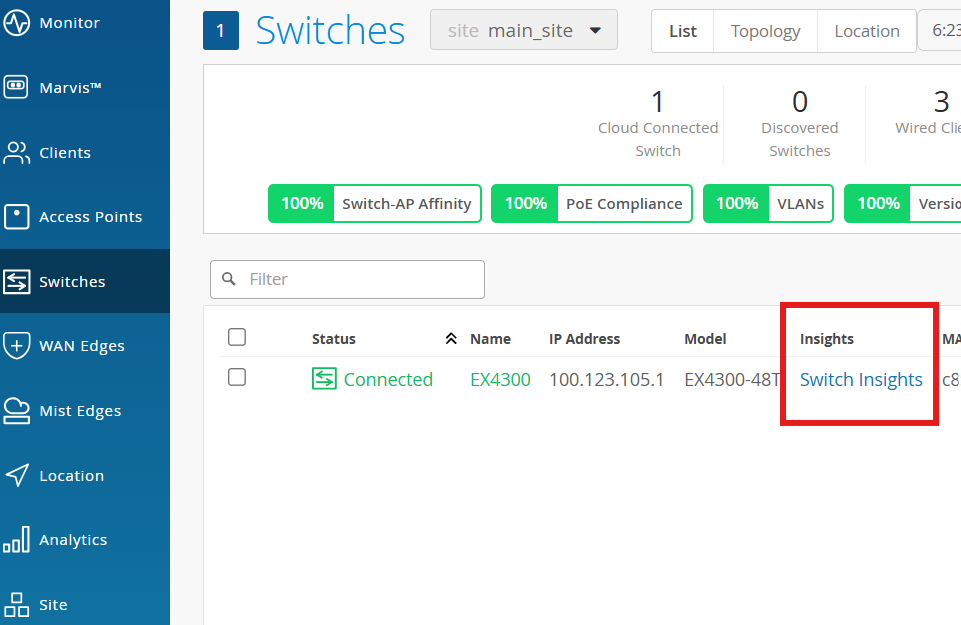
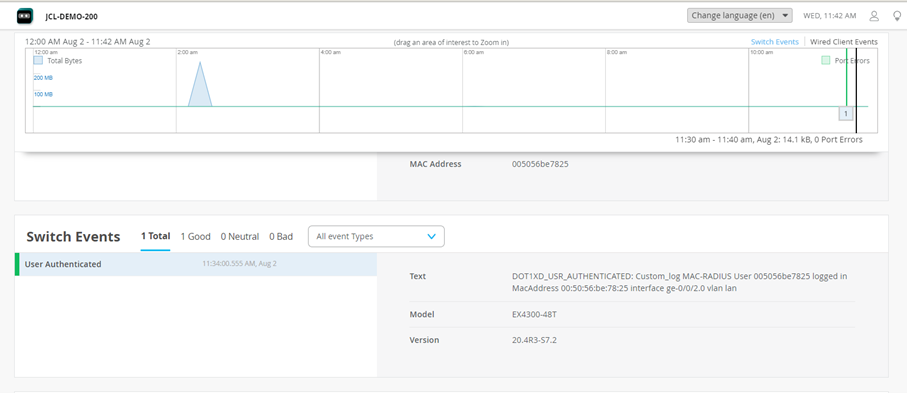
Switch Insights
You can now go and explore Switch Insights via clicking here:
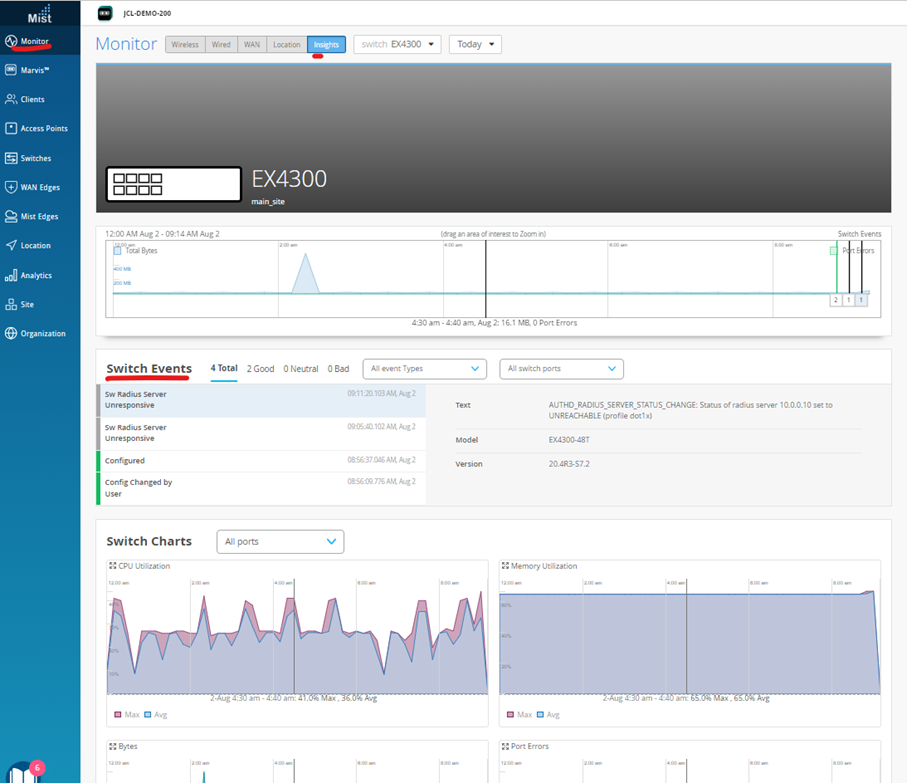
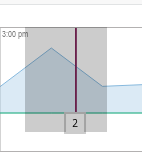
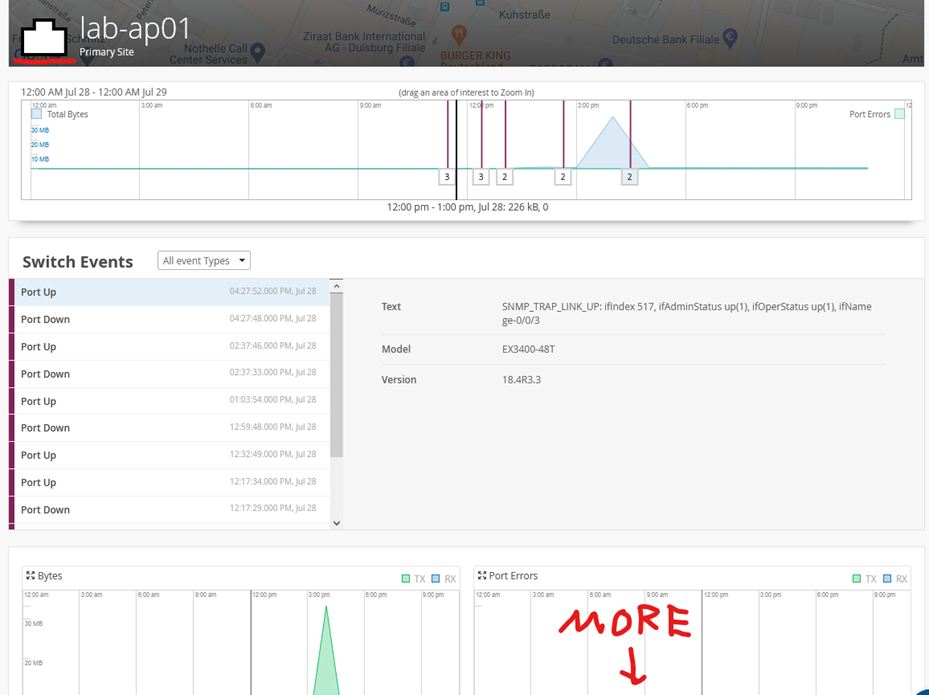
Then you see the Timeline of Switch events and when something has happened.

Using the Mouse, you can mark a Field within to zoom in which will give you more details
(Note: these graphs are added for information purposes only. They may/may not show up during your lab )
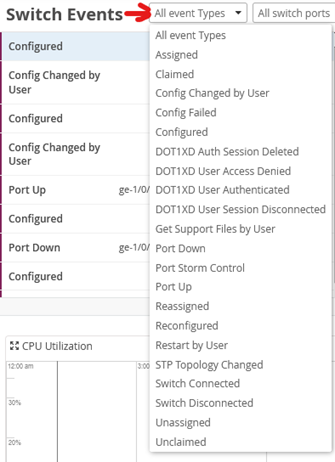
If there are Events in the current selected Event Timeline, they will appear below with more details on what was reported.

Now review all the possible events that the System has configured and will report. You see this is a quite extensive list.
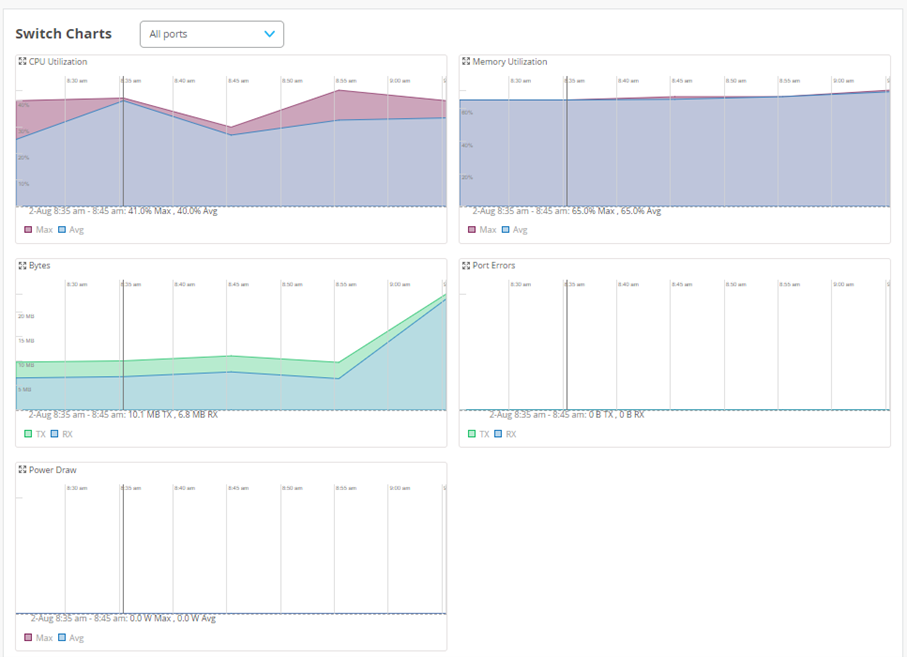
The next Widgets you see in this view contain more details about
CPU Utilization
Memory Usage
Transferred Bytes (TX/RX)
Port Errors
PoE Power Utilization
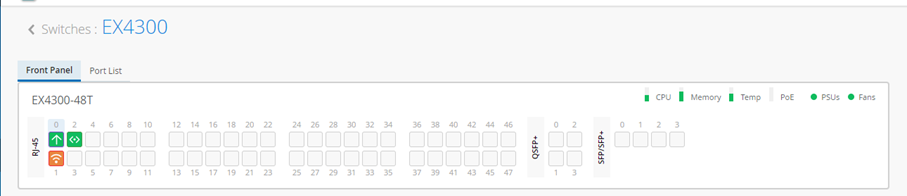
Then again you have the Port view on the Front Panel. Interesting may be the Port List here

It is important to notice that when you click on a Port in the Front Panel View or in the Port List you go a level deeper and get an insight view for a single Port of the Switch.
The last fields as Switch Properties and Status

Wired Clients and Insights
Information about connected Wired Clients is available via Clients > Wired Clients.
!screenshot./images/Image78.png
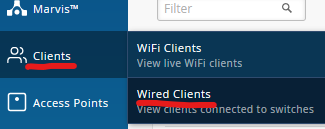
This is then the overview page for a Site with attached Clients
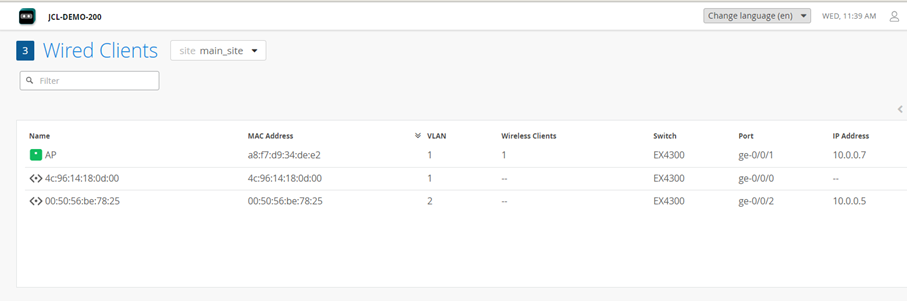
When you click on a single Client link indicated above, a specific Client view opens telling you were exactly it is attached. This view also gives you the ability to go a level deeper and get insight information.

Congratulations, you have completed the lab!
Lab Survey
Please take 2 minutes and complet the Mist Fullstack Hands-On Lab Survey